When installing Intuitive Shipping, you can configure some of your general settings, such as your dimensional, weight and distance units. You can change those settings later if desired, and you can configure other general settings to make your experience with Intuitive Shipping even better.
Control the visibility of the entire app, update your units of measure, change blending modes and configure how packing information is sent to your eCommerce platform.
Access General Settings
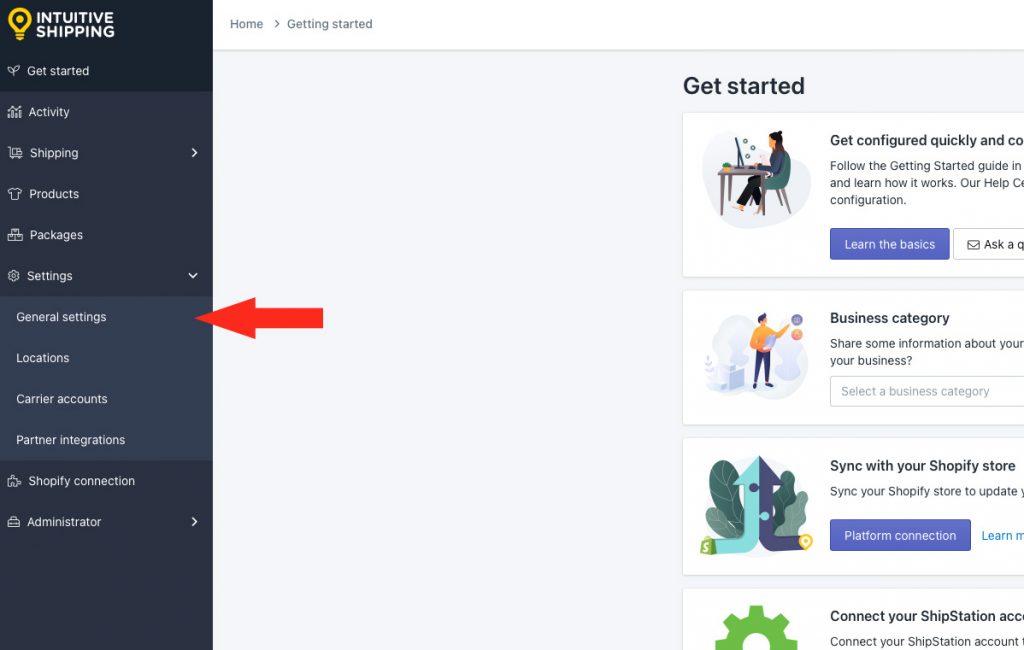
1) Click Settings in the sidebar menu, then select General settings from the drop-down list.
General Settings
Intuitive Shipping lets you control when shipping rates are available at checkout. If desired, you can temporarily disable all rate calculations from Intuitive Shipping or prevent them from being displayed at checkout without changing the Status settings of Scenarios and shipping methods individually.
You can also set or change your dimensional, weight and distance units to suit your shipping requirements and store preferences.
1) Set the general status of Intuitive Shipping at checkout.
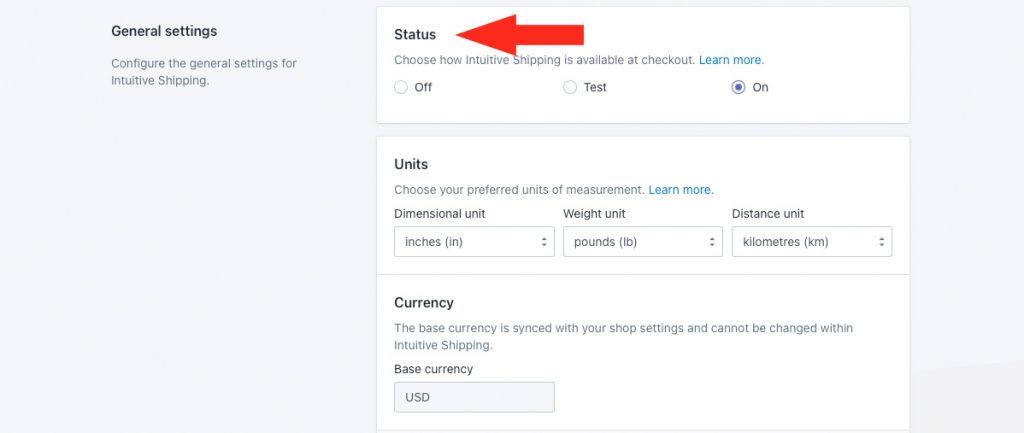
You have three (3) settings to choose from:
Off – all Scenario conditions and shipping methods in Intuitive Shipping are ignored at checkout, even in Sandbox mode, regardless of the status of individual Scenarios and shipping methods. No shipping rates can be calculated or displayed.
Test – rates are displayed at checkout only when you use ‘Intuitive’ on the checkout page. Customers are unable to see any rates from Intuitive Shipping.
If you’re using Shopify, enter ‘Intuitive’ as either the customer’s first or last name.
If you’re using BigCommerce, enter ‘Intuitive’ in the optional address field for ‘Apartment/ Suite/ Building’.
If the status of an individual Scenario or shipping method is set to ‘Off’, it will still be ignored at checkout and rates from those Scenarios or shipping methods will not be displayed, even if you use ‘Intuitive’ on the checkout page. The General ‘Test’ status does not override the ‘Off’ status of individual Scenarios and shipping methods.
On – all Scenarios and shipping methods in Intuitive Shipping are available at checkout as long as their individual status is set to ‘On’.
2) Choose your preferred dimensional unit.
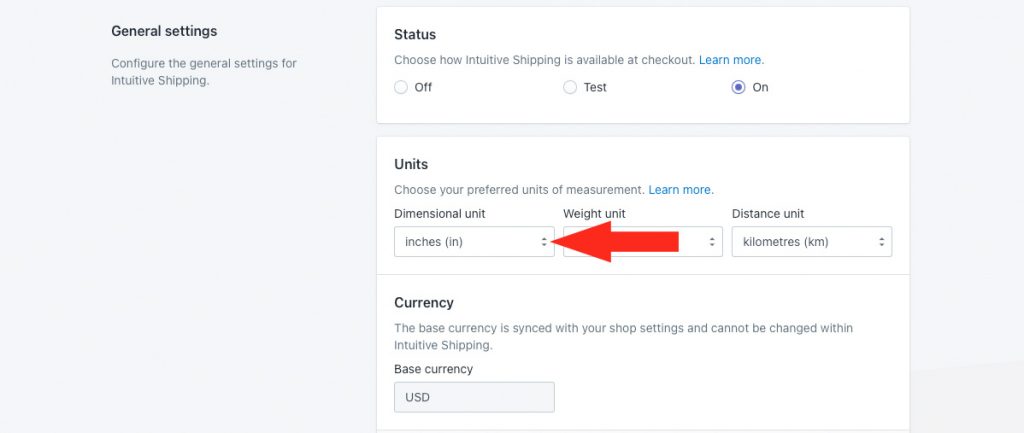
You have four (4) settings to choose from:
Millimetres – dimensional units throughout the app are displayed and calculated as ‘mm’.
Centimetres – dimensional units throughout the app are displayed and calculated as ‘cm’.
Metres – dimensional units throughout the app are displayed and calculated as ‘m’.
Inches – dimensional units throughout the app are displayed and calculated as ‘in’.
3) Choose your preferred weight unit.
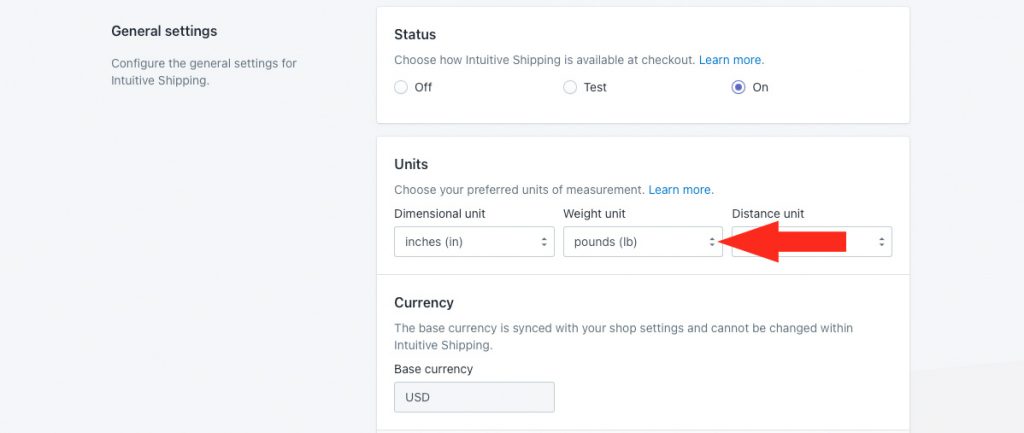
You have four (4) settings to choose from:
Grams – weight units throughout the app are displayed and calculated as ‘g’.
Kilograms – weight units throughout the app are displayed and calculated as ‘kg’.
Pounds – weight units throughout the app are displayed and calculated as ‘lb’.
Ounces – weight units throughout the app are displayed and calculated as ‘oz’.
4) Choose your preferred distance unit.
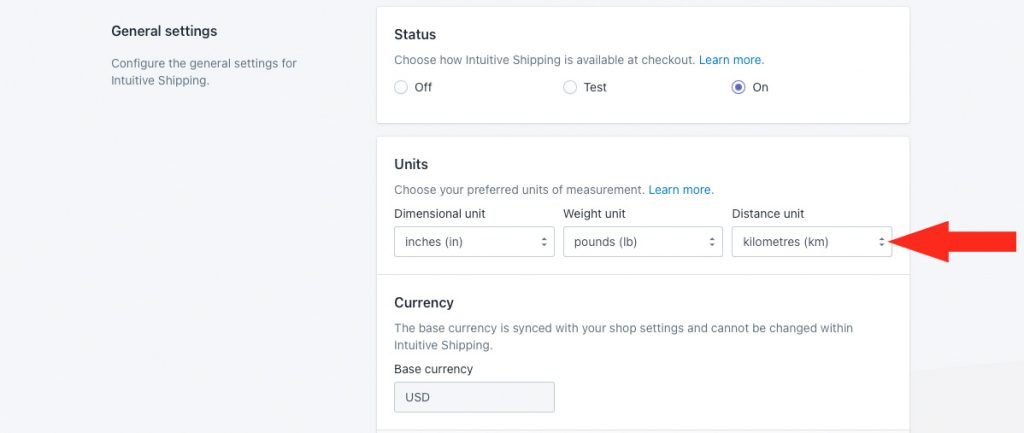
You have two (2) settings to choose from:
Kilometres – distance units throughout the app are displayed and calculated as ‘km’.
Miles – distance units throughout the app are displayed and calculated as ‘mi’.
For example, if you set up package dimensions using centimetres and then change dimensional units to inches, a box configured to 20 cm x 20 cm x 20 cm is updated to 20 in x 20 in x 20 in.
Similarly, if you set up a local delivery shipping method with a rate table based on miles and then changed distance units to kilometers, a local flat rate up to 20 mi is updated to 20 km.
You must covert all of your measurement values and update them throughout the app depending on the changes made in Steps 2 to 4.
Currency
The currency setting in Intuitive Shipping is for reference only and cannot be edited within the app.
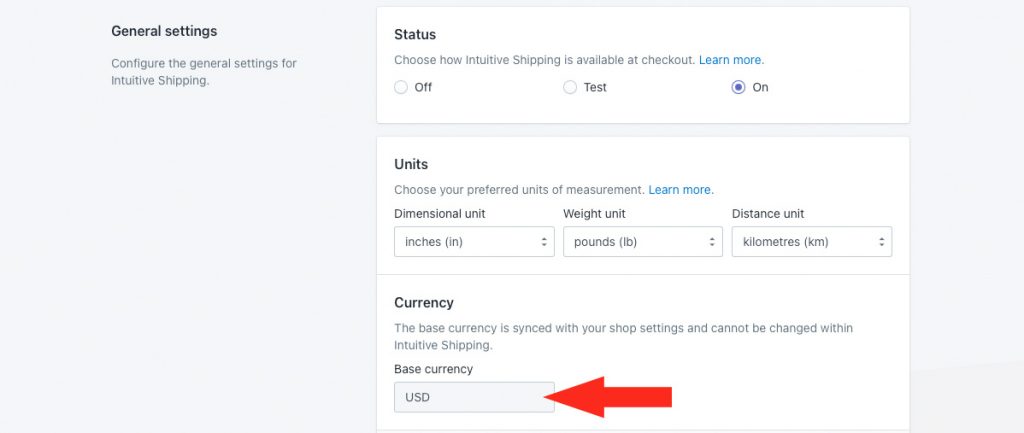
The currency displayed here will be used throughout the app whenever costs are displayed or calculated. When Intuitive Shipping is installed, our system syncs your base currency with the currency selected in your eCommerce platform settings. For example, if your default currency in Shopify or BigCommerce is USD, your base currency in Intuitive Shipping is USD.
To change your base currency:
1) Click on your store name at the far right of the app header, then select Shopify admin or BigCommerce admin from the drop-down list. This will open your admin screen in a new browser tab.
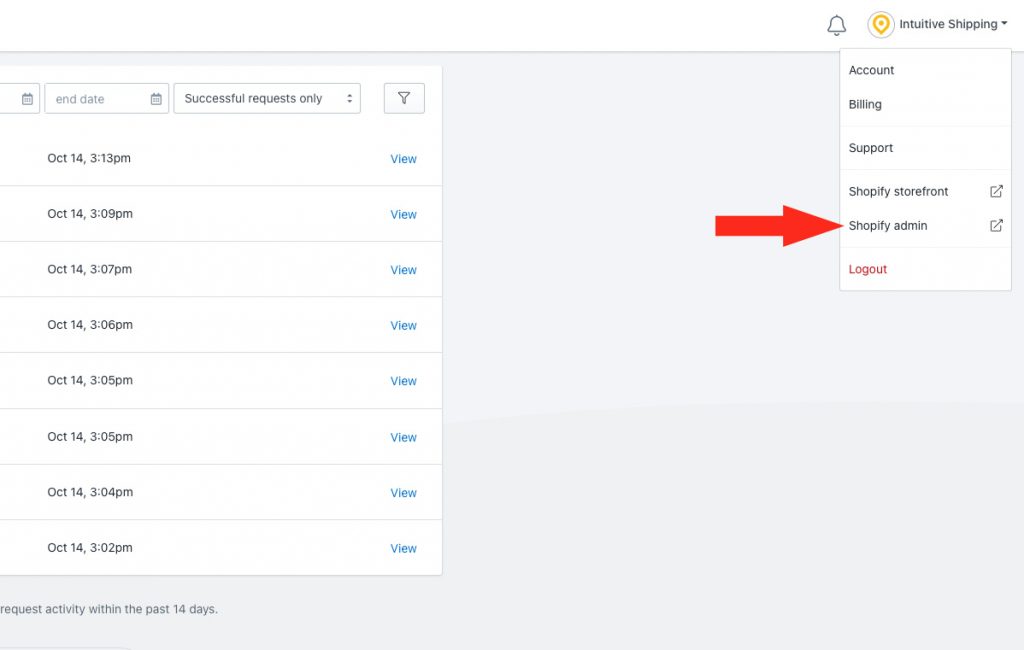
If you are not using Shopify, skip ahead to BigCommerce.
Shopify
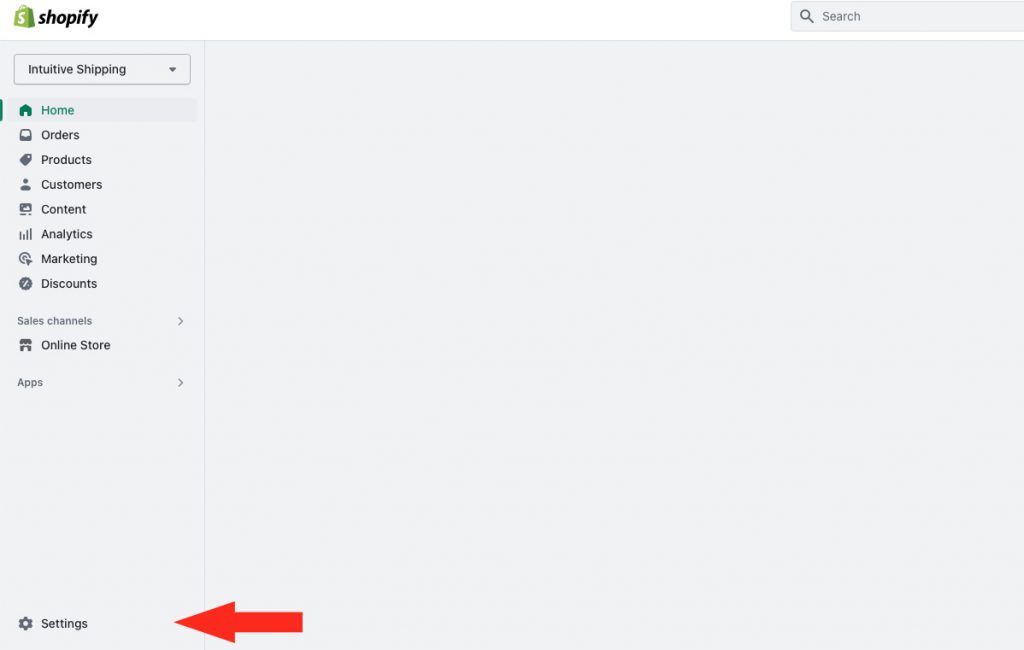
1) Click Settings on the admin sidebar menu in Shopify. This will bring up a large pop-up Settings menu.
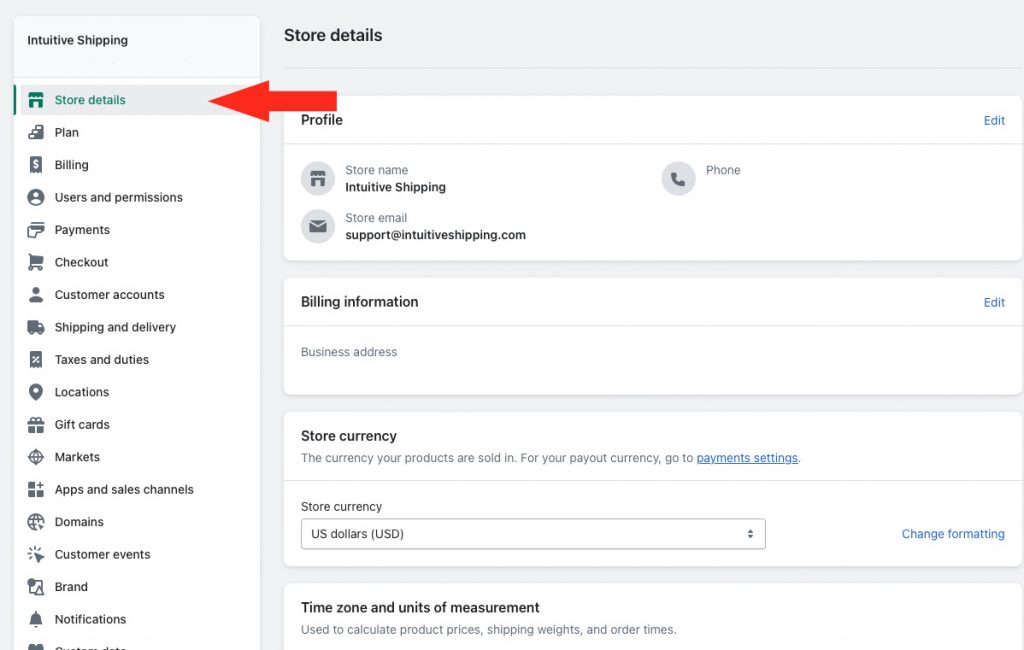
2) By default, you should already be on Store details, which is where you need to be.
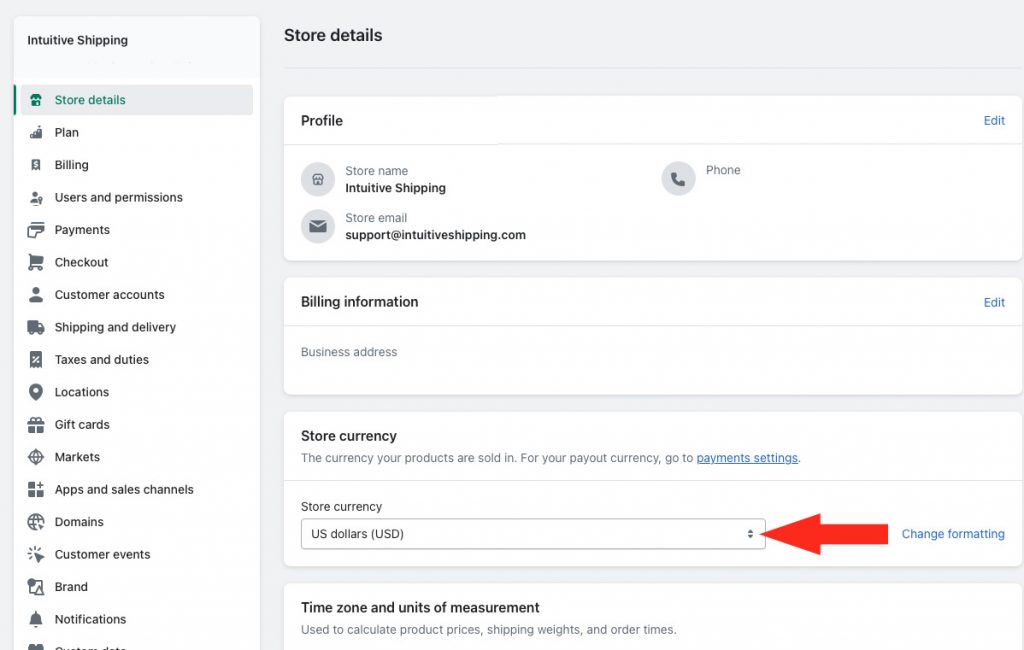
3) Scroll down to Store currency, then update the currency setting.
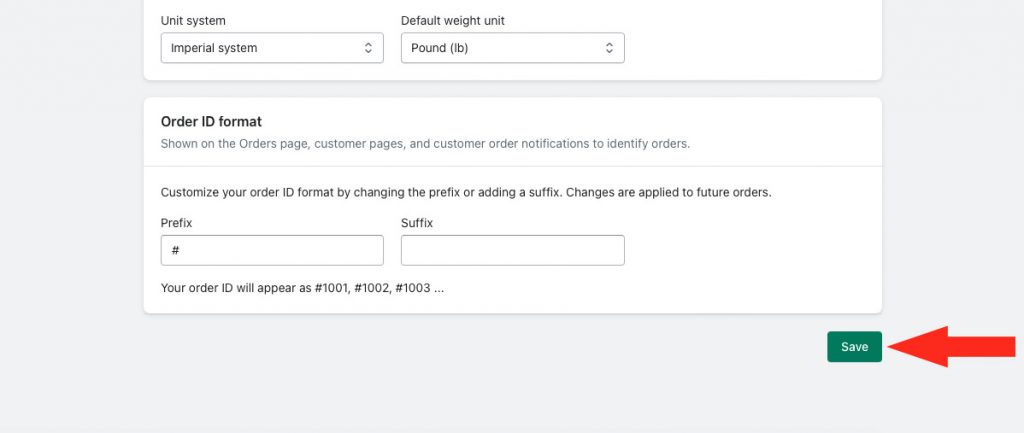
4) Click the Save button at the bottom of the screen to update your currency in Shopify.
5) Return to the browser tab with Intuitive Shipping, then skip ahead to Sync Changes With Intuitive Shipping.
BigCommerce
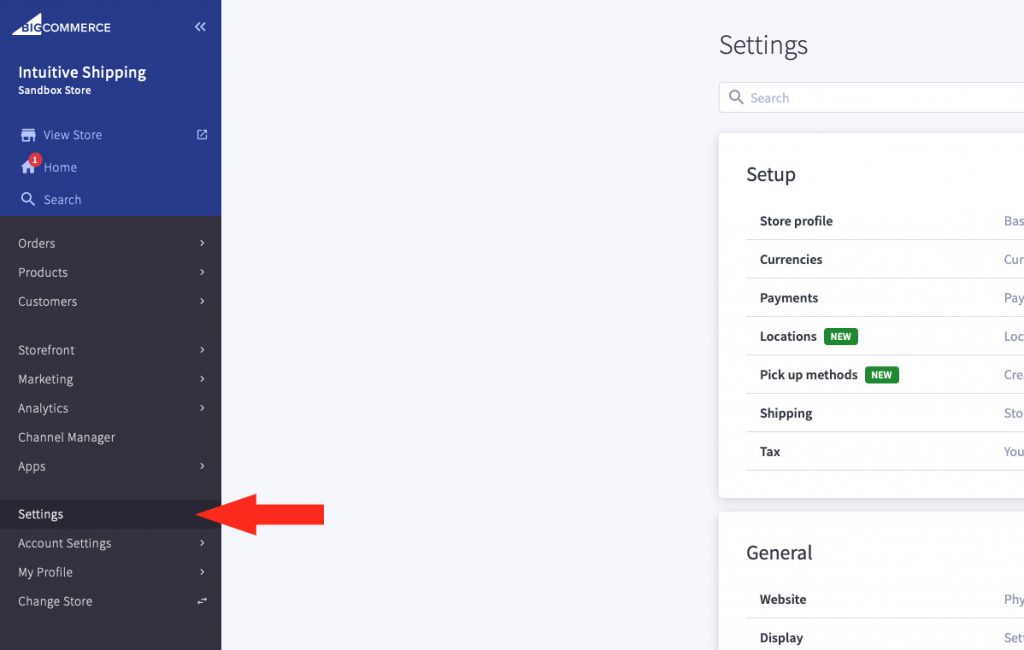
1) Click Settings on the admin sidebar menu in BigCommerce.
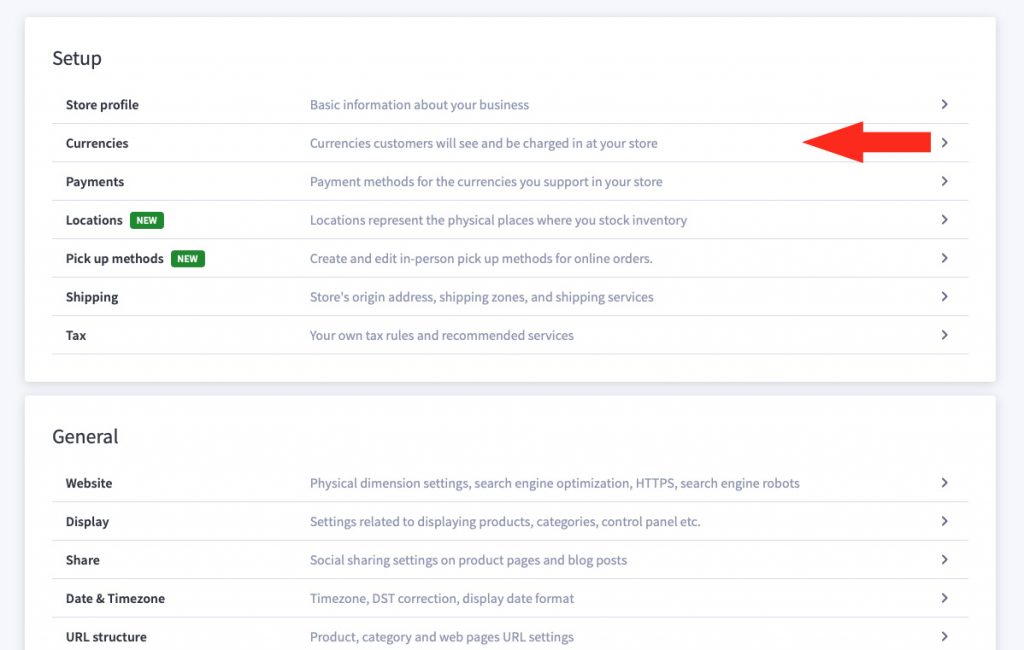
2) Click Currencies in the ‘Setup’ section of the Settings menu.
3) Go to the Additional Currencies section.
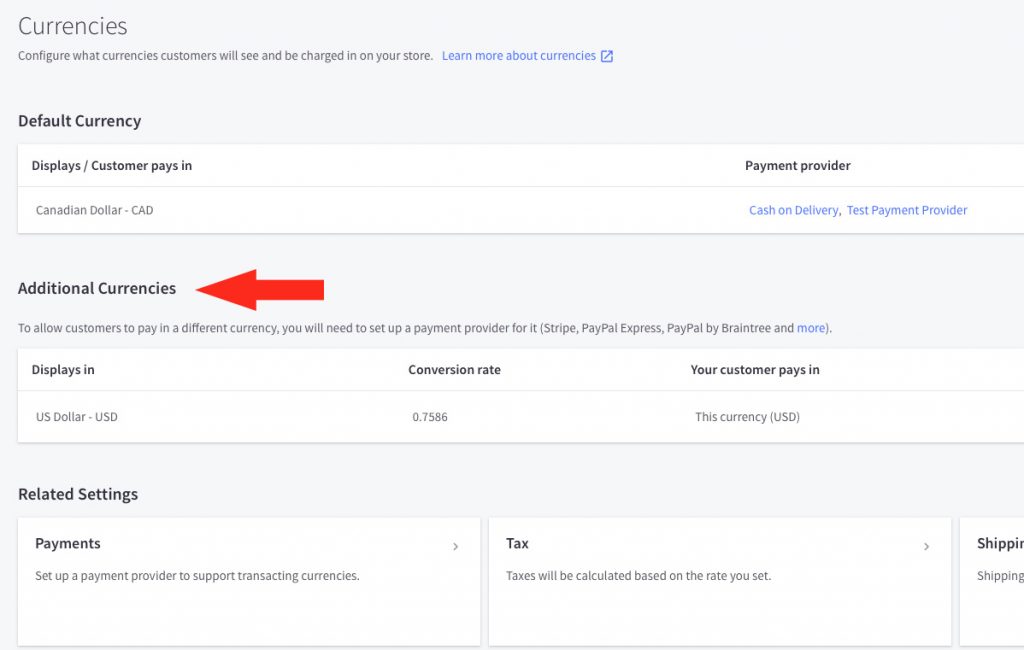
If the currency you wish to make default is not listed, you will need to add a new currency first.
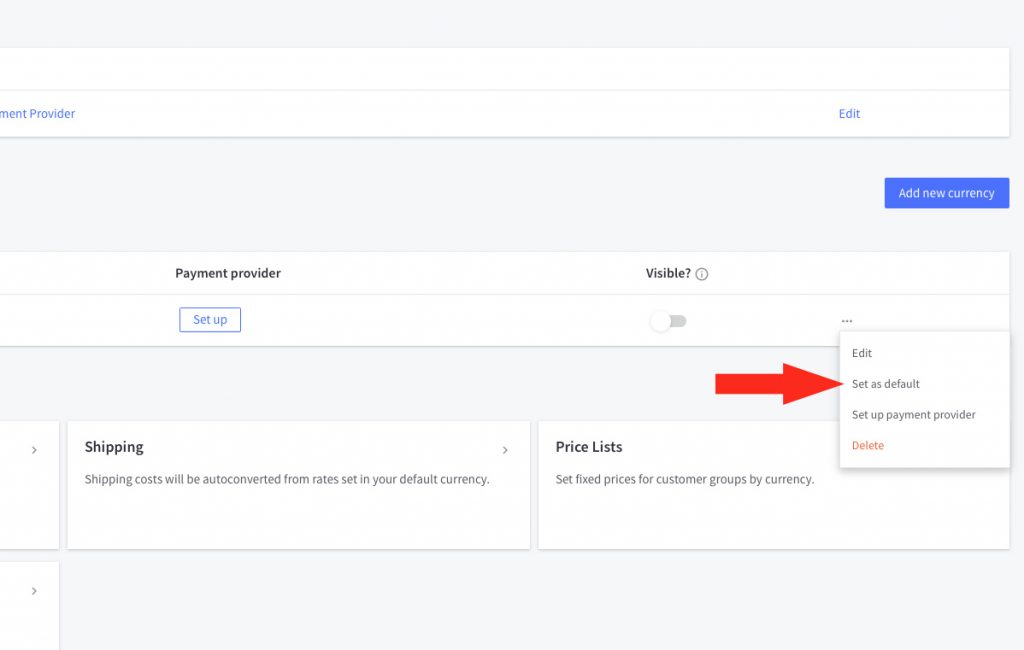
4) On the right side of the page, click the ellipsis (three dots) beside the currency you wish to use, then select Set as default from the drop-down list. You will be prompted to confirm the change.
5) Return to the browser tab with Intuitive Shipping.
Sync Changes With Intuitive Shipping
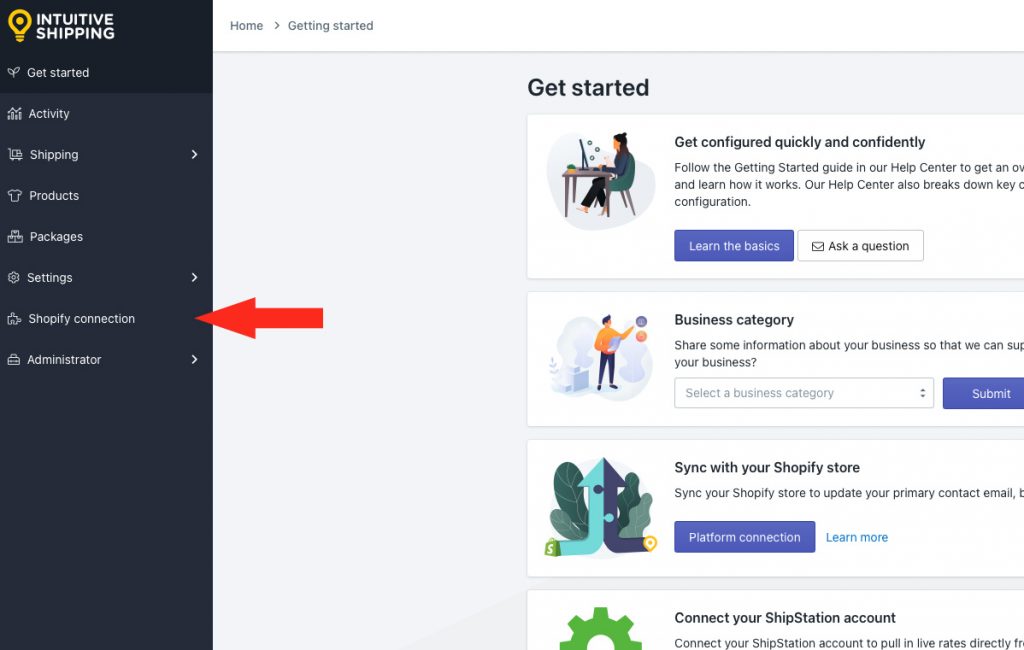
1) Click your eCommerce platform connection on the sidebar menu.
2) Click Sync account settings.
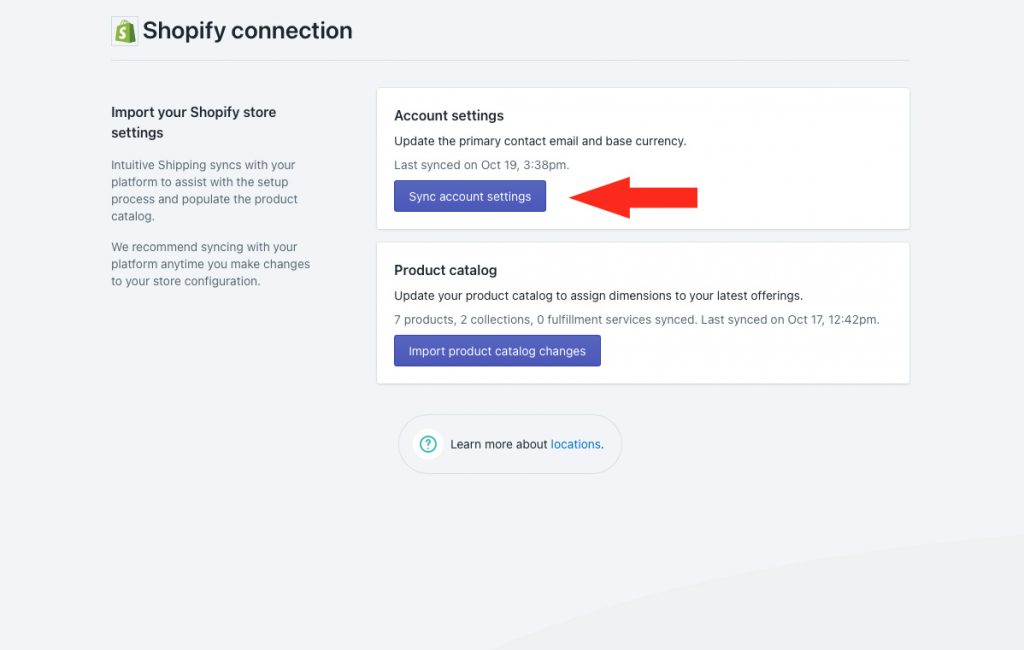
Once the sync is completed, your base currency will be updated throughout the app.
As with dimensional units, you’ll need to convert and manually update any costs in the app to align with the change in currency.
For example, if you set up cart conditions in a Scenario using Canadian dollars (CAD), then changed your base currency in Shopify to US Dollars (USD), a cart condition of greater than or equal to $200.00 CAD is updated to greater than or equal to $200.00 USD.
Delivery Dates
Please contact us through the Support page in the app and request to have this beta feature enabled if you are interested in using it. Until our Support team has enabled the feature, it will not be displayed on your General settings page.
By default, Intuitive Shipping displays estimated delivery in the number of days, whether provided by a carrier or determined by a custom setting in the shipping method. You can use this setting to display the estimated delivery date if desired.
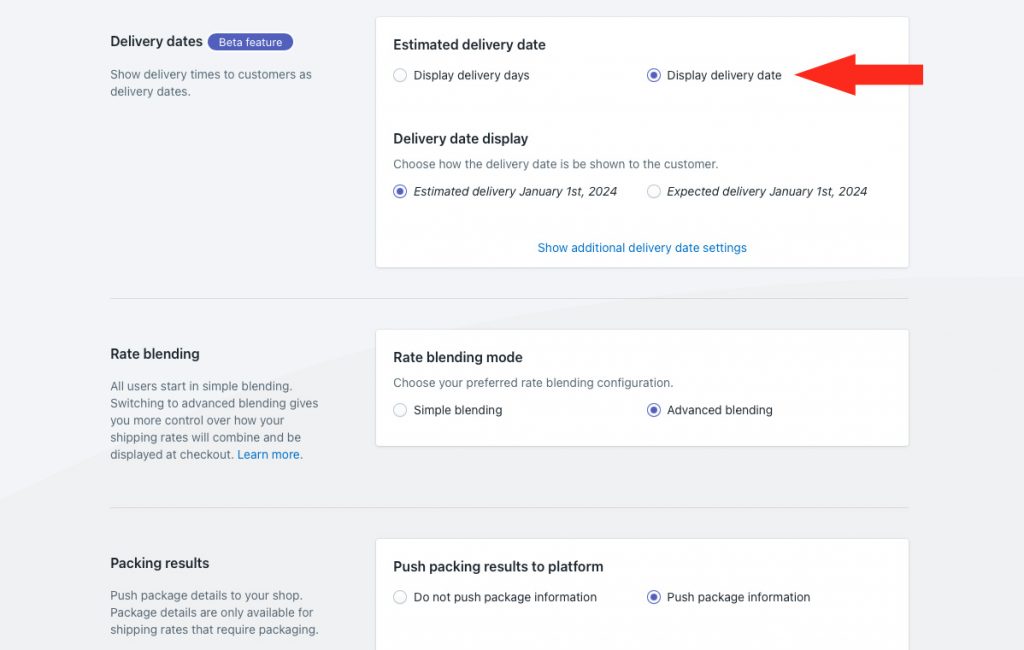
Once the beta feature has been enabled, a Delivery dates (Beta feature) section will be displayed above the Rate blending section.
To display dates instead of the number of days:
1) Select Display delivery date.
2) Choose how delivery dates are displayed to customers.
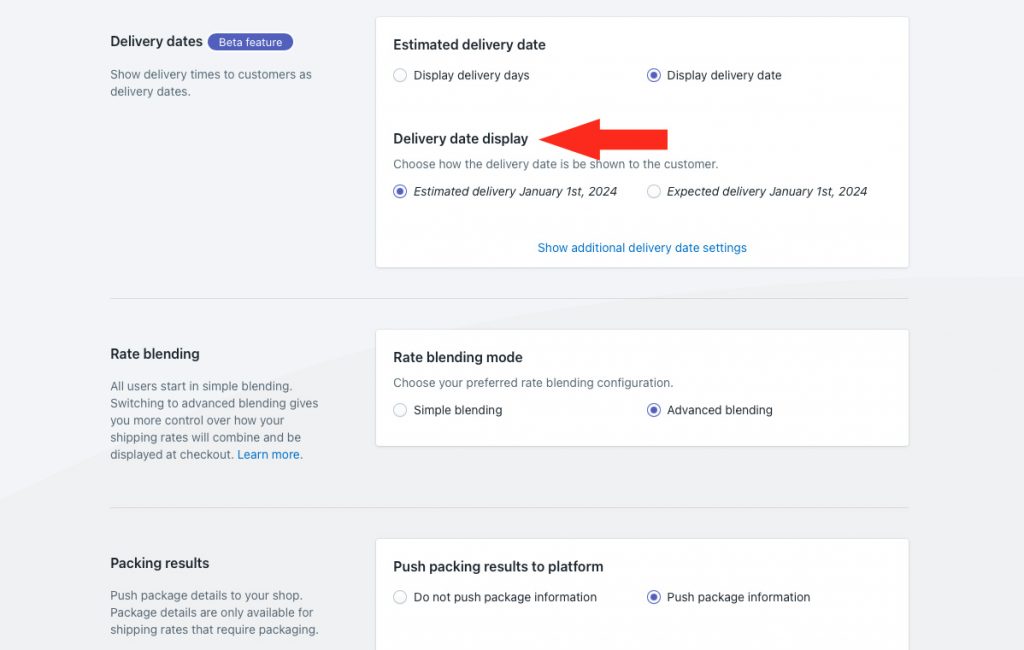
You have two (2) settings to choose from:
Estimated – delivery dates are displayed with ‘Estimated delivery…’. For example, a date of January 1, 2024 will be displayed as ‘Estimated delivery January 1st, 2024‘.
Expected – delivery dates are displayed with ‘Expected delivery…’. Using the same example, the message will be displayed as ‘Expected delivery January 1st, 2024‘.
Additional delivery date settings are available to help improve the accuracy of the delivery date. Skip ahead to Rate Blending if these settings are not required. Otherwise, continue to Step 3.
3) Click Show additional delivery date settings.
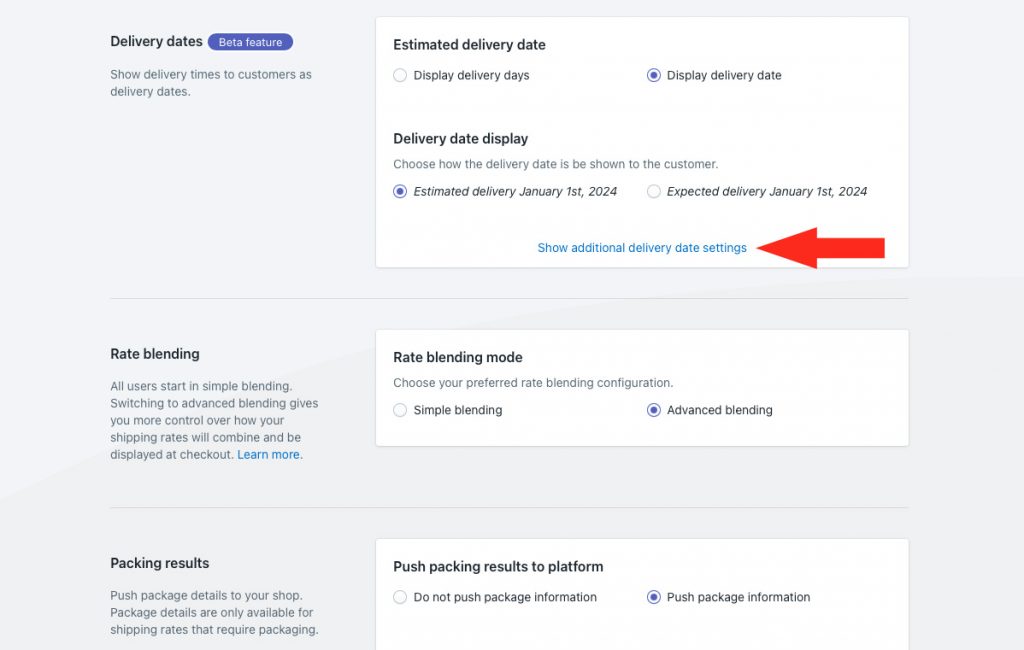
4) If desired, select your dispatch days. These are the days of the week your orders are picked up and dispatched from your warehouse.
Click or hover over the selection field to expand it, then select each day you dispatch orders.
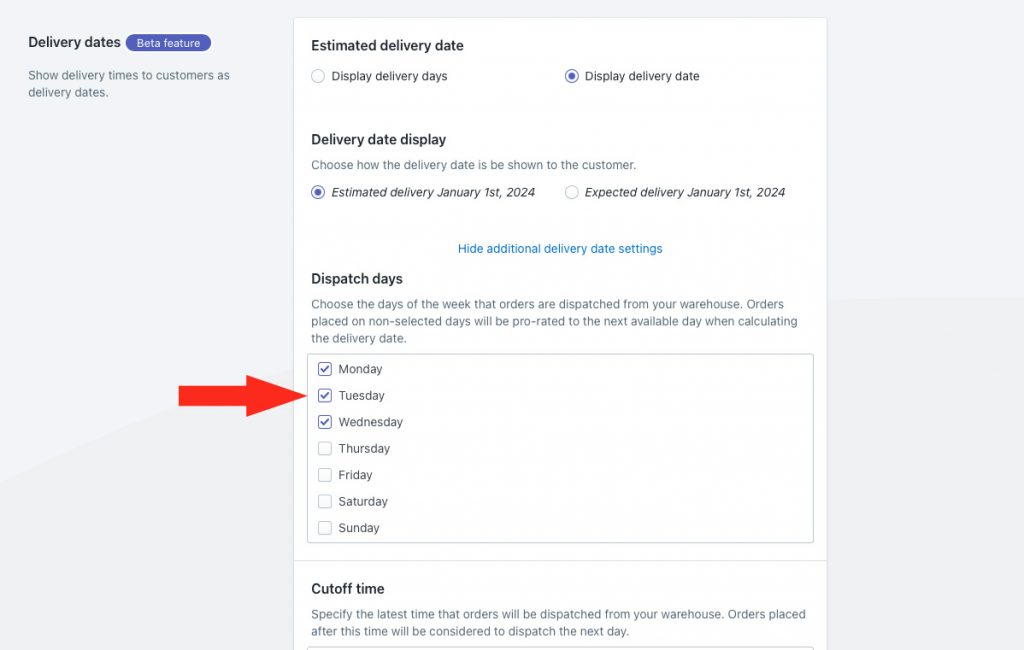
When customers place orders on days that are not selected, Intuitive Shipping pro-rates to the next available dispatch day when calculating the delivery date.
Let’s say you select Monday, Tuesday and Wednesday as your dispatch days, and a customer places an order on Thursday, March 7th, 2024. If a carrier provides an estimated delivery of 3 business days, Intuitive Shipping will count three business days from Monday, March 11th. The delivery date will be displayed as Thursday, March 14th.
5) If desired, select a cutoff time. Times can be selected or entered manually.
To select times from the list, click the selection field. Times are displayed in one-hour increments in 24-hour time from ‘0:00′ (12:00 AM) to ’23:00’ (11:00 PM).
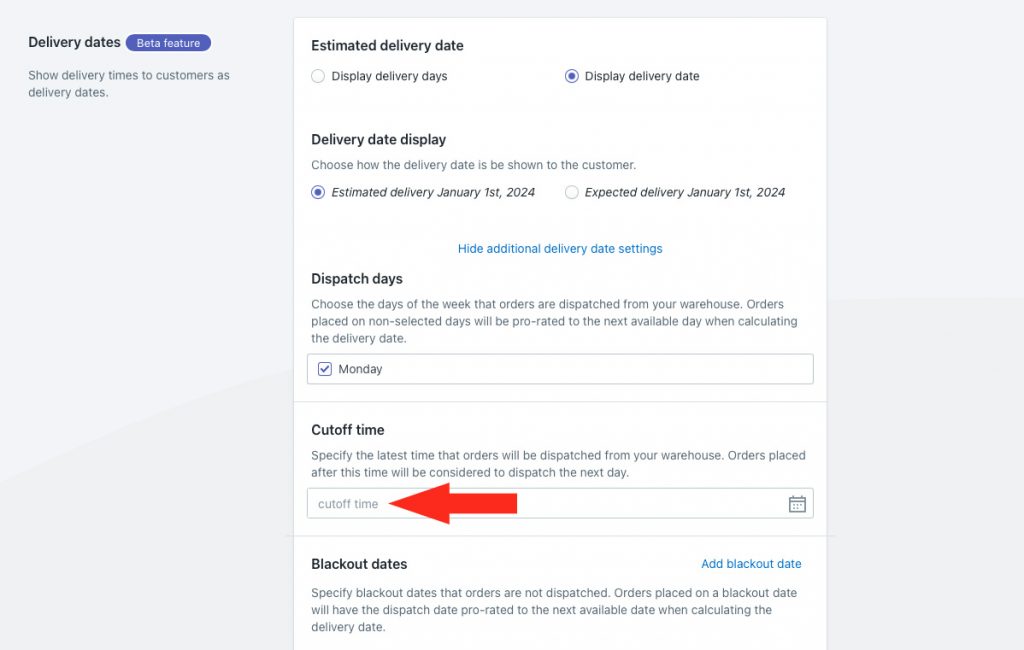
When customers place orders after the cutoff time, Intuitive Shipping pro-rates to the next available dispatch day when calculating the delivery date.
Let’s say you select Monday, Tuesday and Wednesday as your dispatch days, your cutoff time is 16:00 (4:00 PM) and a customer places an order on a Wednesday at 4:47 PM. Intuitive Shipping will calculate the delivery date using the following Monday as the next available dispatch day.
For example, if your cutoff time is 4:30 PM, enter it as ’16:30′.
6) If desired, click Add blackout date to exclude specific dates from the delivery date calculation. This is useful if you are unable to dispatch an order on a regular dispatch day due to stat holidays, store closures, etc.
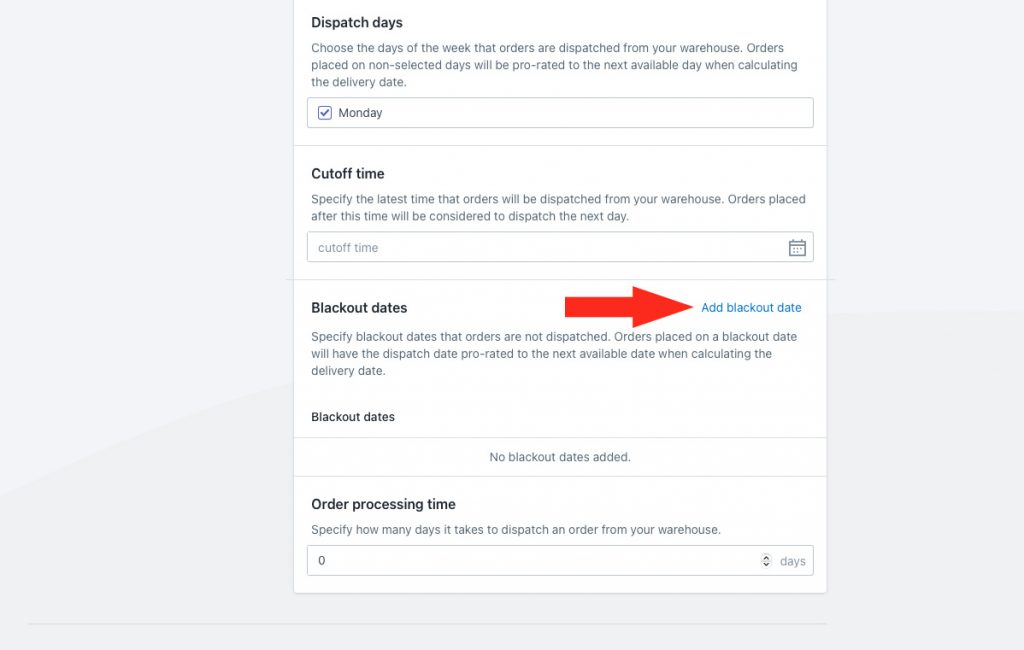
7) Click on the field provided to select specific blackout dates from the calendar.
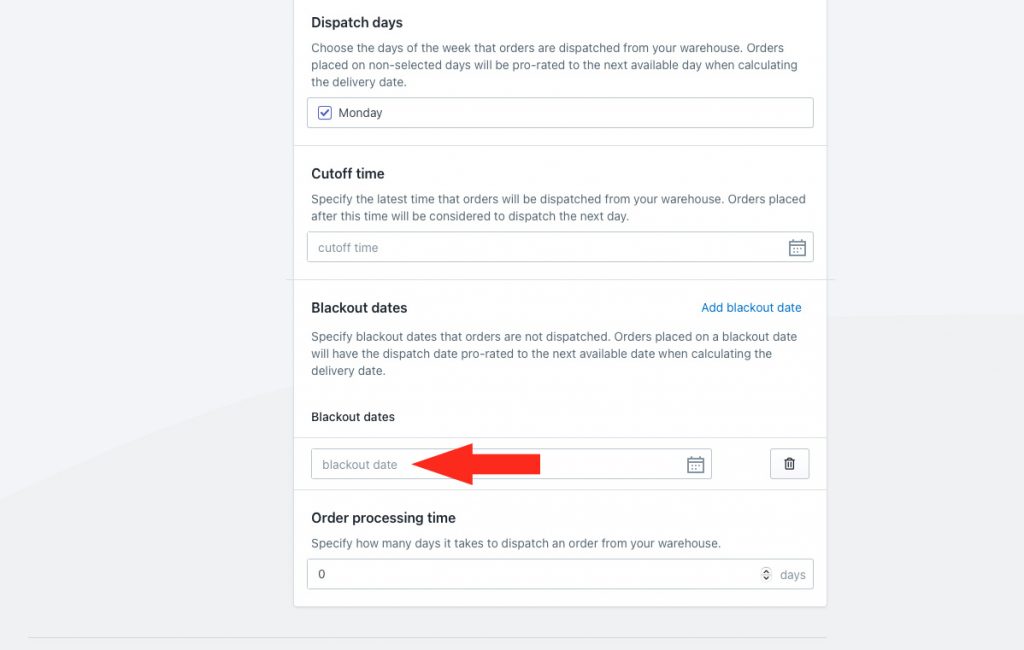
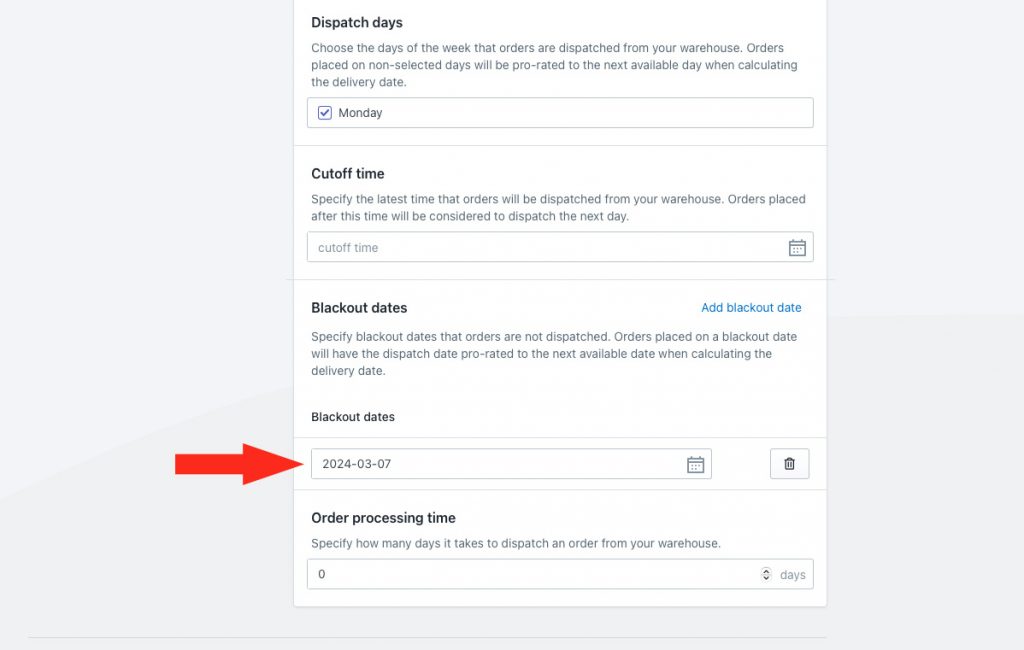
When customers place orders on or before a blackout date, Intuitive Shipping pro-rates to the next available dispatch day when calculating the delivery date.
Let’s say you selected Monday, Tuesday and Wednesday as your dispatch days in Step 4, and you’ve added a blackout date of Monday, March 4th, 2024. If a customer places an order on Sunday, March 3rd, 2024, Intuitive Shipping will calculate the delivery date using Tuesday, March 5th as the next available dispatch day.
8) Repeat Steps 6 and 7 to add more blackout dates.
9) If desired, add order processing time in days. This is useful when you sell products that cannot be shipped out the same day the order is placed, regardless of dispatch days, cutoff times or blackout dates.
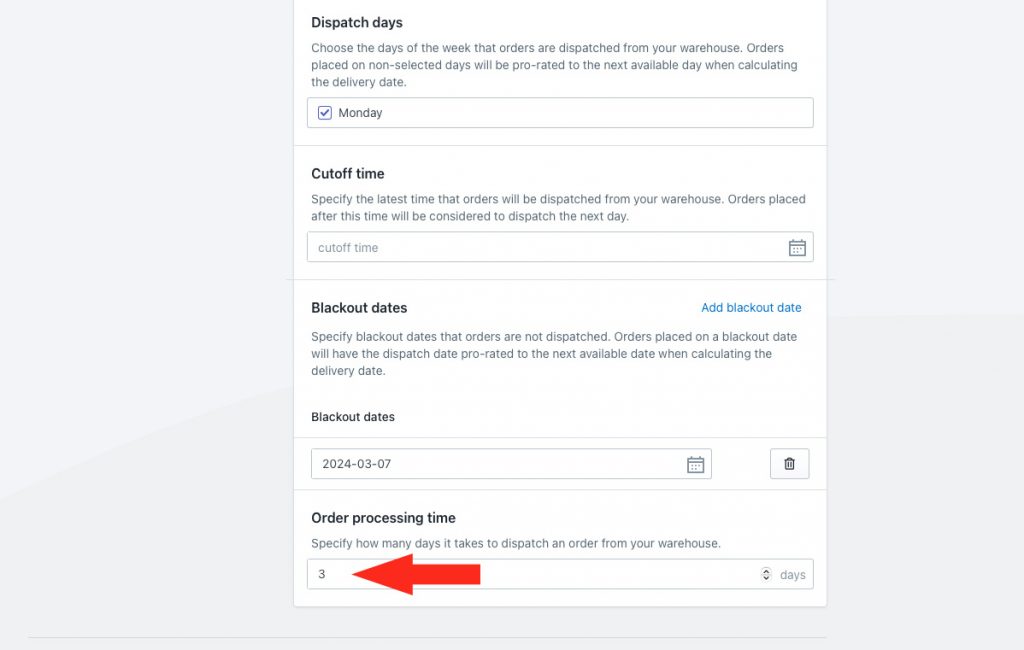
Let’s say you selected Monday, Tuesday and Wednesday as your dispatch days in Step 4, and you added 3 days for order processing. If a customer places an order on Sunday, March 3rd, Intuitive Shipping will calculate the delivery date using Monday, March 11th as the next available dispatch day.
Rate Blending
When you want to blend multiple shipping rates together into a single cost, Intuitive Shipping lets you blend in different ways. You can simply blend all shipping rates together into a single rate, or for greater control, you can set up multiple blending rules.
1) Choose a rate blending mode.
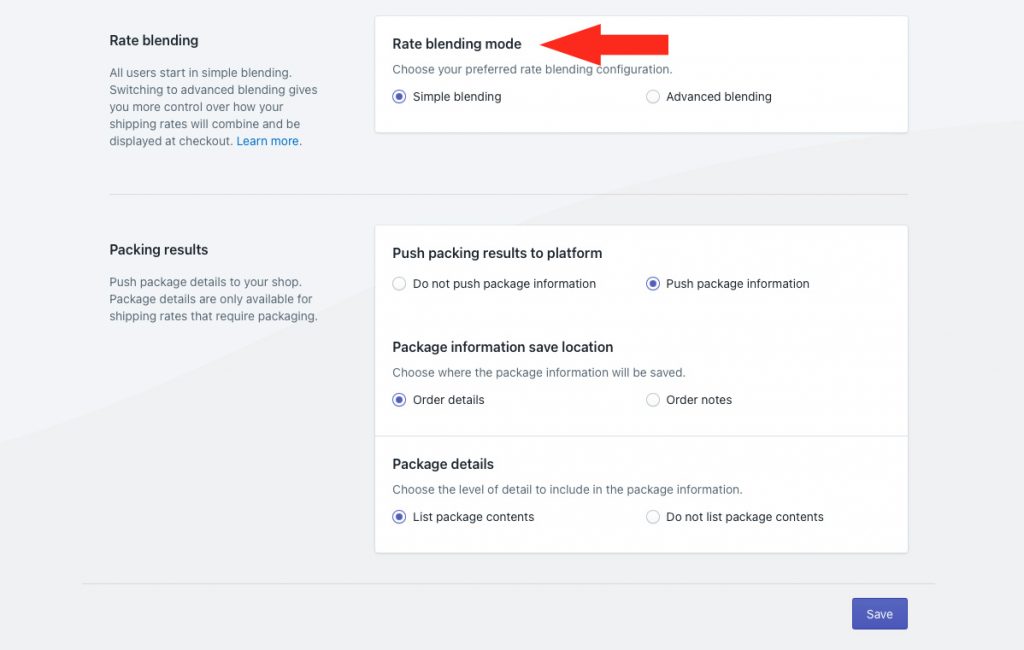
You have two (2) settings to choose from:
Simple – blends all shipping methods with rate blending enabled into a single rate, based on the configuration of your simple blended rate settings.
When configuring your simple blended rate, you have the option to display rates based on the blended total, the average cost, the slowest delivery method, and more. This is the default setting.
Advanced – blends shipping methods with rate blending enabled and matching blending group tags into a single rate. This setting is useful when you need more than one blended rate for different groups of shipping method costs, and you want to customize the checkout display settings when the blended rate is activated.
As with simple blending, you can control exactly how the blending is done.
Packing Results
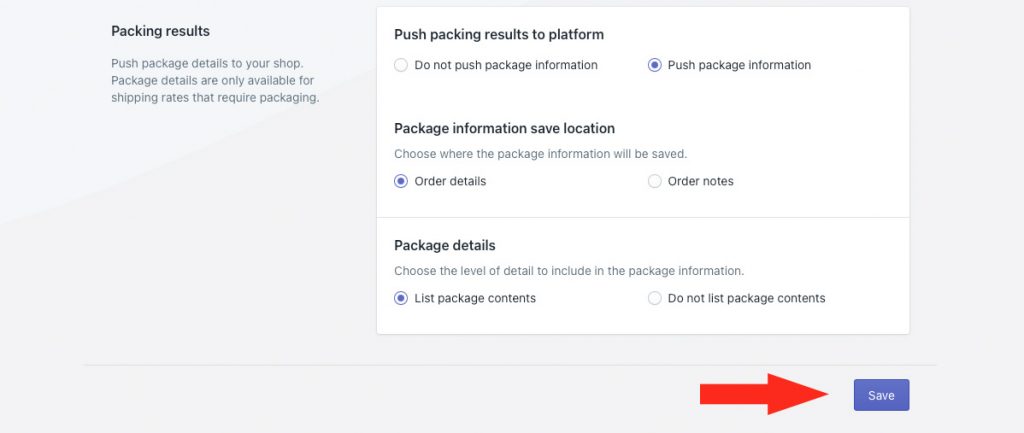
Shipping methods that require packing, such as parcel service shipping methods and freight service shipping methods, can push packing information to the Shopify order. This can help your fulfillment team take the guess work out of determining which packages need to be used when the order is fulfilled.
Packing results can include:
- The name of each package used to pack the order, and its dimensions
- The quantity of each size of package
- The weight of each package
- The name and quantity of the products in each package
That means the customer must complete their checkout and create an order number in Shopify for packing results to be available.
While in Sandbox mode, even if you complete an actual test purchase – meaning you successfully collected a dummy payment and it resulted in a Shopify order – packing results will not be pushed to to the order.
1) Choose whether or not packing results will be pushed to Shopify when the order is completed.
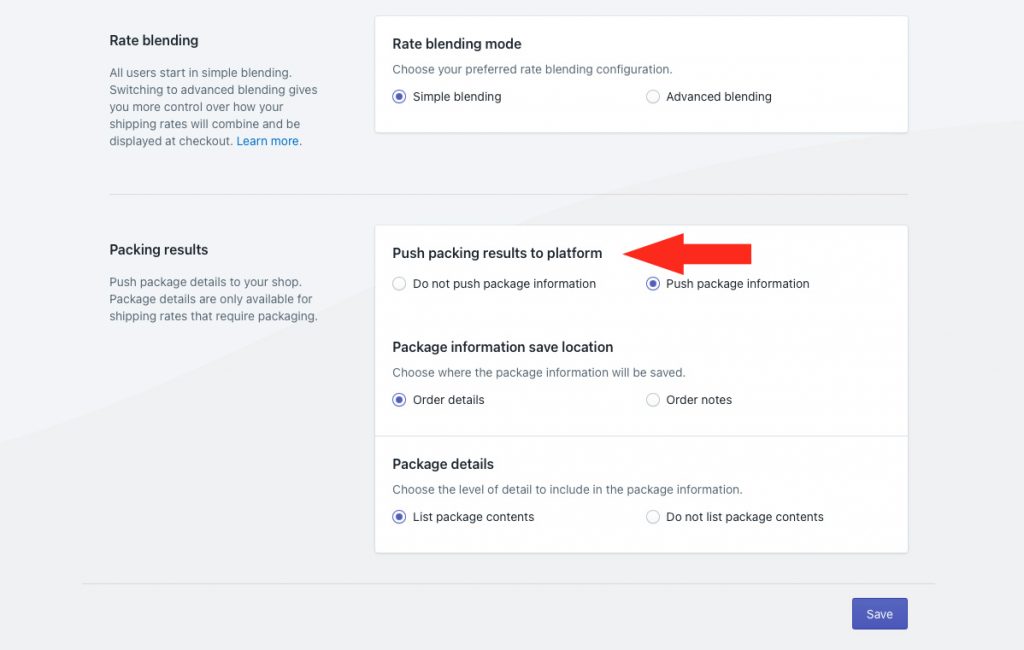
You have two (2) settings to choose from:
Do not push package information – packing results are not pushed to Shopify when the order is completed.
Push package information – packing results are pushed to Shopify when the order is completed. Results a displayed based on the settings selected in Steps 2 and 3.
2) Choose the save location for the packing results. The location may be determined by where your fulfillment app or service retrieves the information. Consult with your fulfillment team or service if you aren’t sure.
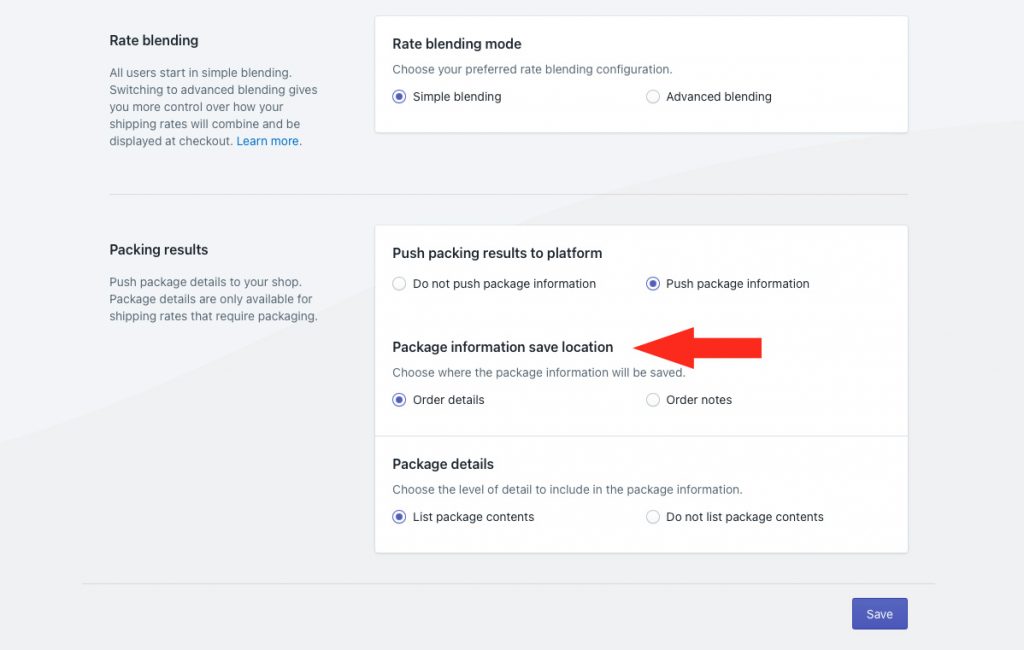
You have two (2) settings to choose from:
Order details – packing results are sent to the Shopify Order details (or attributes). This is the default setting.
Order notes – packing results are sent to the Shopify Order notes.
3) Choose what details to include in the packing results.
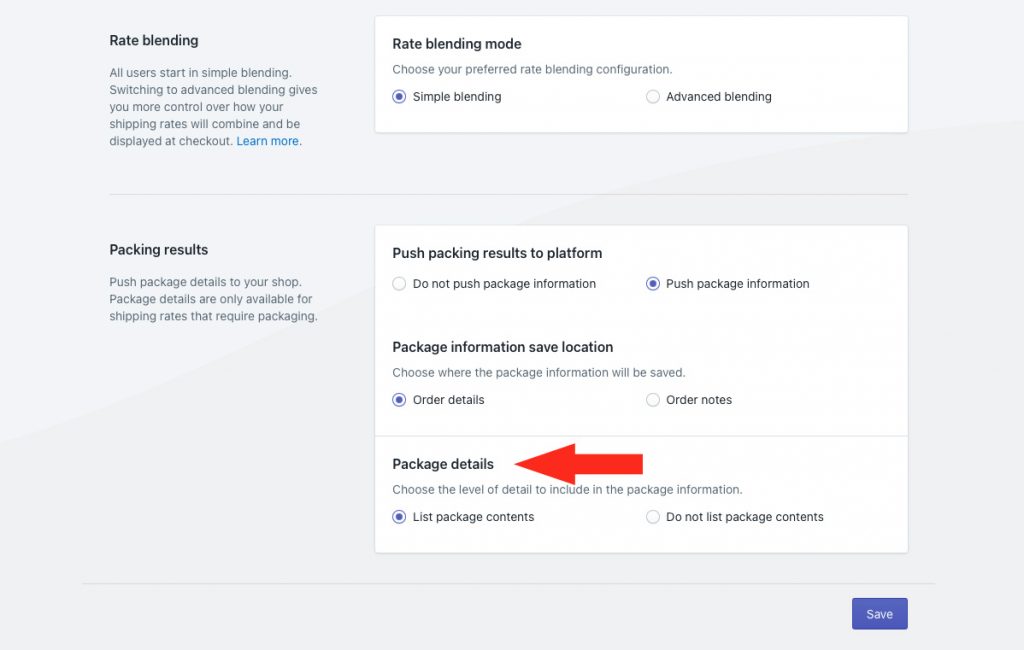
You have two (2) settings to choose from:
List package contents – packing results will include details about the products included in each package, along with the packages used to pack the order, their dimensions and weights. This is the default setting.
Do not list package contents – packing results will include only the packages used to pack the order, their dimensions and weights. Product information will not be included.
Save Your Settings
1) Click the Save button to save your general settings.
