Dealing with COVID-19 means you’ve likely faced the challenge of finding safer and more responsible ways to interact with and provide goods to your customers. Free, contact-less home delivery and scheduled store pick-ups for local customers may now be an integral part of your customer service strategy. With Intuitive Shipping, we can help you facilitate those new services so that your local business can continue to run, and even thrive during these unprecedented times.
Here are some of the ways you can use Intuitive Shipping to safely deliver goods to your local customers.
Add A Free Local Delivery Scenario
Encourage local business by setting up a responsible Free Delivery Scenario that informs your customers how and when their order will be delivered, and create custom descriptions that provide shoppers with detailed information about their delivery.
With Conditions, you can determine if customers qualify for free local delivery based on Postal Code/ ZIP code, Distance, or City name.
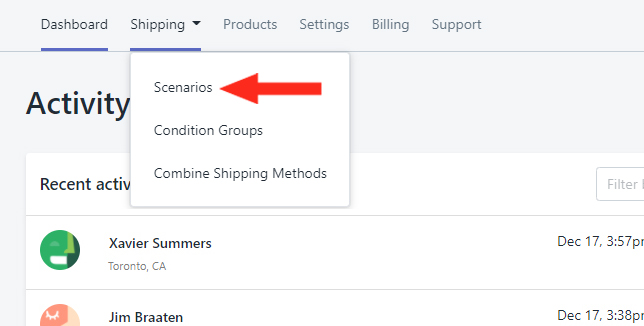
1) Click Shipping on the main menu, then select Scenarios from the drop-down list.
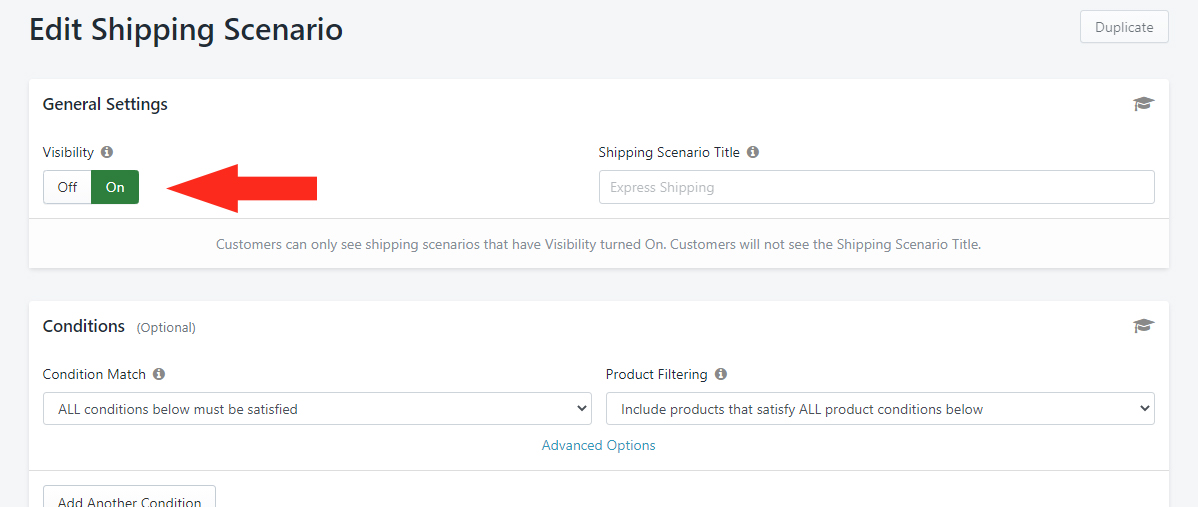
3) Set Visibility to On.
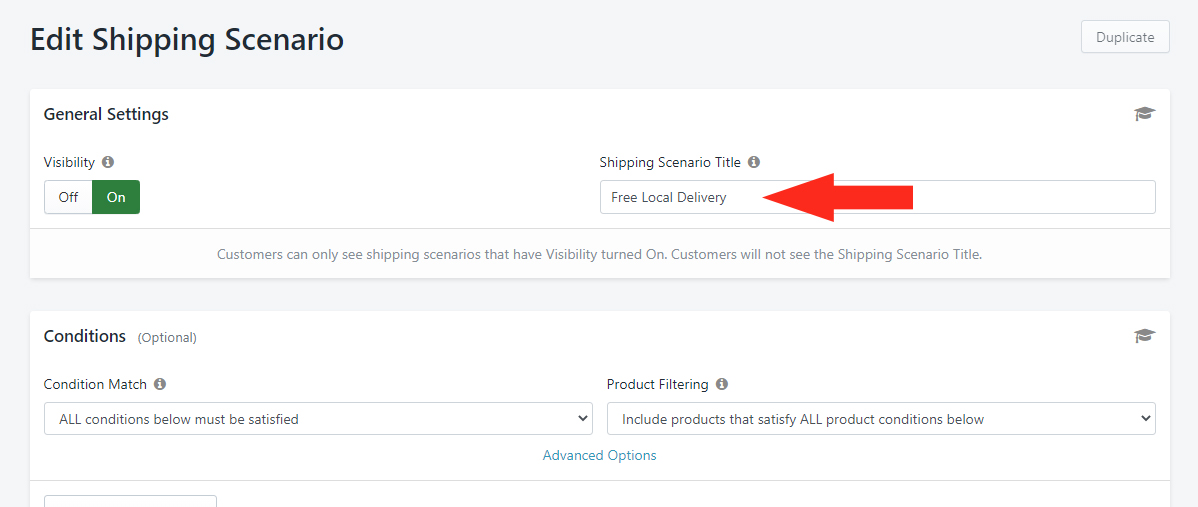
4) Enter the Shipping Scenario Title – e.g ‘Free Local Delivery’.
Set The Condition
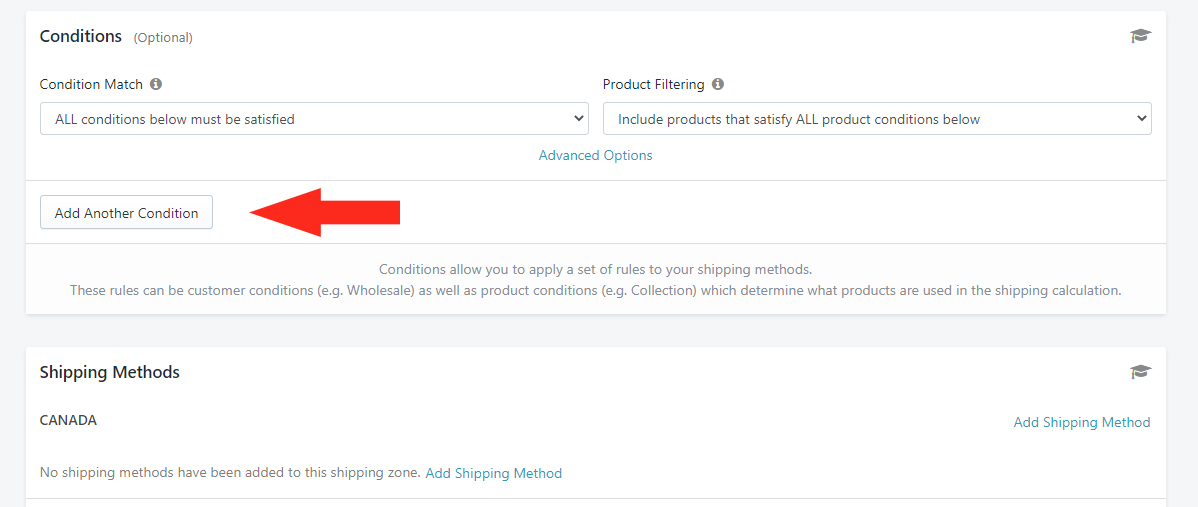
1) Leave the settings under Condition Match, Product Filtering, and Advanced Options on their Default settings.
2) Click the Add Another Condition button.
You can limit the free delivery option to local customers using a Condition based on either Distance, Postal/Zip Code or City.
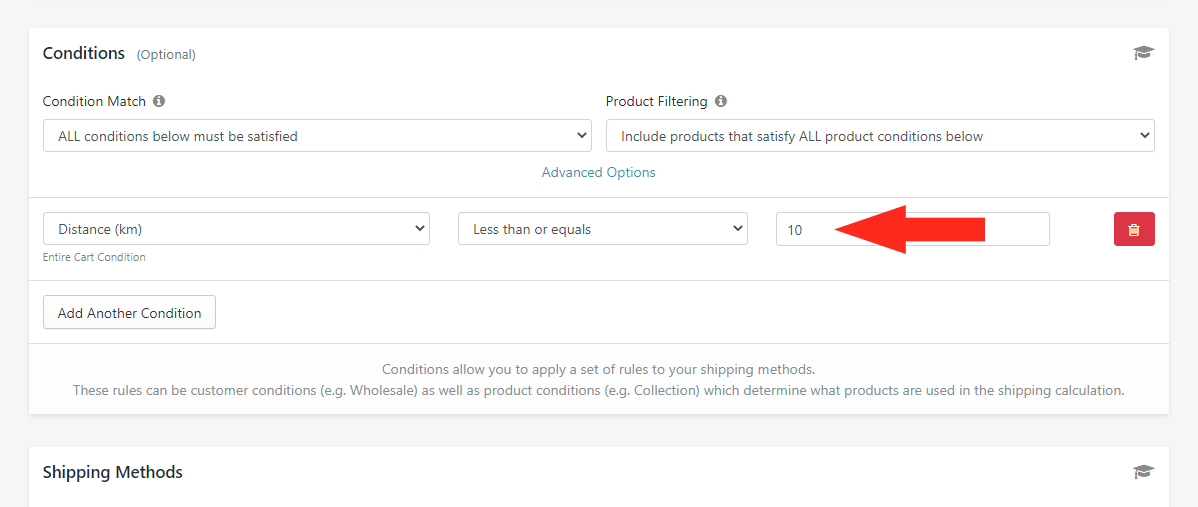
Option 1: By Distance
1) Click the Condition field. Then select Distance from the Entire Cart Conditions section.
2) Set the Condition logic to Less than or equals.
3) Enter the Value as the amount of distance – e.g enter ’10’ if the distance limit is 10 kilometers.
Option 2: By Postal Code/ ZIP Code
1) Click the Condition field. Then select Postal Code/ Zip Code from the Customer Conditions section.
2) Set the Condition logic to Equals.
3) Enter the Value as the Postal Code or Zip Code range that covers your local delivery area- e.g. 90401:90411

4) Select the Postal Code format.
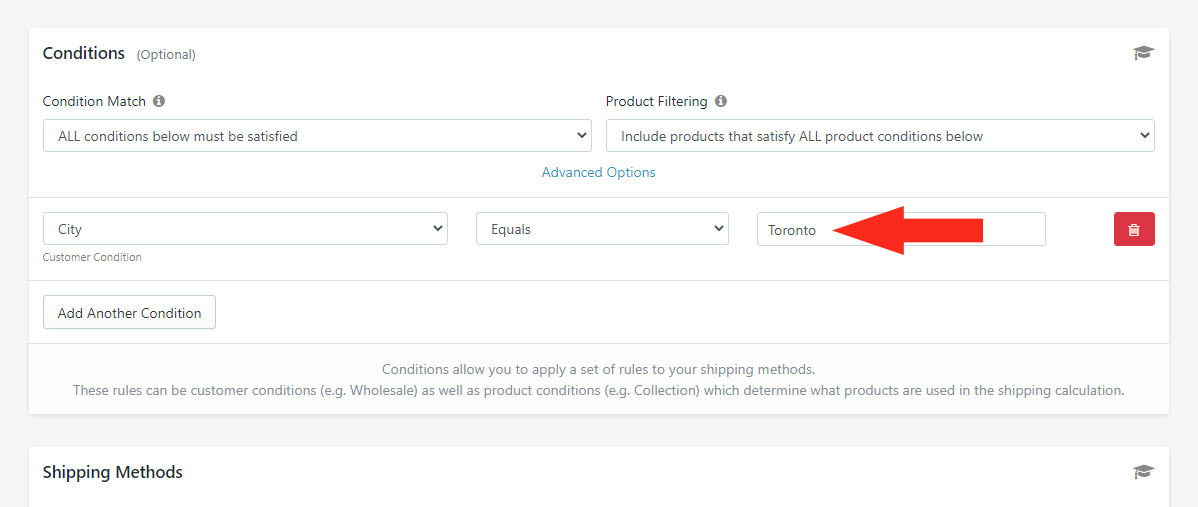
Option 3: By City
1) Click the Condition field. Then select City from the Customer Conditions section.
2) Set the Condition logic to Equals.
3) Enter the Value as the City name (or names, separated by comma).
That means typos and alternative spellings entered by the customer on the checkout page could cause the Condition to be ignored. For example, if the city Condition value is ‘St. Paul’ and the customer enters ‘St Paul’ (without the period) or ‘Saint Paul’, the Condition will not pass.
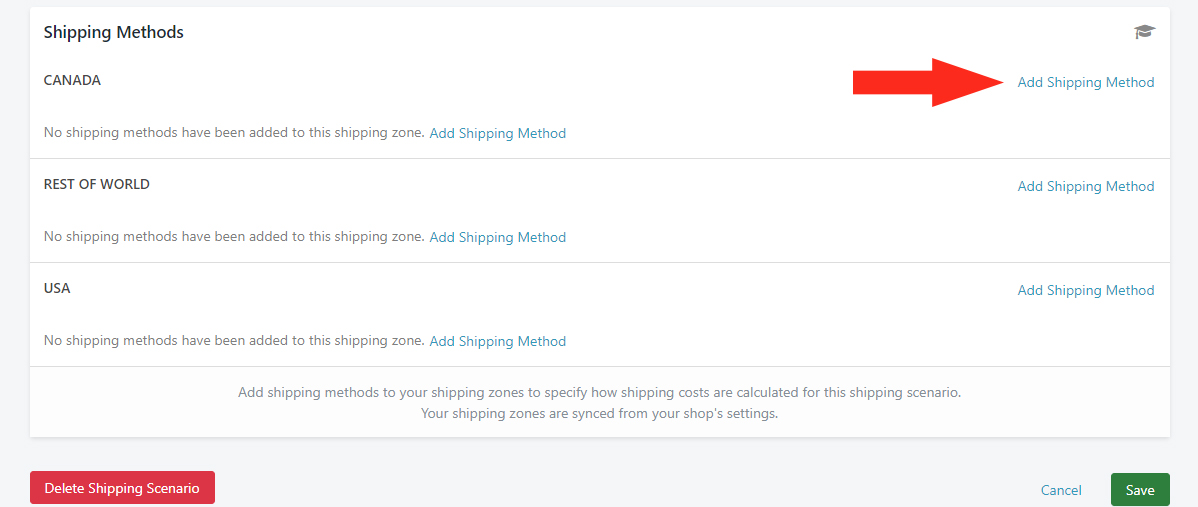
Add A Local Delivery Shipping Method
1) In the Shipping Methods section, click Add Shipping Method beside a Shipping Zone that includes your local delivery area.
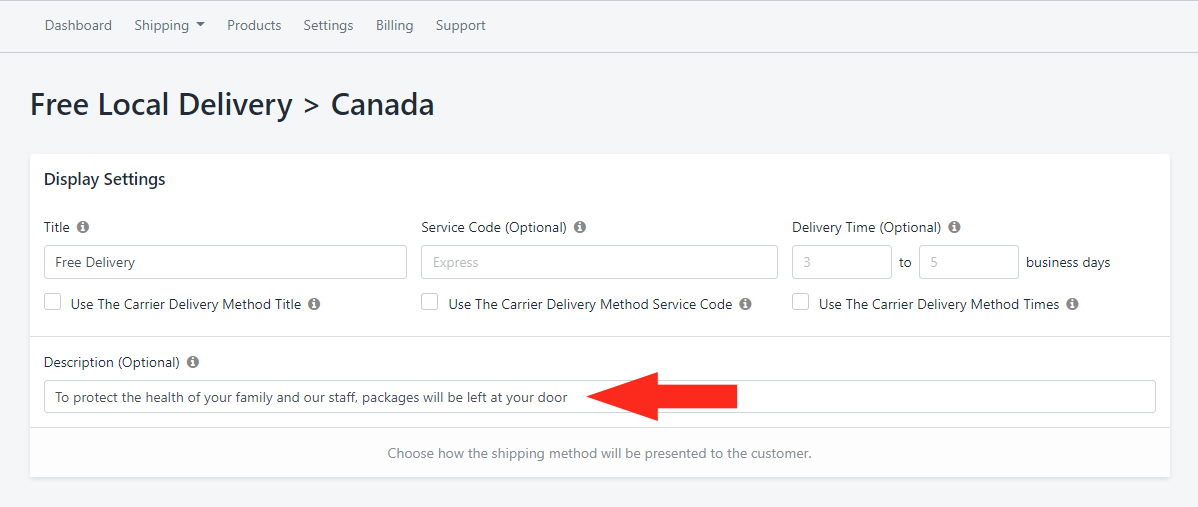
2) Enter a Title for your Shipping Method – e.g. ‘Free Delivery’.

3) If desired, complete the optional Display Settings for Service Code and Delivery Time.
4) Enter a Description that clearly explains how the delivery will occur – e.g. ‘ To protect the health of your family and our staff, we will leave the package at your door’.
Add The Shipping Cost
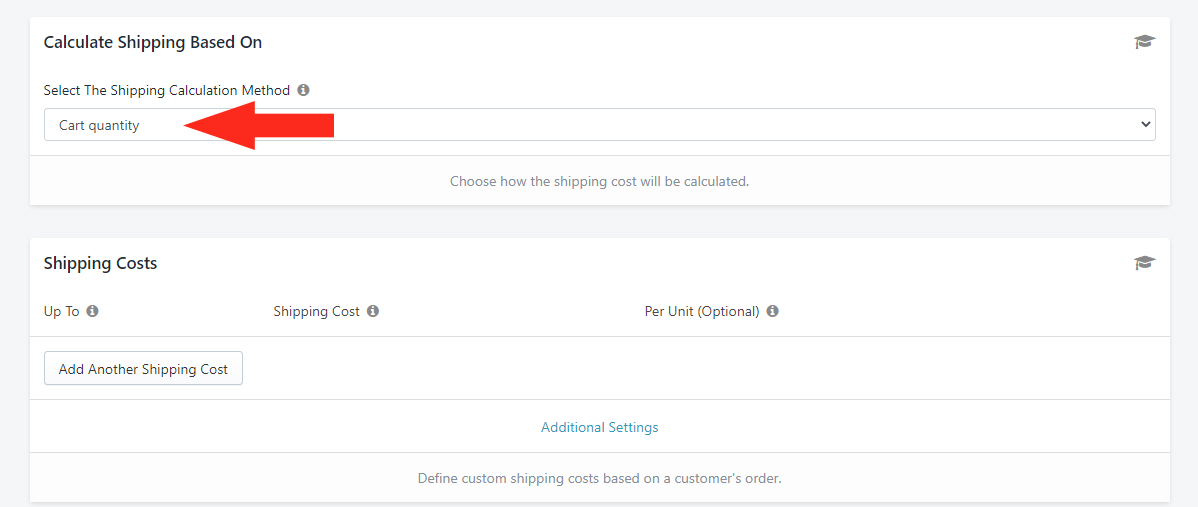
1) In the Calculate Shipping Based On section, you can leave ‘Select The Shipping Calculation Method’ on Cart quantity. This is the default setting.
Since your Shipping Cost will be set to $0.00 (free), this setting can be any Cart Value setting.
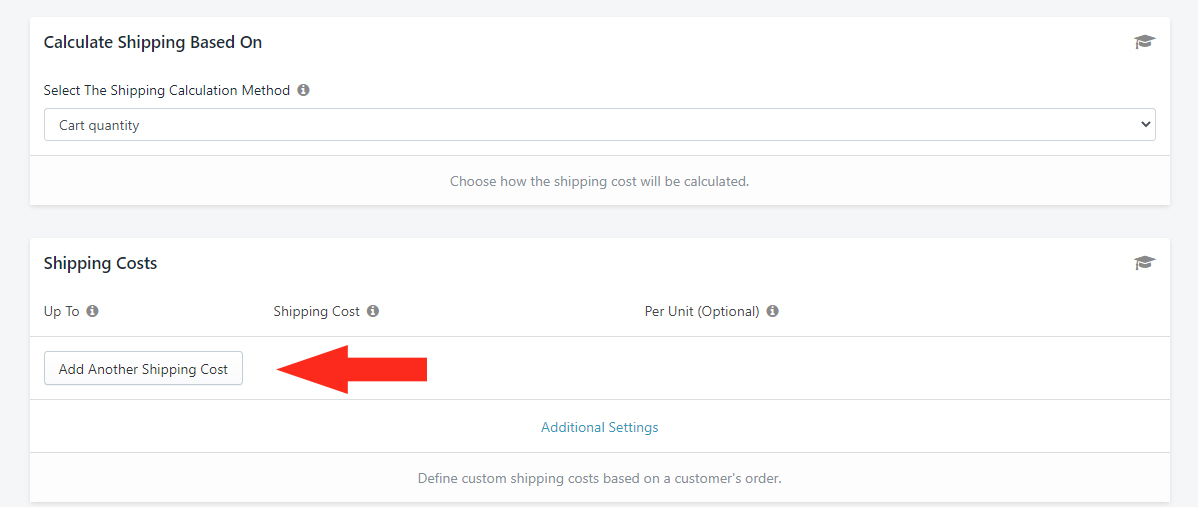
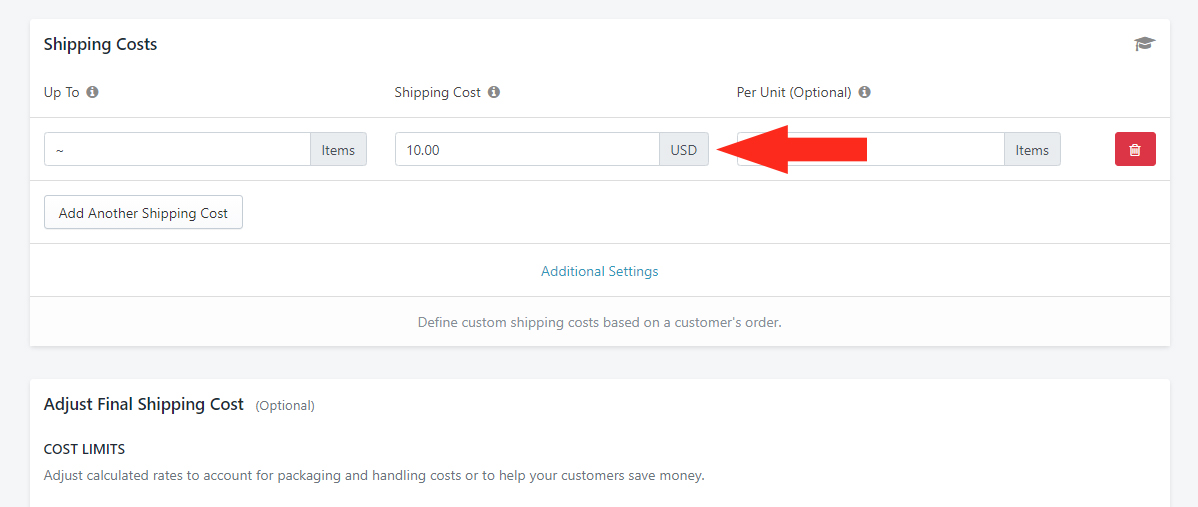
2) In the Shipping Costs section, click the Add Another Shipping Cost button.
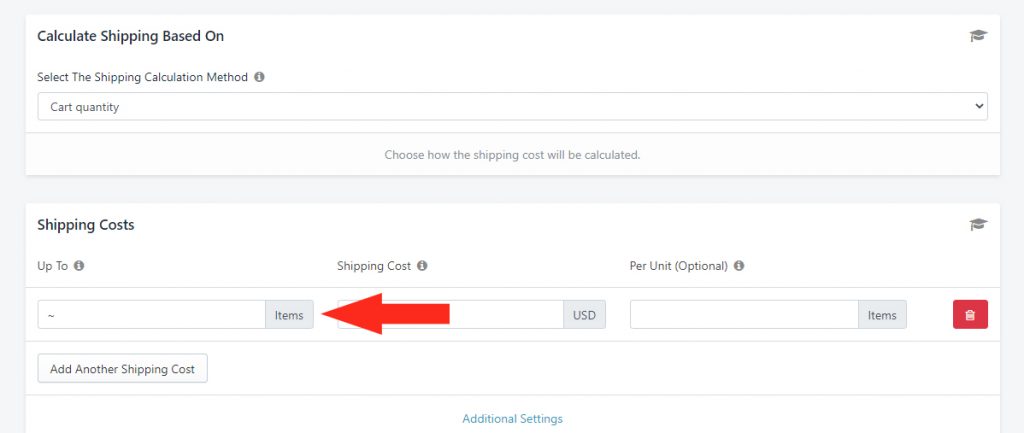
3) Enter the Up To limit as the ~ tilde symbol.
4) Enter the Shipping Cost as 0 (zero).
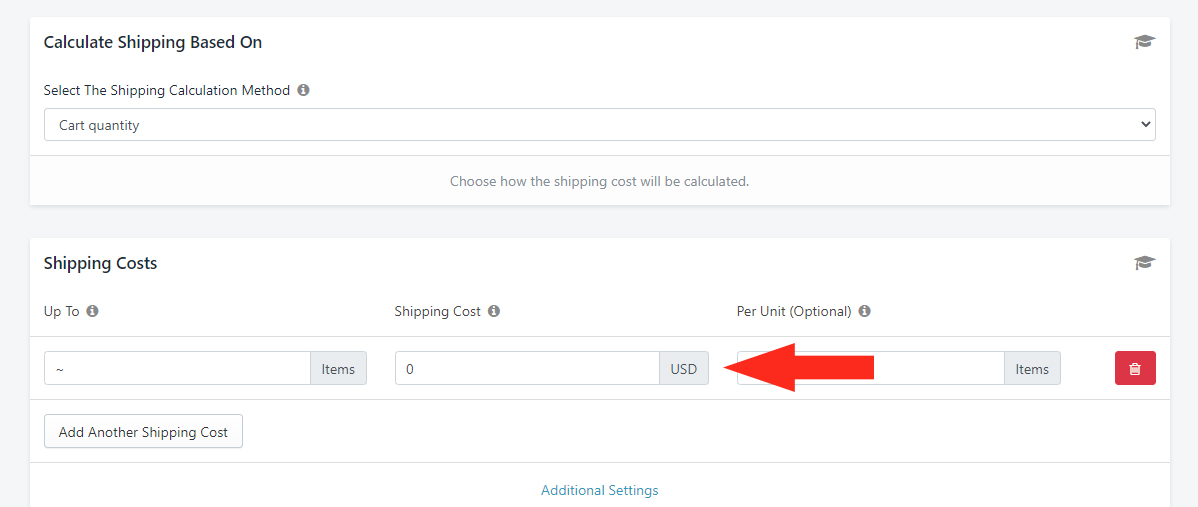
5) Leave the Per Unit (Optional) setting blank.
6) Additional Settings are not required for Free Local Pickup.
Save Your Free Delivery Shipping Method
1) Click the Save button to save your Shipping Method!
Save Your Settings
When you return to the Edit Shipping Scenario screen, click the Save button!
Add An Option for Regional Customers
Don’t want to alienate customers who live just outside your free delivery range? It may not be feasible to provide them with the same free delivery offered to your truly local customers, so why not compromise? Set a threshold limit on the cart amount so customers outside the ‘always free’ zone have to spend a minimum amount to get free delivery.
Or, skip the free delivery minimum and charge a small, flat local shipping rate.
Add A Cart Threshold Limit For Free Delivery
To simplify the process, you can make a Duplicate of your Free Local Delivery Scenario, then make minor adjustments to the Condition and Shipping Methods, rather than creating a new Scenario from scratch.
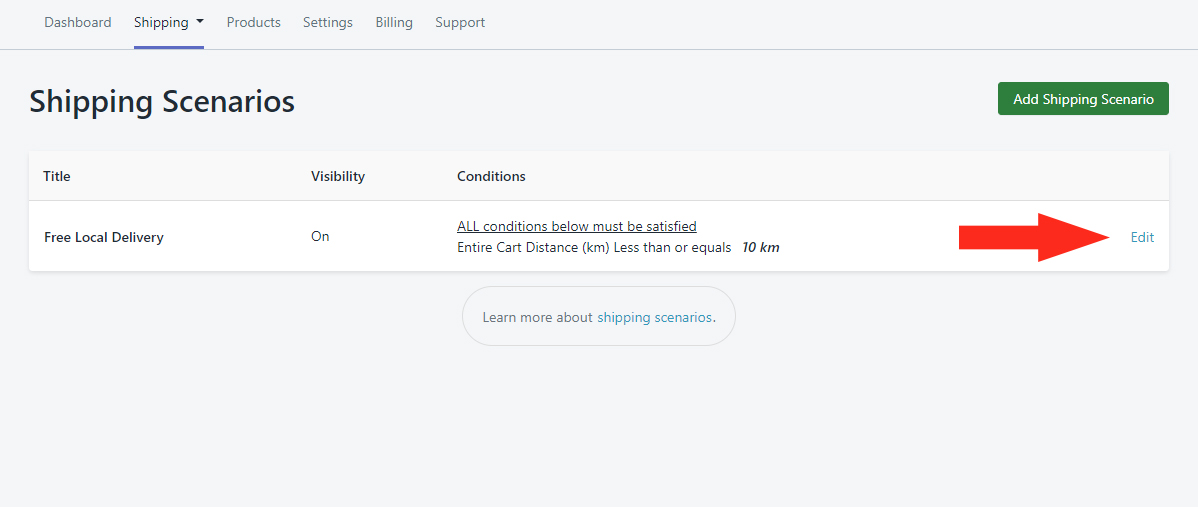
1) Click Shipping on the main menu, then select Scenarios from the drop-down list.
2) Click Edit beside your Free Local Delivery Scenario.
3) Click the Duplicate button in the top right. This will create an exact copy of the Free Local Delivery Scenario, including any Shipping Methods.
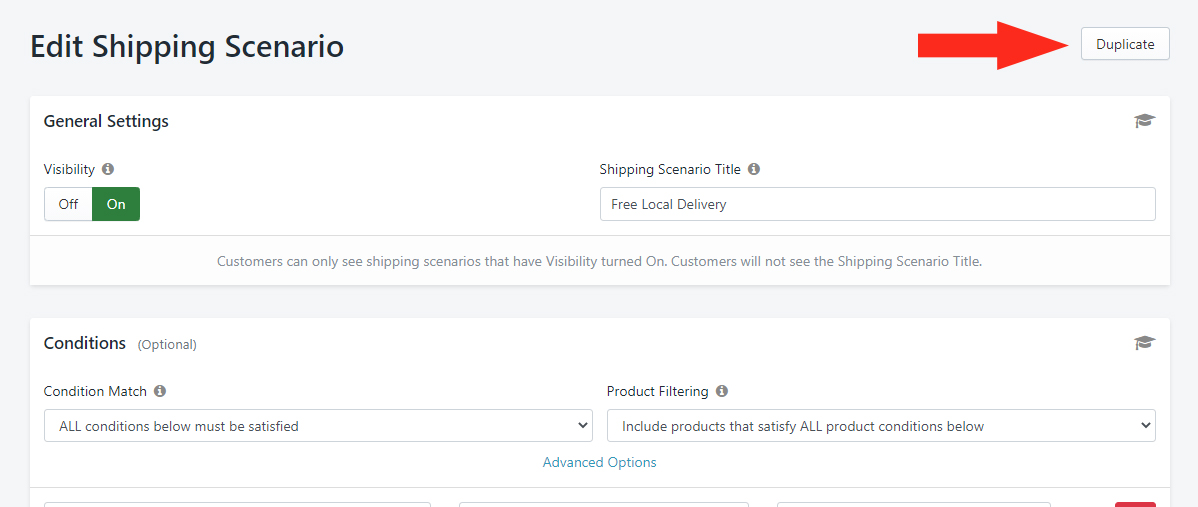
4) Confirm Visibility is set to On.
5) Change the Title from ‘Copy of Free Local Delivery’ to something new – e.g. ‘Regional Delivery (Free over $25)‘.
Set The Conditions
1) Leave the settings under Condition Match, Product Filtering, and Advanced Options on their Default settings.
2) Edit the Condition, depending on how you set up the original Scenario:
Option 1: By Distance
a) Leave the Condition type set to Distance.
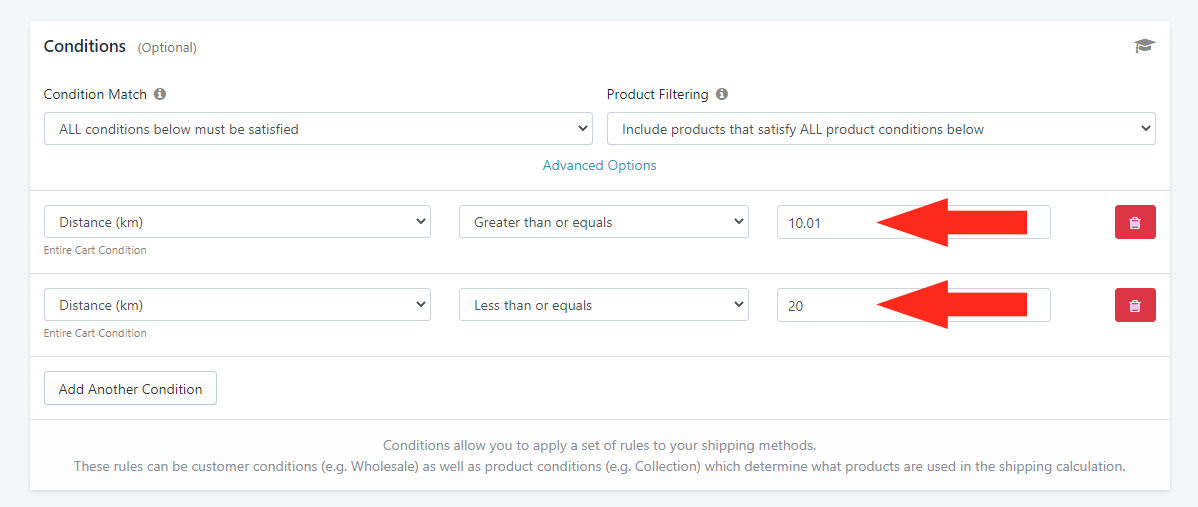
b) Change the Condition Logic to Greater than or equals.
c) Change the Value to an amount that is 0.1 greater than the ‘Free Local Delivery’ distance – e.g. if you used ’10’ (10 kms) as the maximum distance in your original Scenario, make this value ‘10.01’.
d) Click the Add Another Condition button.
e) Click the Condition field. Then select Distance from the Entire Cart Conditions section.
f) Set the Condition logic to Less than or equals.
g) Enter the Value as the amount of distance – e.g enter ’20’ if the ‘regional’ distance limit is 20 kilometers.
Option 2: By Postal Code/ ZIP Code
a) Leave the Condition type set to Postal Code/ Zip Code.
b) Leave the Condition logic set to Equals.
c) Change the Value to a different Postal Code or ZIP Code range that covers your expanded regional delivery area- e.g. 90401:90411.
Option 3: By City
a) Leave the Condition type set to City.
b) Leave the Condition logic set to Equals.
c) Change the Value to a different City name (or names, separated by comma).
3) Click the Save button to save the changes to your new Scenario.
Add A Regional Delivery Shipping Method
Instead of creating a new Shipping Method from scratch, you can edit the ‘Free Delivery’ Shipping Method that was copied over from your original ‘Free Local Delivery’ Scenario.
1) Click Edit beside the ‘Free Delivery’ Shipping Method.
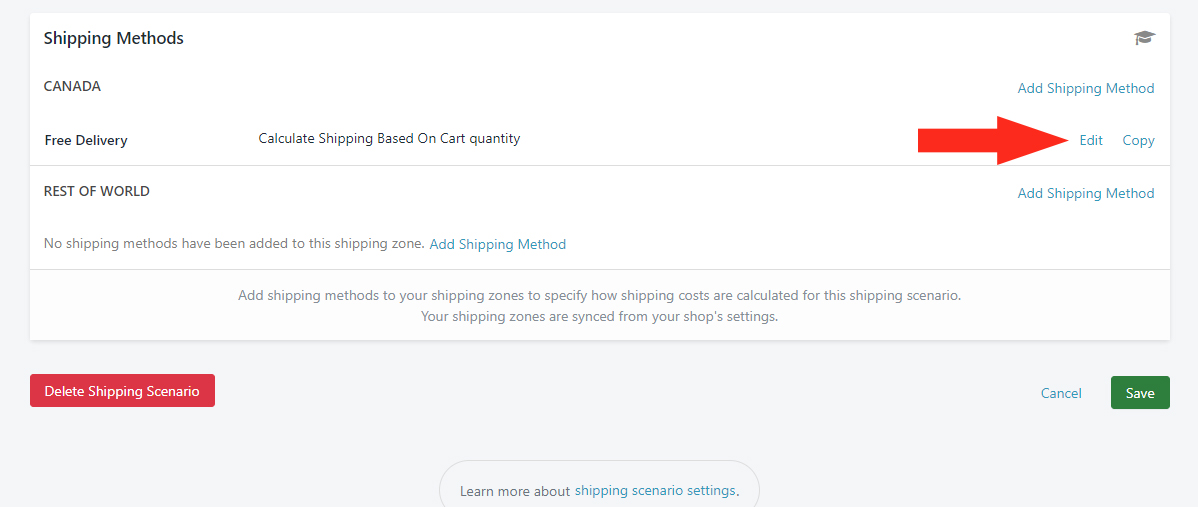
2) Change the Title of the Shipping Method – e.g. ‘Regional Delivery’.
3) Update the other Display Settings as needed.
We recommend leaving the Description the as-is or using one similar to the one used in your ‘Free Delivery’ Shipping Method – e.g. ‘ To protect the health of your family and our staff, we will leave the package at your door’.
4) Scroll down to the Shipping Costs. section.
5) Leave the ~ (tilde) symbol as the Up To value.
5) Change the Shipping Cost from ‘0’ to the amount you need to charge for delivery outside of your local ‘free’ area (below the cart threshold) – e.g. ’10’ ($10.00)
If it isn’t feasible to offer free shipping, even with a minimum cart amount, skip Steps 6 and 7.
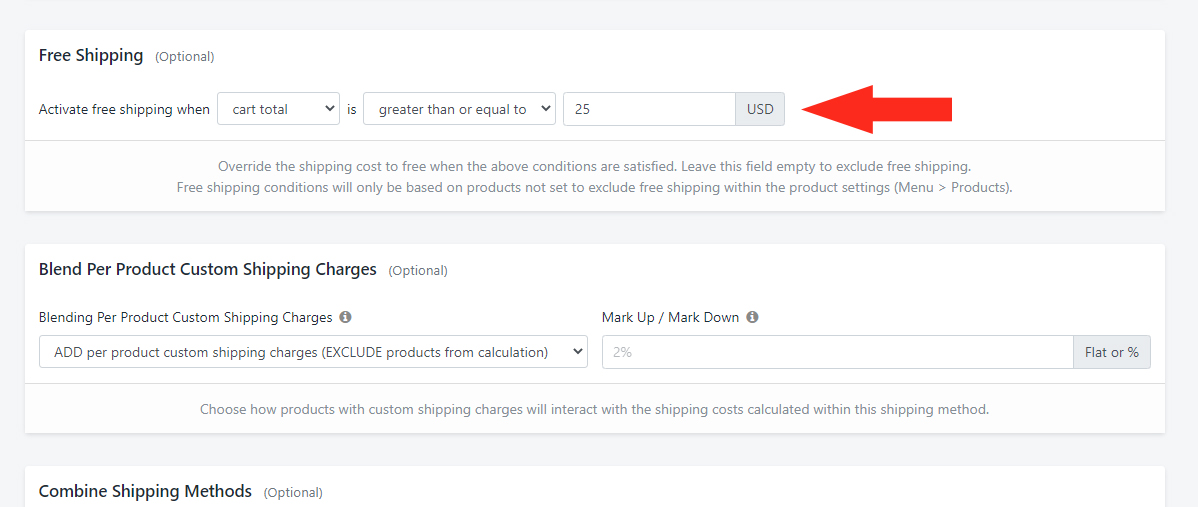
6) Scroll down to the Free Shipping (Optional) section.
7) Activate free shipping when the cart total is greater than or equal to 25 ($25.00).
When the customer’s cart total is $25.00 or more, the shipping cost entered in Step 5 will be overridden and the customer will not be charged for shipping.
Save Your Regional Shipping Method
Click the Save button to save your Shipping Method!
Save Your Settings
When you return to the Edit Shipping Scenario screen, click the Save button!
Add A Store Pick-up Scenario
If free local delivery isn’t an option for your store, or if you want to offer another choice to your local customers, allow them to schedule a time to come to your store by setting up a Safe Curbside or In-Store Pick-up Scenario. Use custom descriptions to inform your customers when and where to safely pick up their orders.
Add a Safe Store Pickup Scenario
1) Click the Shipping menu button, then select Shipping Scenarios from the drop-down list.
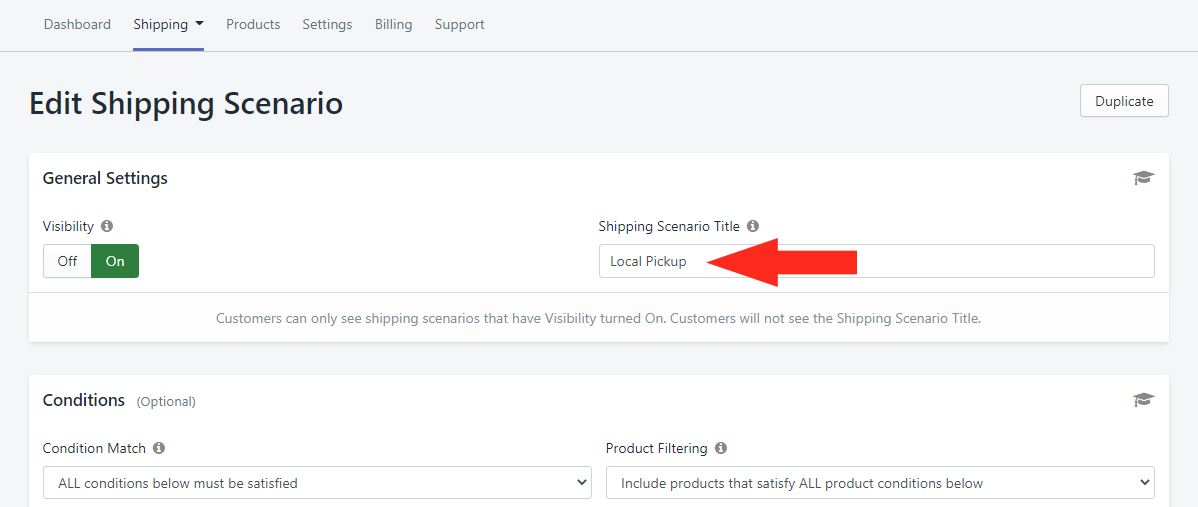
3) Set Visibility to On.
4) Enter the Shipping Scenario Title – e.g ‘Local Pickup’.
Set The Condition
1) Leave the settings under Condition Match, Product Filtering, and Advanced Options on their Default settings.
2) Click the Add Another Condition button.
You can limit the free delivery option to local customers using a Condition based on either Distance, Postal/Zip Code or City.
Option 1: By Distance
1) Click the Condition field. Then select Distance from the Entire Cart Conditions section.
2) Set the Condition logic to Less than or equals.
3) Enter the Value as the amount of distance – e.g enter ’10’ if the distance limit is 10 kilometers.
Option 2: By Postal Code/ ZIP Code
1) Click the Condition field. Then select Postal Code/ Zip Code from the Customer Conditions section.
2) Set the Condition logic to Equals.
3) Enter the Value as the Postal Code or Zip Code range that covers your local delivery area- e.g. 90401:90411
4) Select the Postal Code format.
Option 3: By City
1) Click the Condition field. Then select City from the Customer Conditions section.
2) Set the Condition logic to Equals.
3) Enter the Value as the City name (or names, separated by comma).
That means typos and alternative spellings entered by the customer on the checkout page could cause the Condition to be ignored. For example, if the city Condition value is ‘St. Paul’ and the customer enters ‘St Paul’ (without the period) or ‘Saint Paul’, the Condition will not pass.
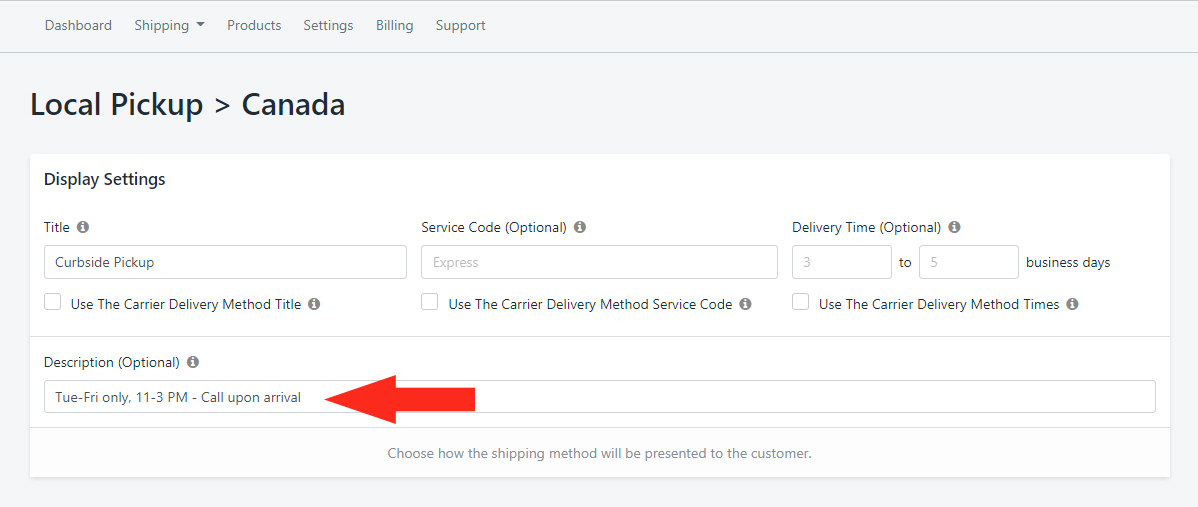
Add A Local Pickup Shipping Method
1) In the Shipping Methods section, click Add Shipping Method beside a Shipping Zone that includes your local pickup area.
2) Enter a Title for your Shipping Method – e.g. ‘Curbside Pickup’.
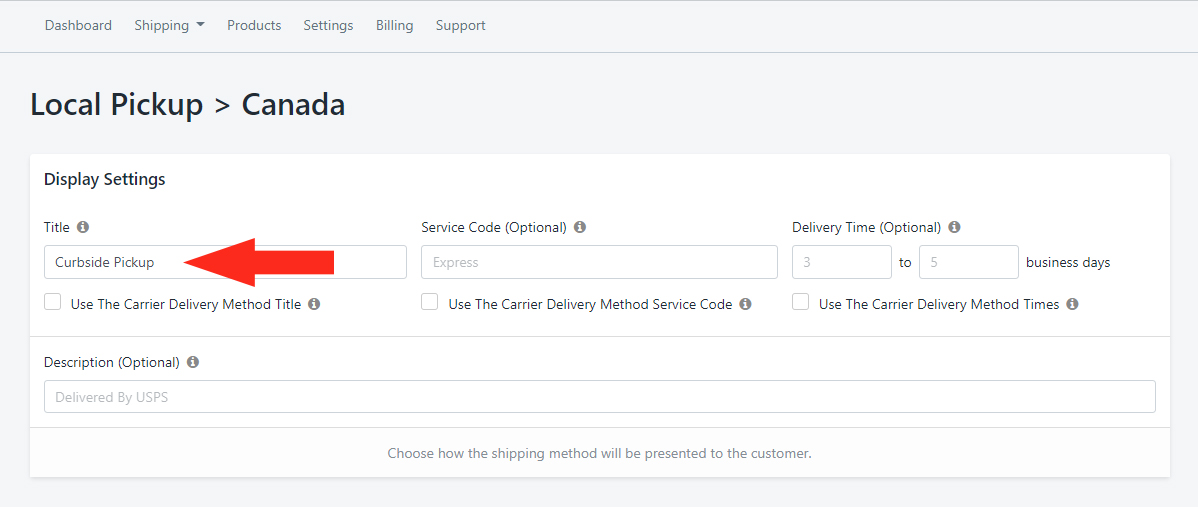
3) If desired, complete the optional Display Settings for Service Code and Delivery Time.
4) Enter a Description that clearly explains what customers need to do – e.g. ‘Call to schedule a safe pickup time’, or indicate times pickup if available.
Add The Shipping Cost
1) In the Calculate Shipping Based On section, you can leave ‘Select The Shipping Calculation Method’ on Cart quantity. This is the default setting.
Since your Shipping Cost will be set to $0.00 (free), this setting can be any Cart Value setting.
2) In the Shipping Costs section, click the Add Another Shipping Cost button.
3) Enter the Up To limit as the ~ tilde symbol.
4) Enter the Shipping Cost as 0 (zero).
5) Leave the Per Unit (Optional) setting blank.
6) Additional Settings are not required for Free Local Pickup.
Save Your Free Local Pickup Shipping Method
1) Click the Save button to save your Shipping Method!
Save Your Settings
When you return to the Edit Shipping Scenario screen, click the Save button!