There may be times when you want to prevent shipping from being displayed under certain conditions. Often this can be achieved using Intuitive Shipping’s more common features and settings. But there are times when preventing shipping might mean building complex Scenarios with multiple conditions, zones or sub-zones. That can take a lot of time, and it can create issues when you need to make changes in the future.
To simplify things, you can set up a ‘forced fail’ using the advanced No shipping service.
This guide will show you how to use the ‘No shipping’ service option when you have product restrictions, and when you want to prevent shipping to certain postal code sub-zones.
Using ‘No Shipping’ with Product Restrictions
This part of the guide explains how to use the ‘no shipping’ service when you want to limit shipping options for certain products in the cart. This is useful if you offer blended shipping rates with multiple carrier service levels, but some products can only ship on one of those service levels.
How It Works
Let’s say you have 10 different product types, each with its own flat ‘Ground’ and ‘Expedited’ shipping rate options. You previously enabled blending on each shipping method, and set up two advanced blending rules – one that combines all shipping methods tagged ‘GROUND’ and one that combines all shipping methods tagged ‘EXPEDITED.
Now you want to offer a new product, but it has shipping restrictions and can only be shipped ‘Ground’, which means the entire order has to ship ‘Ground’, regardless of what else is in the cart.
To prevent customers who order this restricted product from getting the ‘Expedited’ option along with ‘Ground’, you only need to create a new Scenario for the restricted product. The new Scenario will have a paid ‘Ground’ shipping option set to blend with other ‘Ground’ rates. And, it will have a ‘no shipping’ option set to blend with other ‘Expedited’ rates.
You do not need to edit your existing Scenarios.
When customers order the new product along with any other combination of product types, they’ll only get your blended ‘Ground’ shipping option. The ‘Expedited’ option will not appear unless they remove the restricted product from the cart.
We recommend that you provide information about product shipping restrictions somewhere on your store website, such as a ‘Shipping’ info page or in the site footer.
Create A New Scenario
You can create a new Scenario from scratch, or, to simplify things, you can create a duplicate of one of your existing Scenarios, then make changes as needed.
For this example, we’re going to create a duplicate of an existing Scenario.
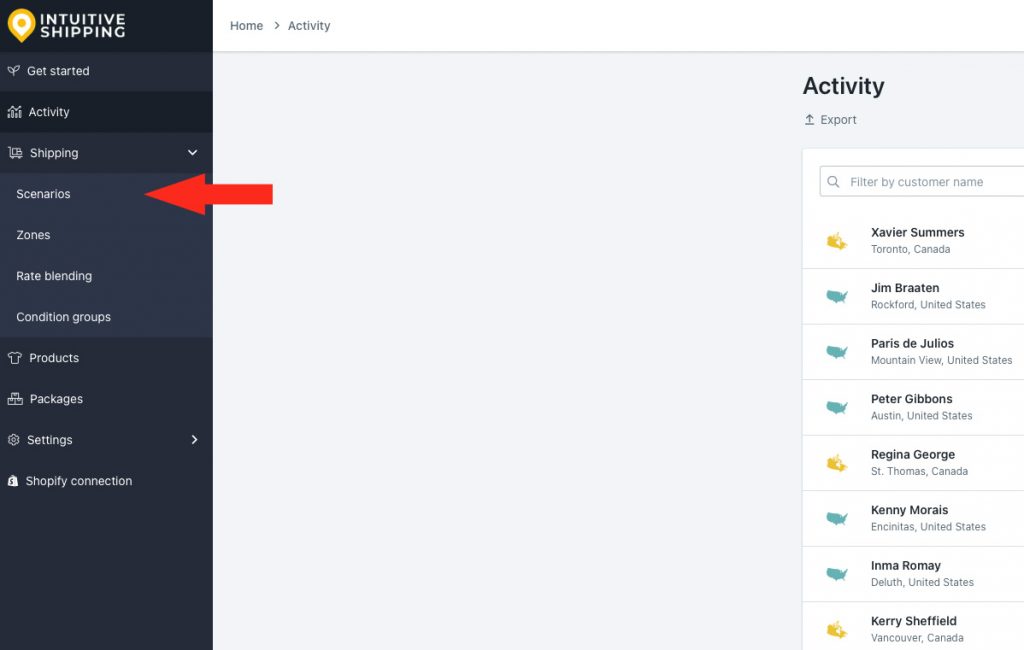
1) Click Shipping on the main menu, then select Scenarios from the drop-down list.
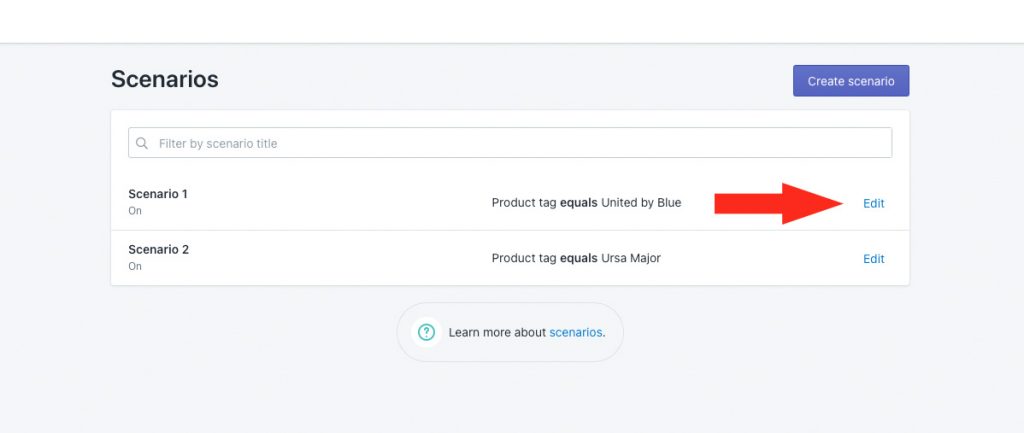
2) Click Edit beside any one of your existing Scenarios.
3) Click Duplicate below the Scenario heading.
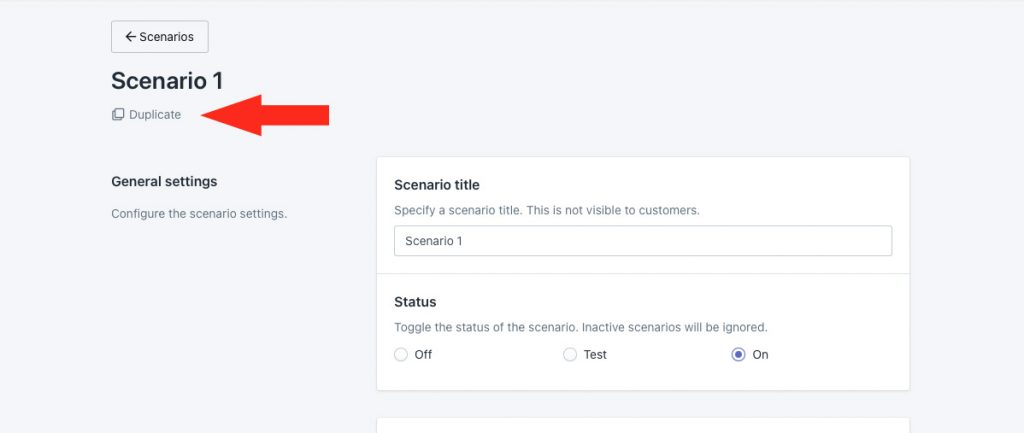
4) Change the Scenario title from ‘Copy of [the original title] to something else. We recommend using a format similar to the title of your existing Scenarios that identifies it as the restricted product Scenario.
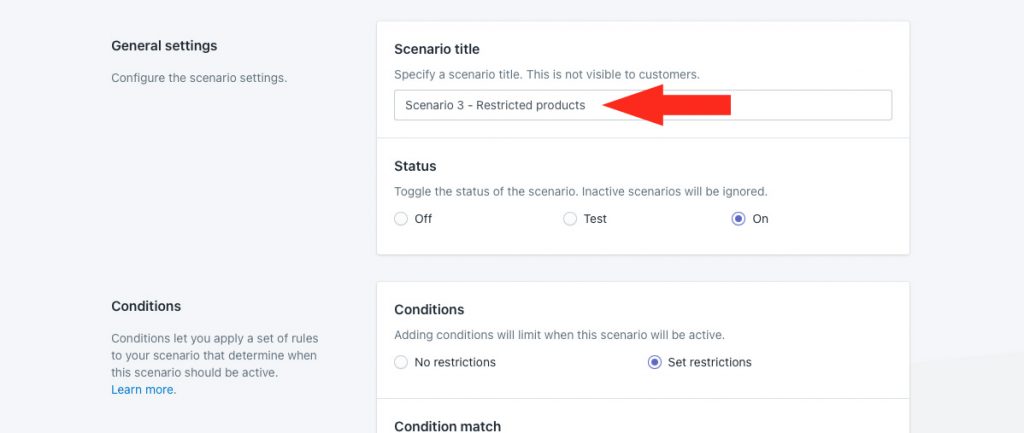
5) In the Conditions section, leave restrictions and condition match settings as-is.
6) Change the product condition as needed. For this example, we’re going to continue using the product tag condition. We’re leaving the condition type set to ‘Product tag’ and the condition logic set to ‘equals’, then changing the condition value to ‘restricted’
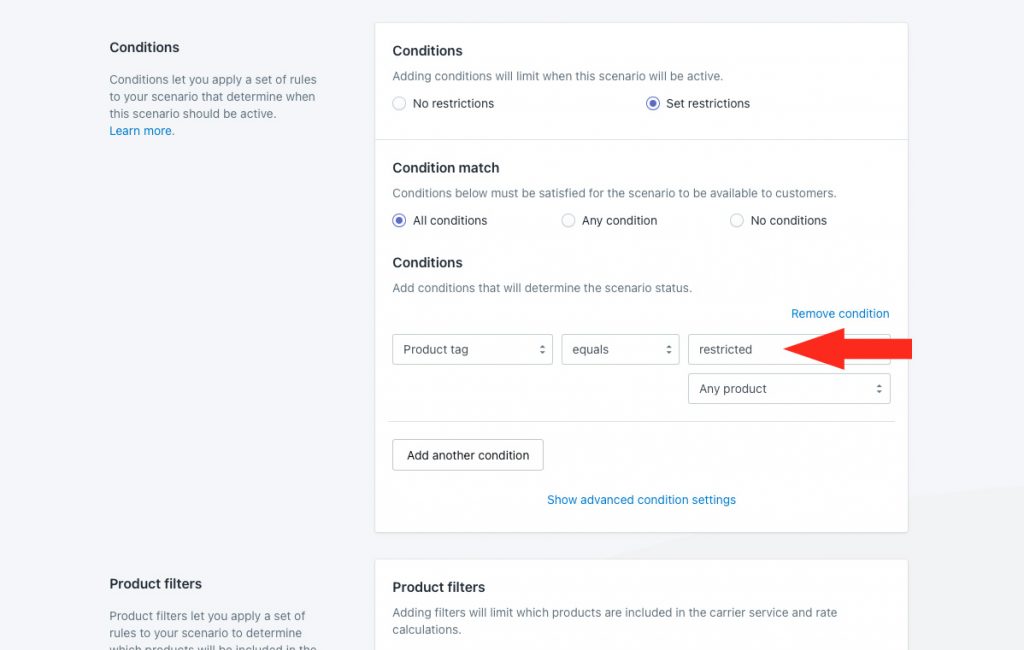
7) Leave the product filters settings as-is.
Save Your Settings
1) Click the Save button to save your new Scenario.
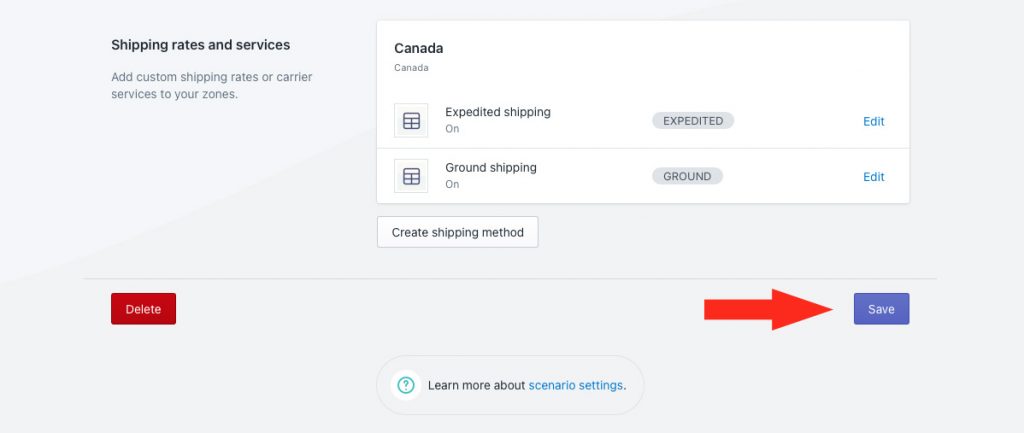
Add A No Shipping Method
When you created the duplicate of the original Scenario, it copied all of the settings from the original, including the shipping methods. Depending on how your shipping methods were configured, you’ll have to remove at least one shipping method before adding ‘no shipping’.
For this example, we had two custom service (flat rate) shipping methods: one for ‘Ground’ shipping and one for ‘Expedited’ shipping. We’re going to remove ‘Expedited’ since the restricted product can only be shipped by ‘Ground’.
1) Click Edit beside the shipping method you need remove.
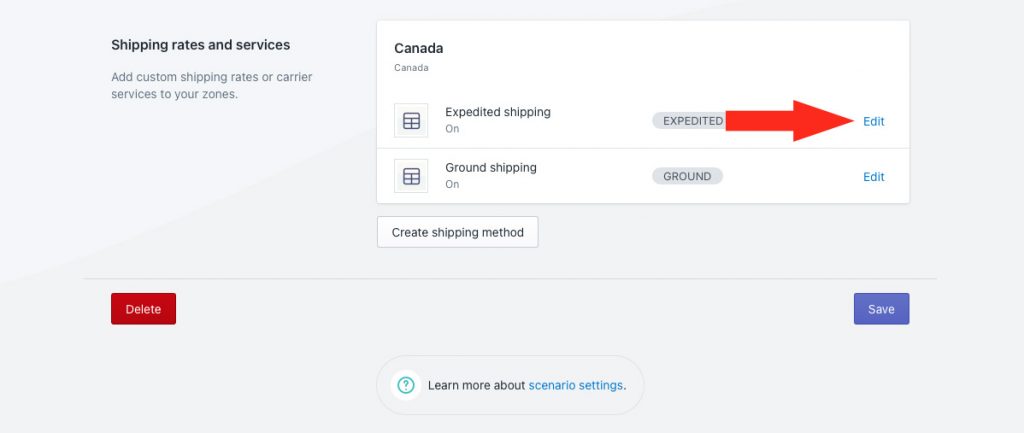
2) Scroll to the bottom of the page, then click the Delete button.
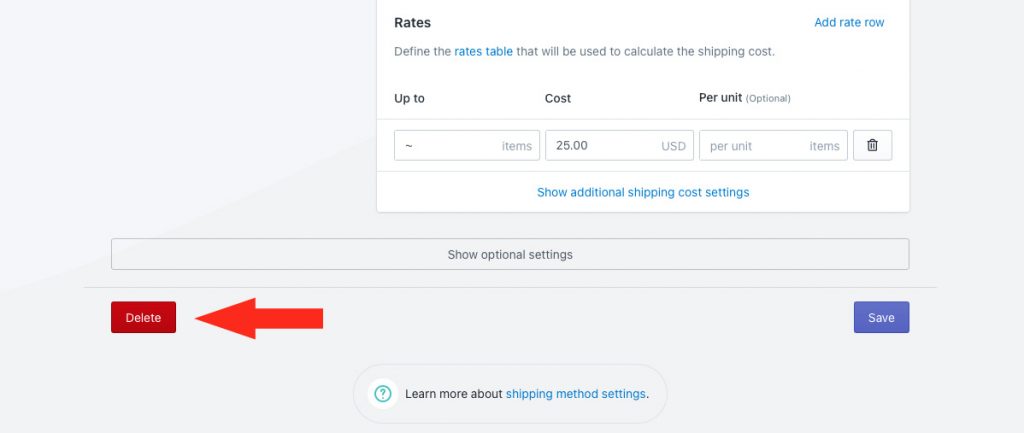
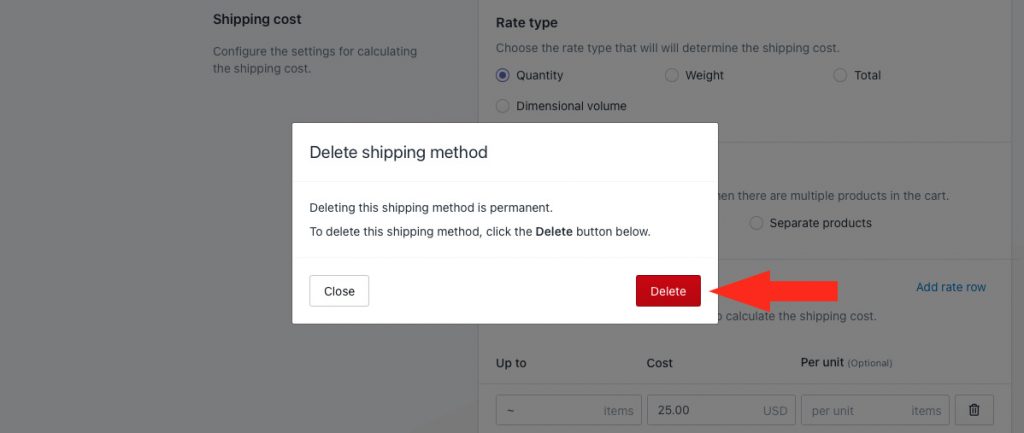
3) When prompted, click the Delete button to confirm.
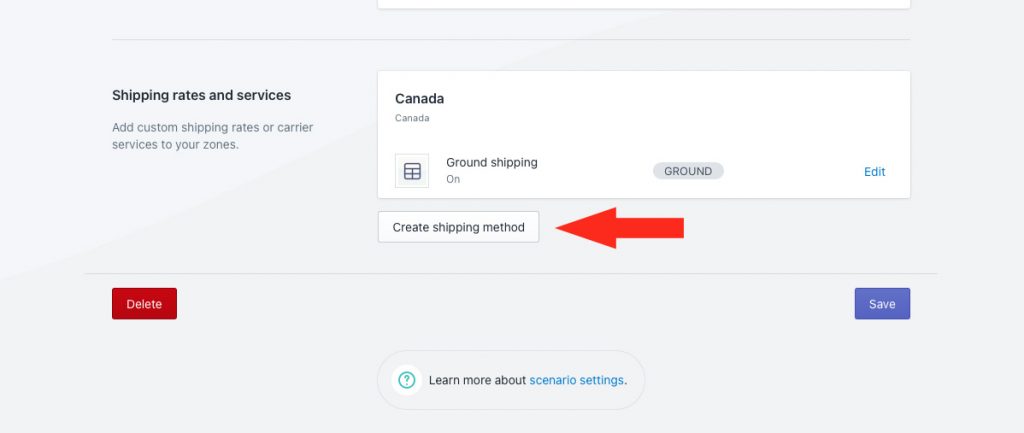
4) Scroll down to ‘Shipping rates and services’, then click the Create shipping method button.
Select An Advanced Shipping Service
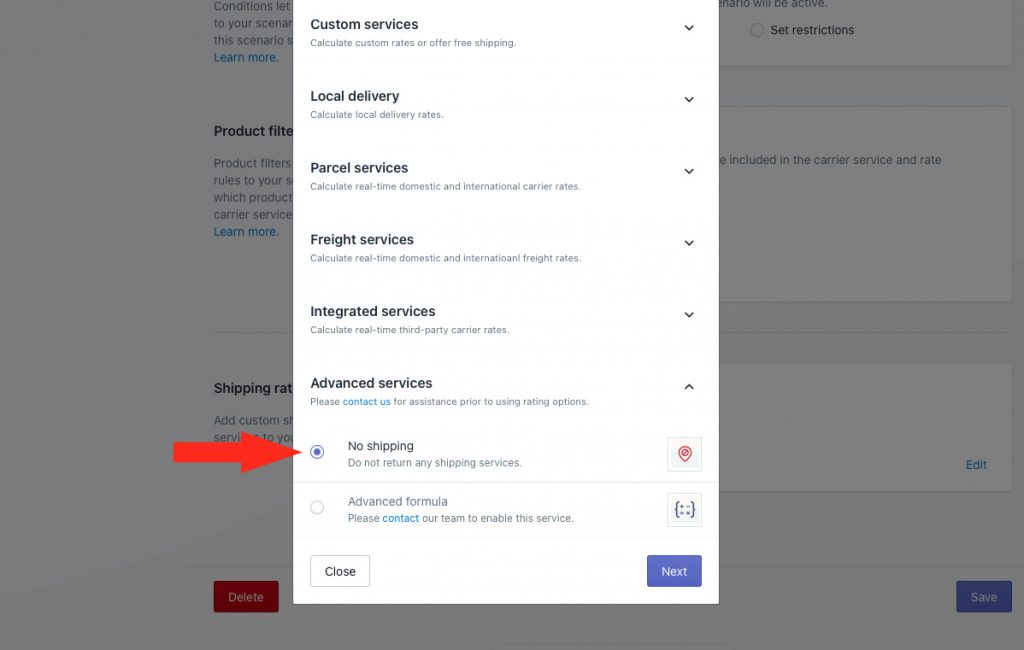
1) Click the downward arrow beside ‘Advanced services’ to display a list of options.
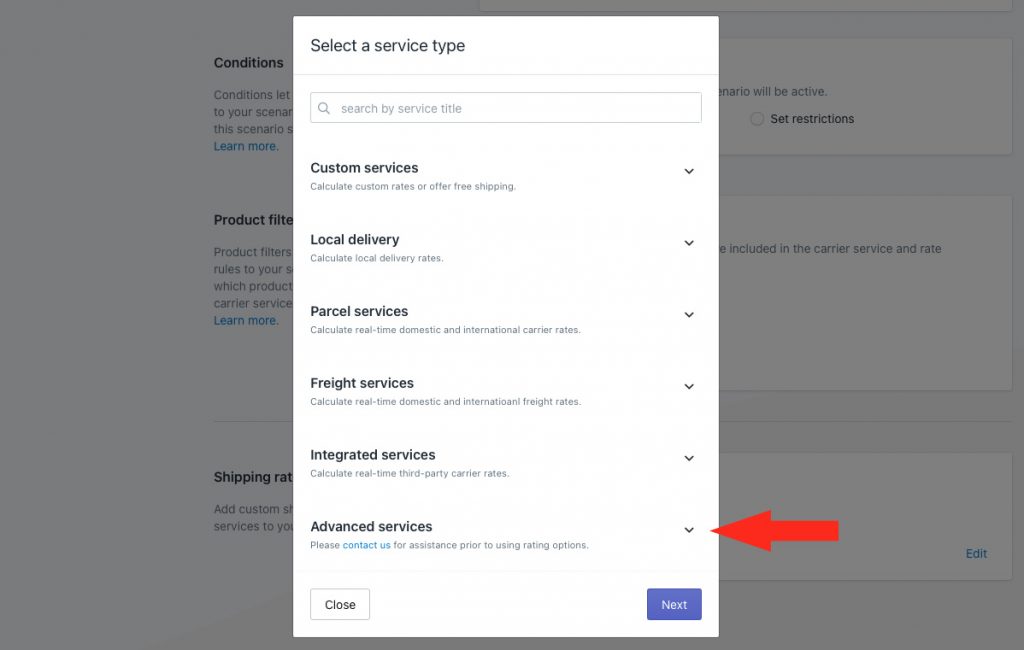
2) Select No shipping from the list.
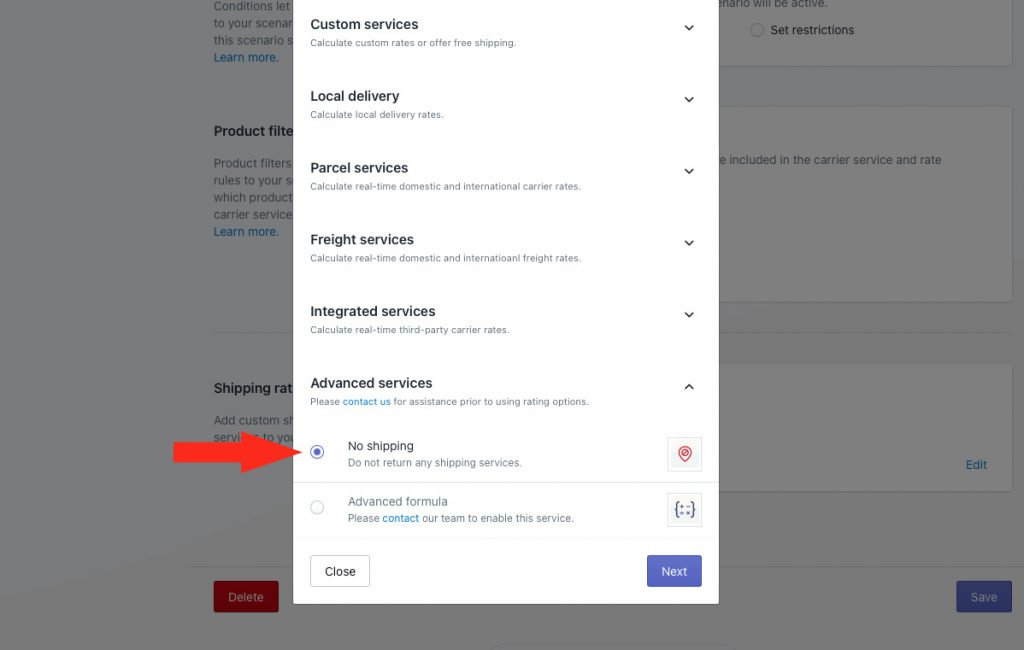
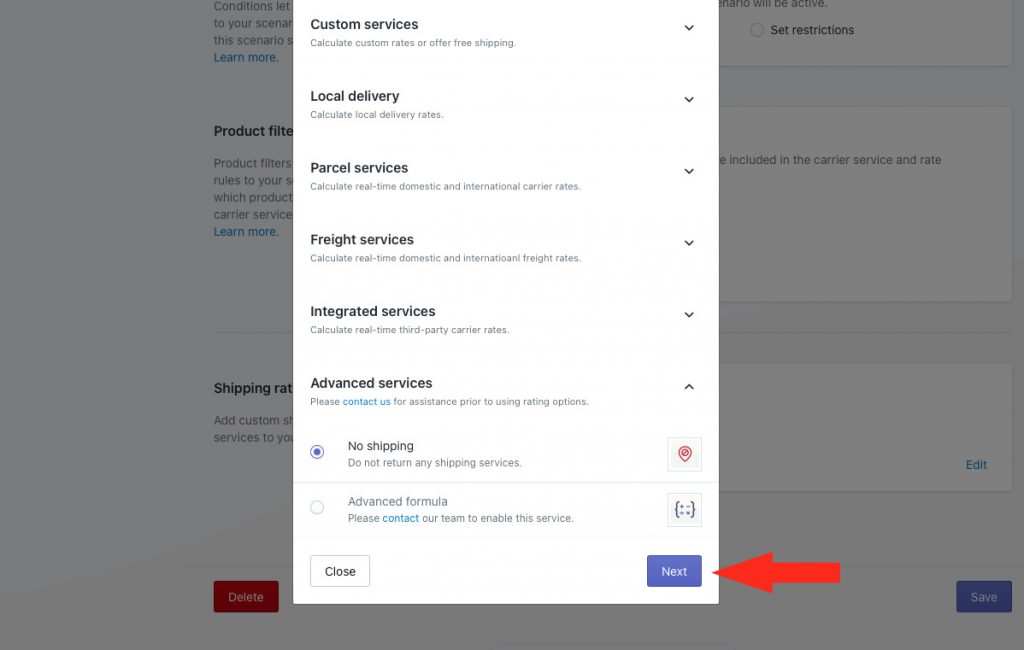
3) Click the Next button.
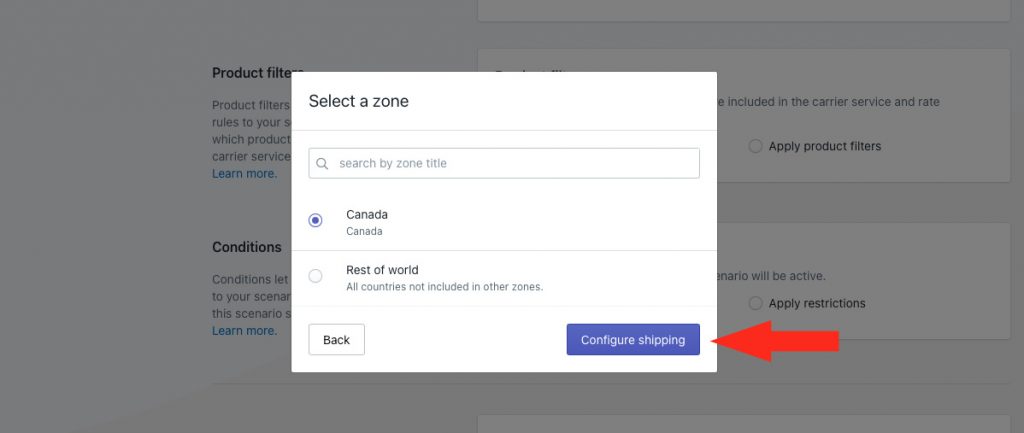
4) Select the same zone you used for the shipping method that was removed earlier.
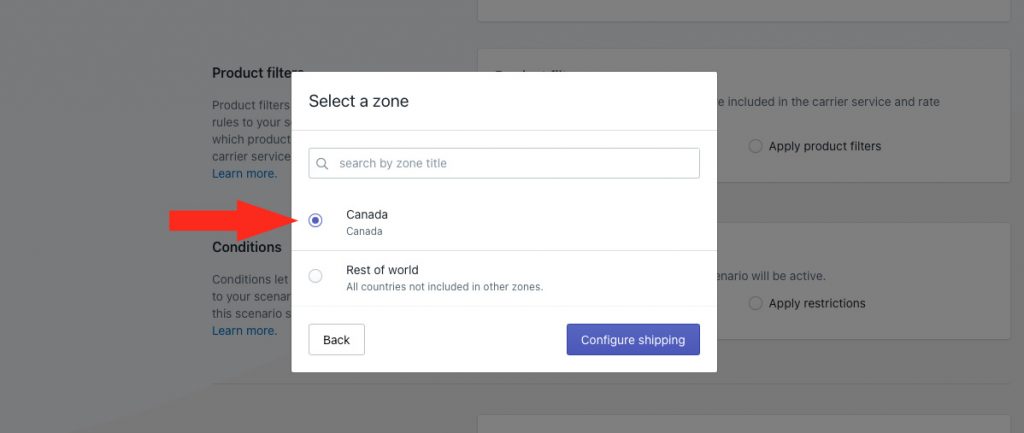
5) Click the Configure shipping button.
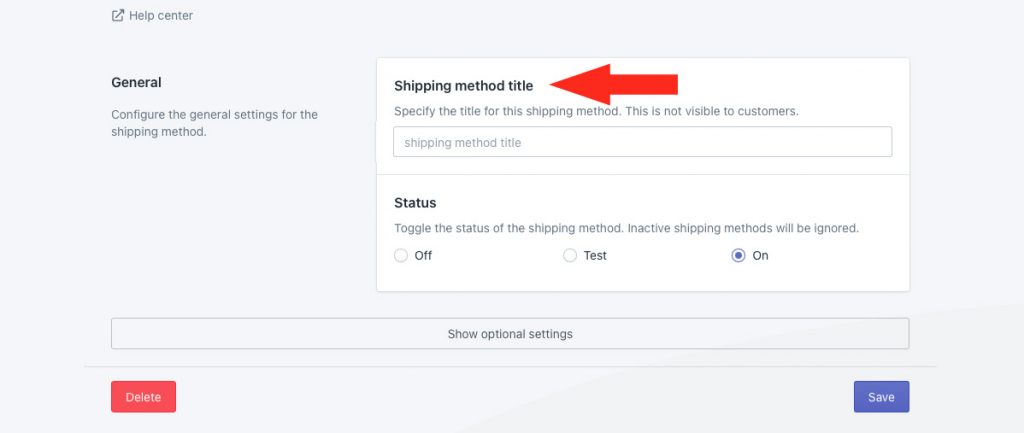
General
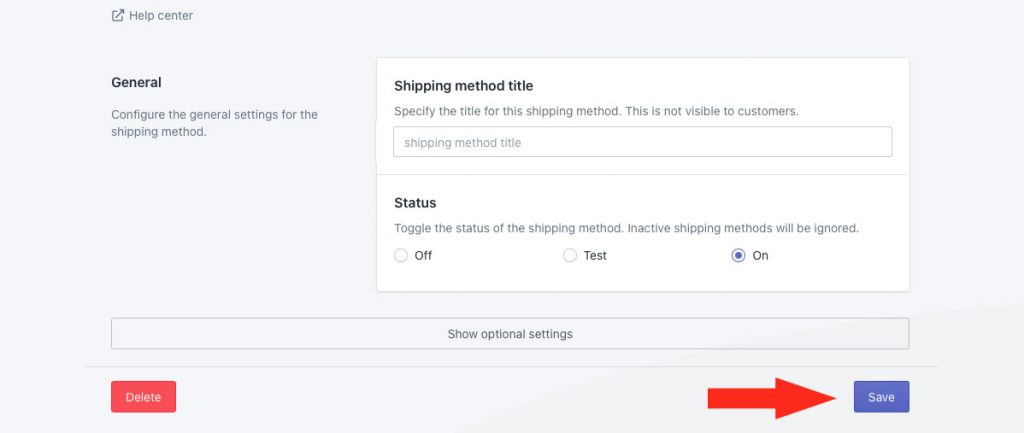
1) Enter a shipping method title, like ‘No Shipping – Restricted Products’.
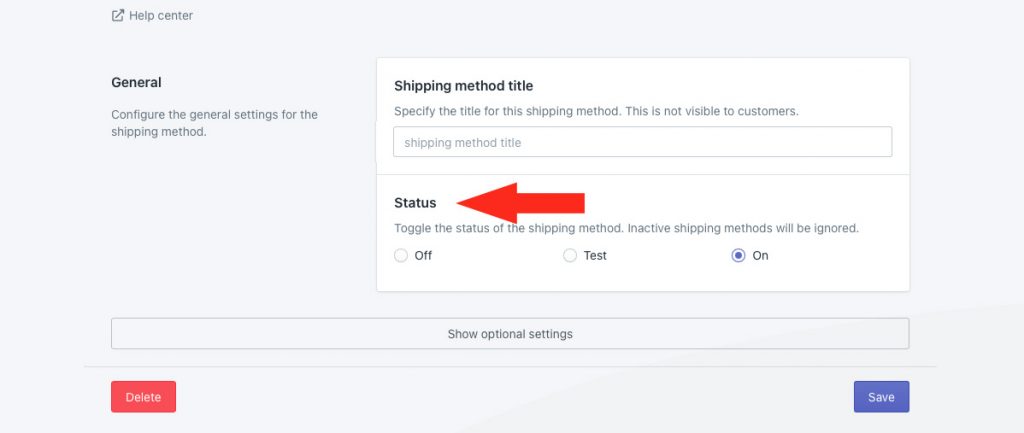
2) Leave the Status set to ‘On’.
3) Click Show optional settings.
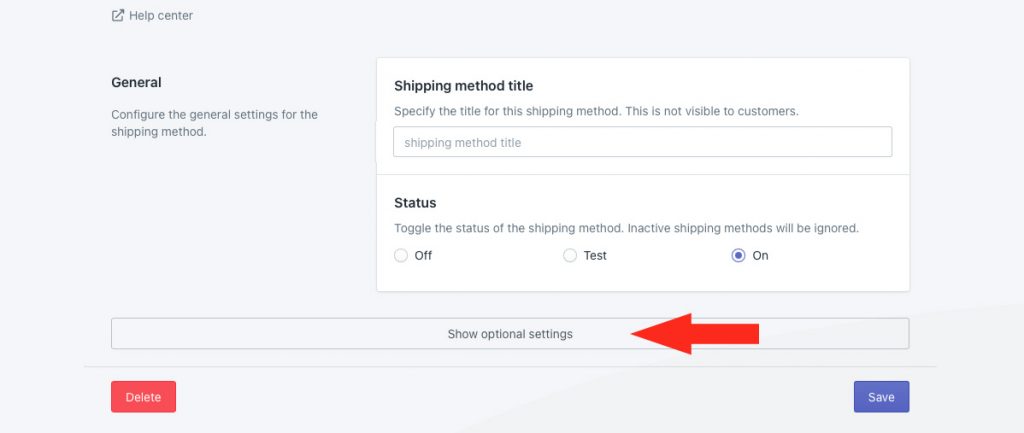
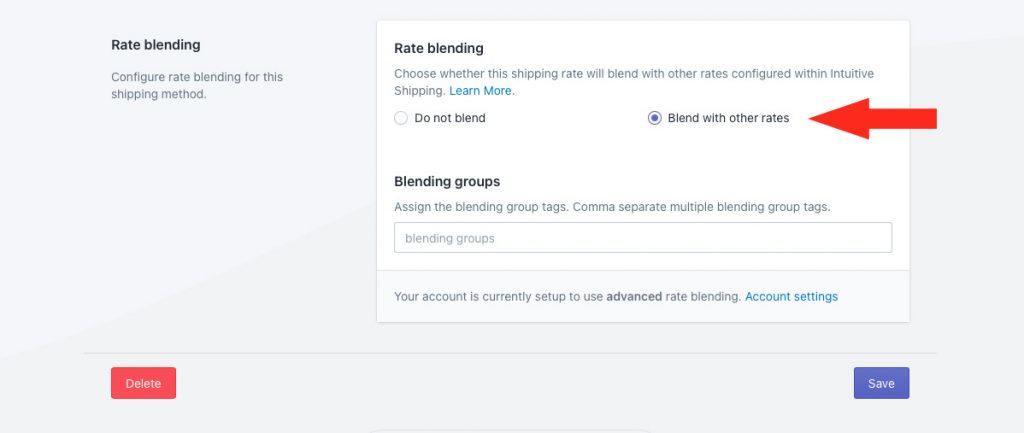
4) Select Blend with other rates.
5) Enter the same blending group tag that you use for the shipping method service you do not want to appear for restricted products. For this example, we’re using ‘Expedited’.
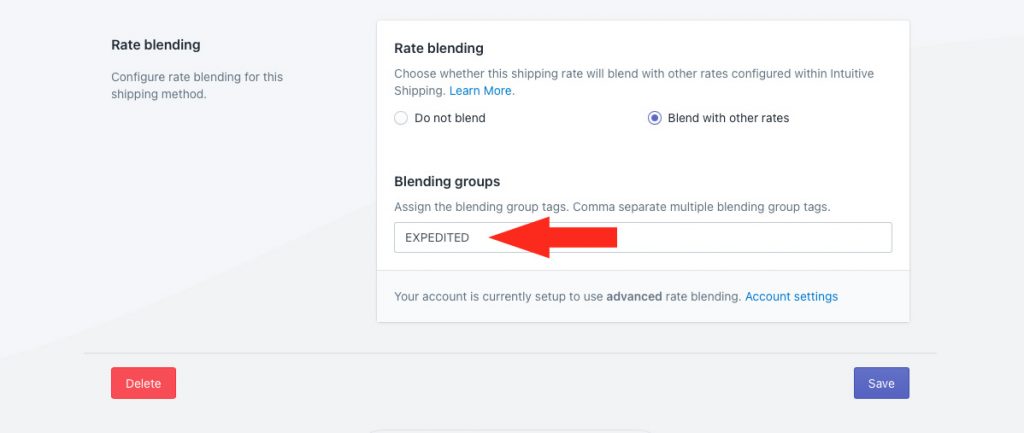
That means, when a customer orders a restricted product along with any other combination of products, the ‘no shipping’ method will be blended with all other shipping methods tagged ‘EXPEDITED’ forcing the entire blended rate to fail. The customer will only see a blended ‘Ground’ option at checkout unless they remove the restricted product from the cart.
Save Your Settings
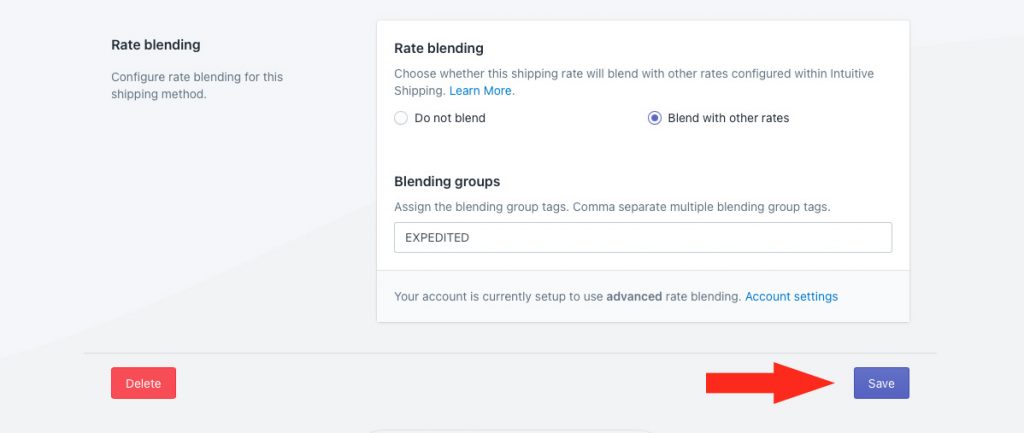
1) Click the Save button to save you ‘no shipping’ shipping method.
Using ‘No Shipping’ with Sub-zones
This part of the guide explains how to use the advanced ‘no shipping’ service when you want to exclude shipping from certain areas using postal code sub-zones. Instead of building out a sub-zone for the areas you do ship to, which may be far more time consuming if it’s a large area, you can create sub-zones only for the areas you don’t ship to.
How It Works
Let’s say you ship throughout the United Kingdom, but you’ve found it far too expensive and problematic to ship to places like the Scottish Highlands, so you’ve decided to exclude that region from shipping altogether. The problem is, the Highlands are part of your UK Zone, which currently has a shipping method assigned to it.
To prevent customers from the Highlands from getting a shipping option, you’ll first need to have a sub-zone for that region. Then, you’ll need to edit any Scenarios with shipping methods for the UK by adding a No shipping method only to the Highlands sub-zone.
You do not need to create a new Scenario.
When customers from anywhere in the UK except the Scottish Highlands order from you, they’ll got your usual shipping options. When customers from the Highlands try to order, they won’t get any shipping options.
We recommend that you provide information about regions and territories excluded from shipping somewhere on your store website, such as a ‘Shipping’ info page or in the site footer.
Create A Sub-Zone
If you don’t currently have a sub-zone for the area you want to prevent from getting shipping, you’ll need to create one.
Sub-zones must be added to the main ‘parent’ zone that includes their postal codes or zip codes. That means, you cannot add UK postcodes to a zone that doesn’t include them, just as you cannot add US Zip codes to a zone that doesn’t include the US as a whole or the state they belong to.
1) Click Shipping on the main menu, then select Zones from the drop-down list.
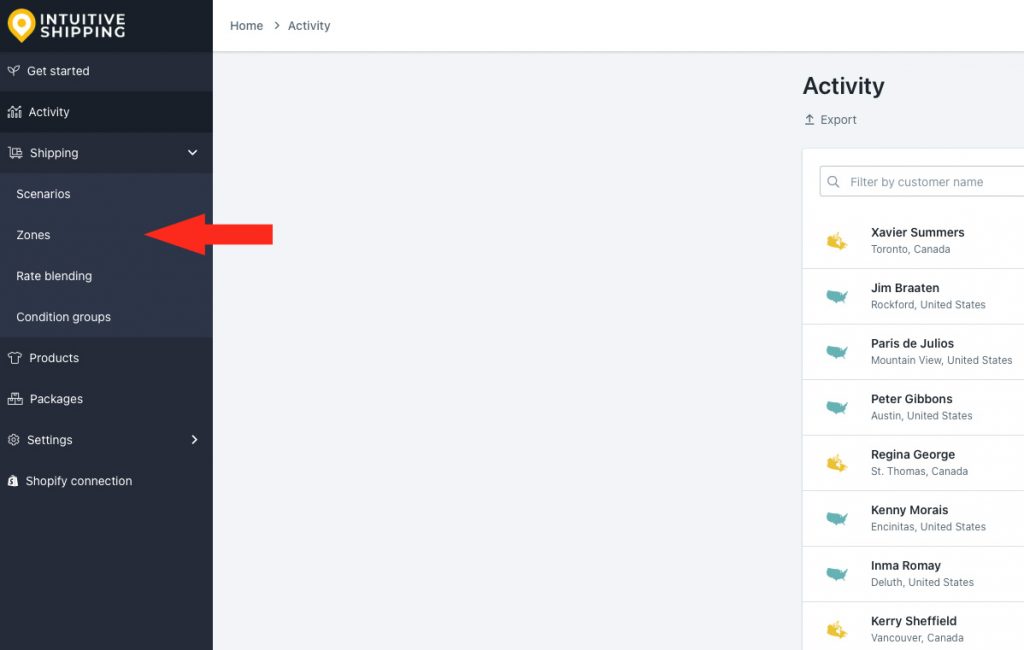
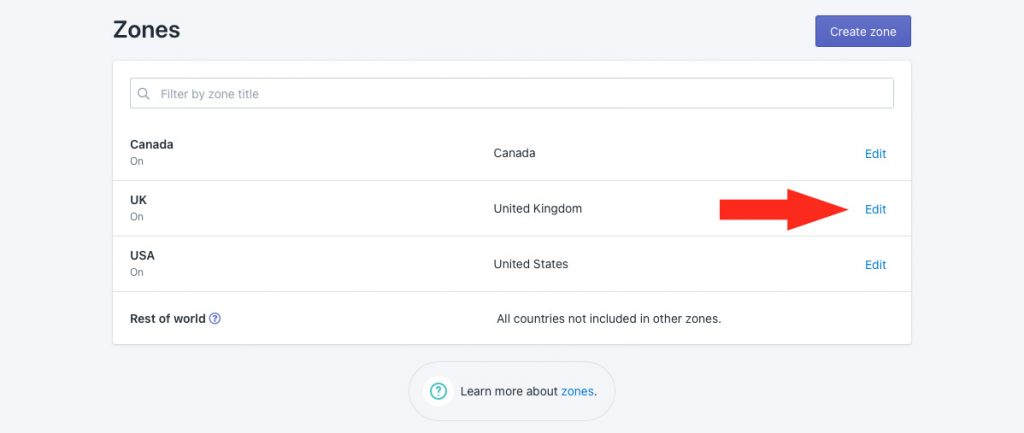
2) Click Edit beside the zone you wish to add the sub-zone to. For this example, we’re editing the UK.
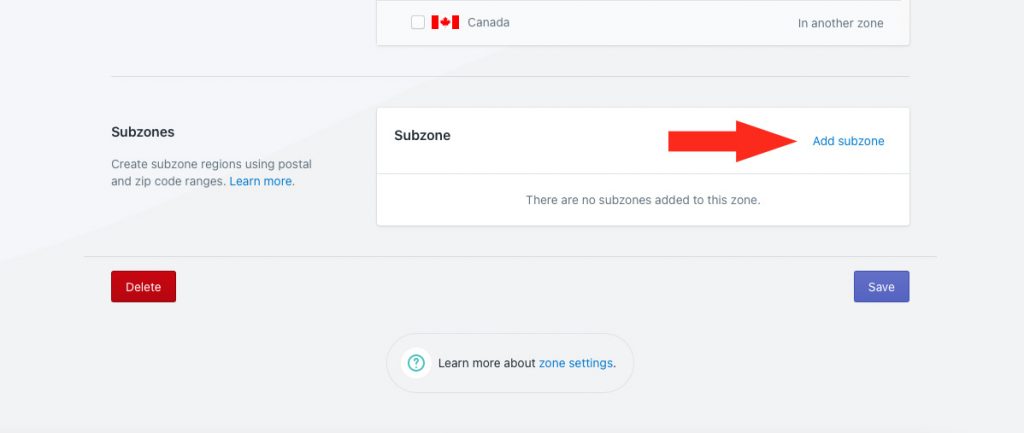
3) Scroll down to the Subzones section, then click Add subzone.
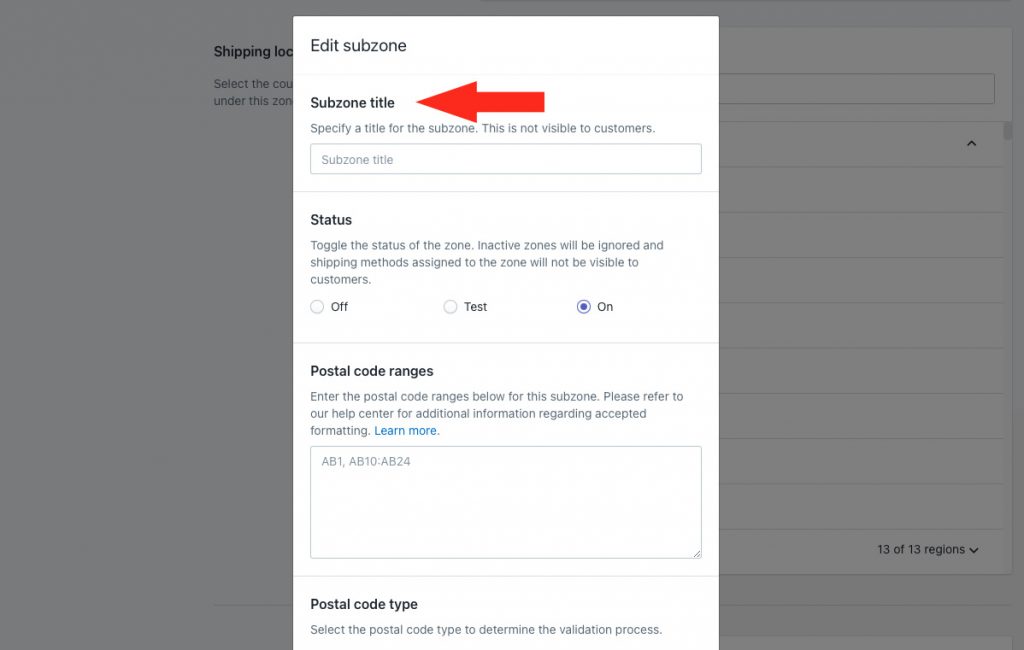
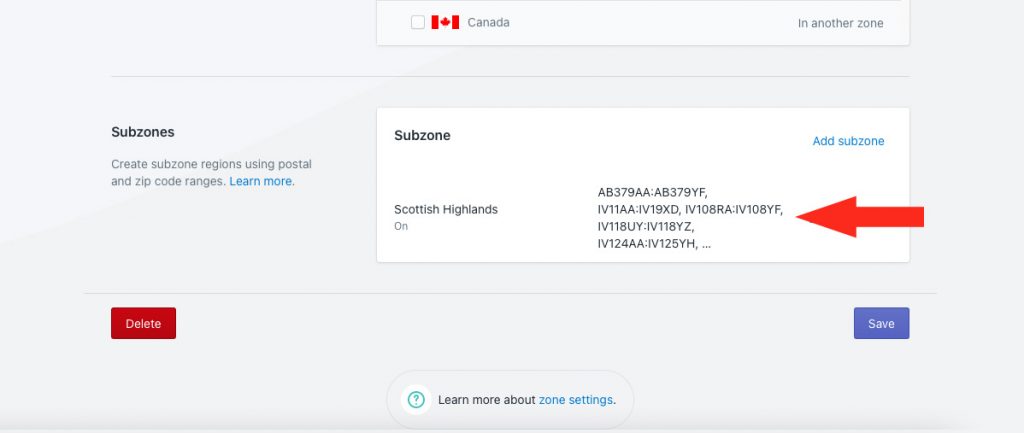
4) Enter a sub-zone title. We recommend naming your sub-zone after the local region (or regions) covered by the postal codes entered in Step 6. For the example, we’re using ‘Scottish Highlands’.
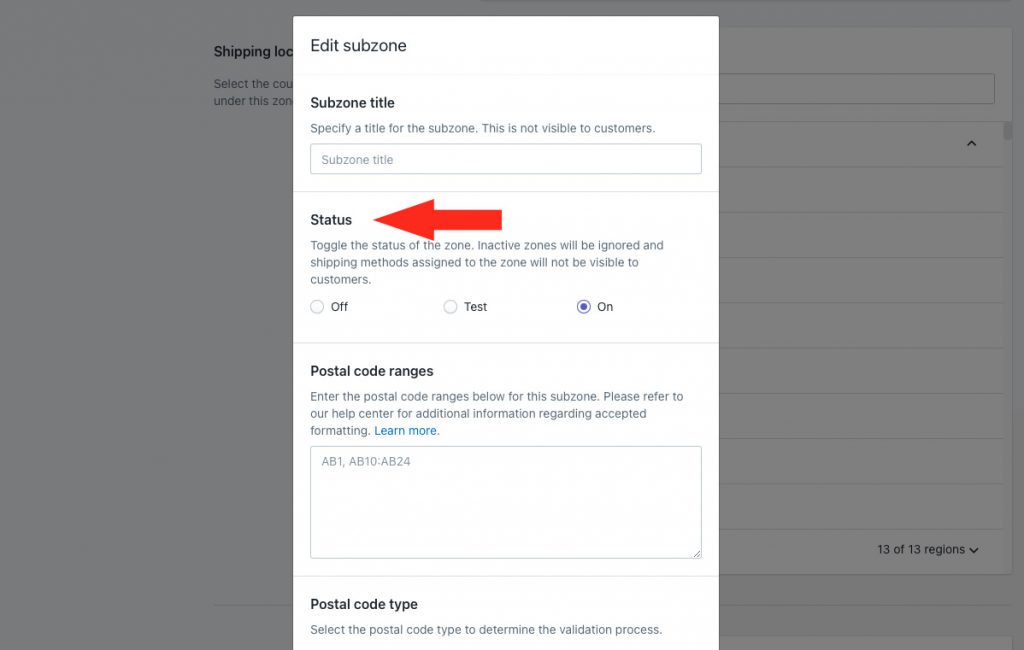
5) Leave the sub-zone status set to ‘On’.
6) Enter the postal code or postal code ranges for your sub-zone. For this example, we’re entering all of the UK postcode ranges for Scottish Highlands.
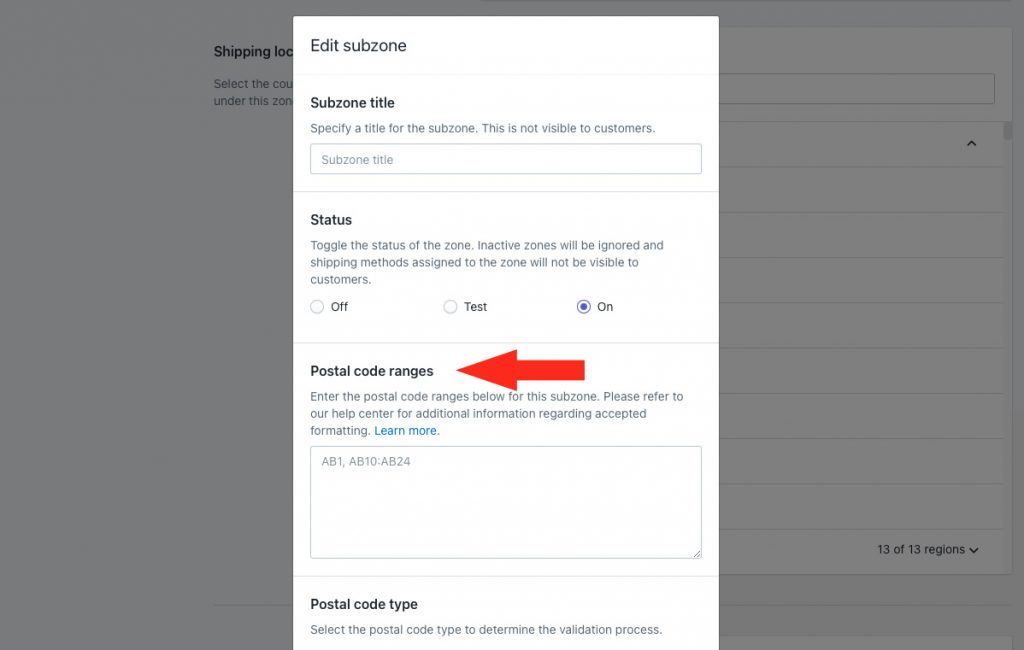
That means, every postcode between and including the prefixes AB10 and AB24 are included in the range.
7) Select a postal code type. For this example, we’re selecting ‘United Kingdom’ because we’re using UK postcodes. If your sub-zone is for postal codes or zip codes outside the UK, use ‘Standard’.
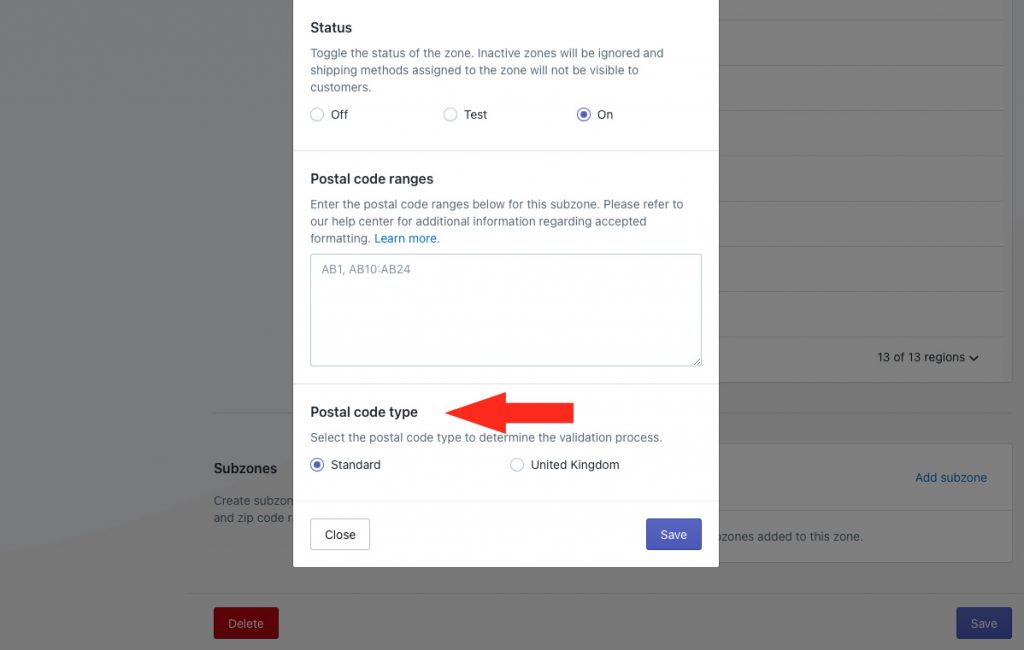
The UK has unique formatting for postcodes which requires a special lookup by Intuitive Shipping to confirm that the postcode is formatted correctly.
8) Click the Save button to save your sub-zone
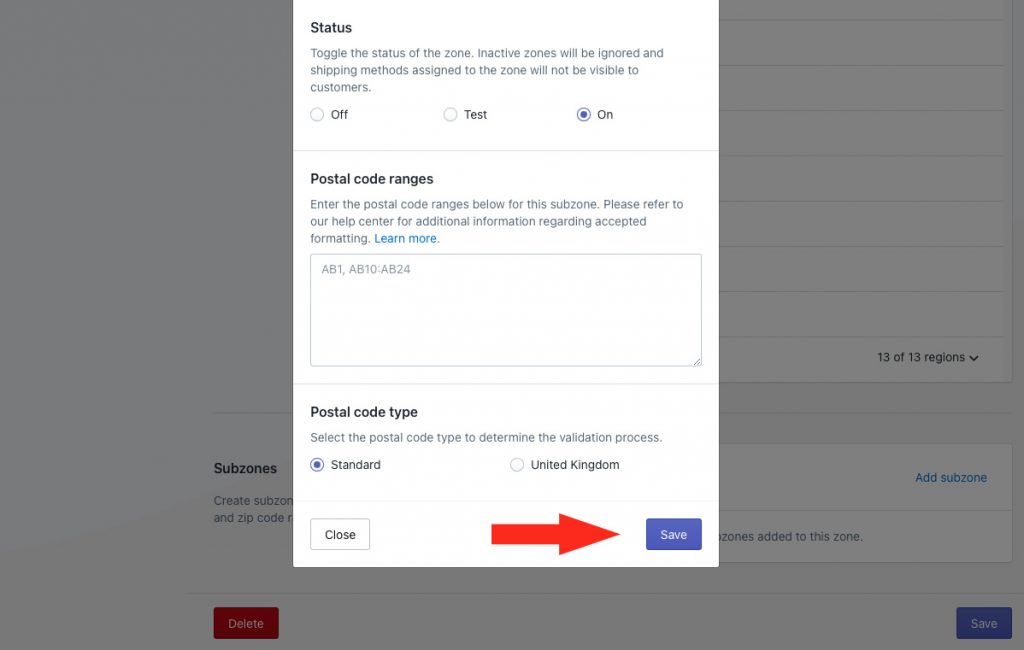
The sub-zone is added to your parent zone, and can be edited or deleted at any time without affecting the parent zone.
Add A No Shipping Method
After completing your sub-zone, you’ll need to add a ‘no shipping’ service to your existing Scenario or Scenarios.
1) Click Shipping on the sidebar menu, then select Scenarios from the drop-down list.

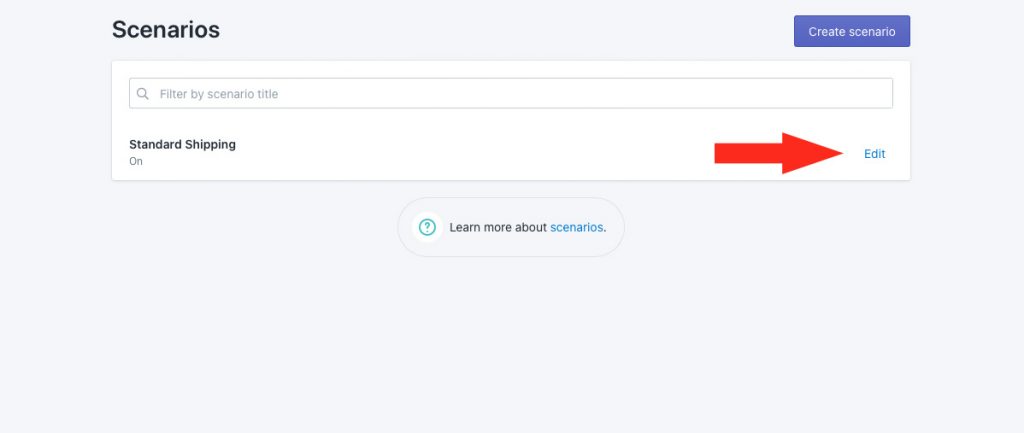
2) Click Edit beside a Scenario that includes shipping to a zone with the area you wish to restrict. For this example, we only have one Scenario.
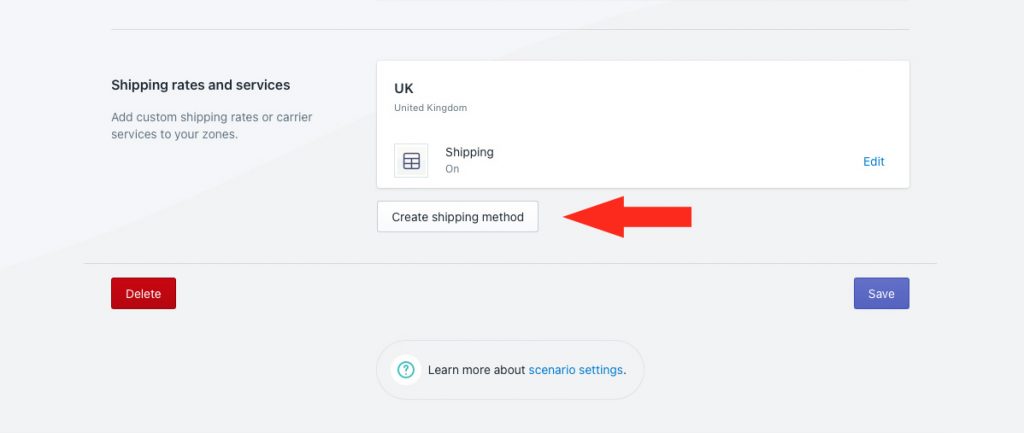
3) Scroll down to Shipping rates and services, then click the Create shipping method button.
Select An Advanced Shipping Service
1) Click the downward arrow beside ‘Advanced services’ to display a list of options.

2) Select No shipping from the list.

3) Click the Next button.

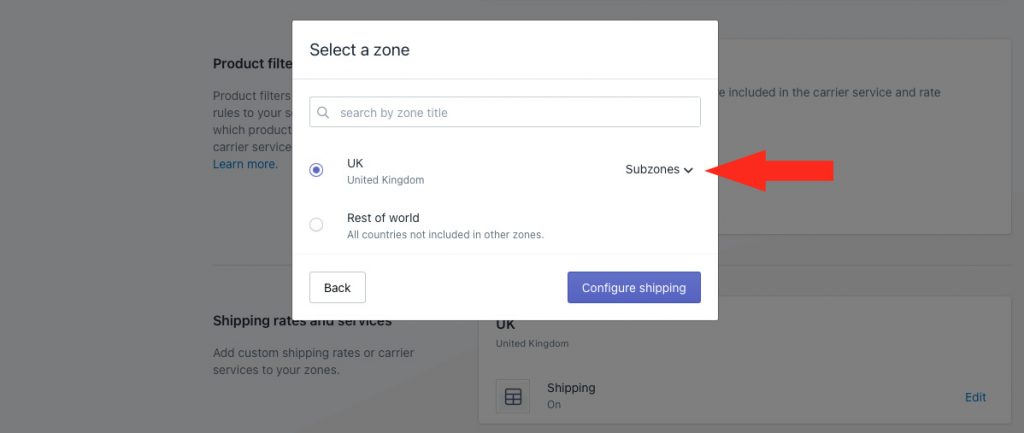
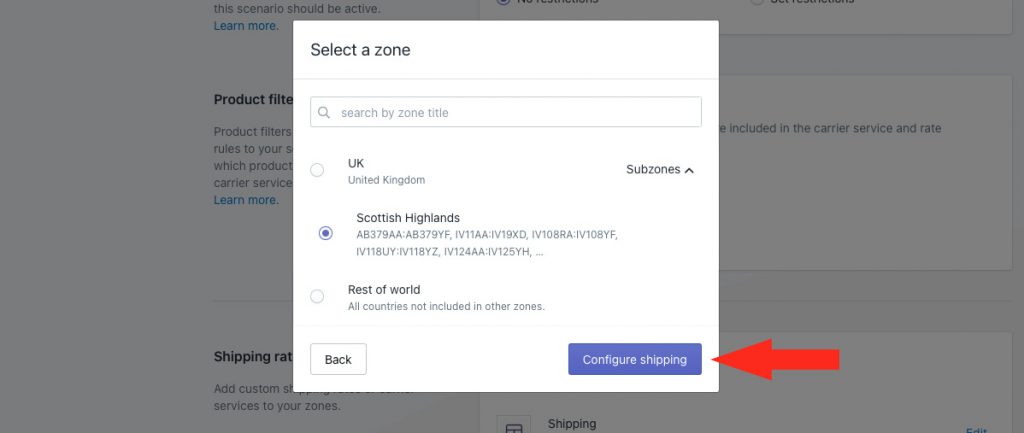
4) Click the downward arrow beside ‘Subzones’. For this example, our sub-zone is listed in the UK parent zone.
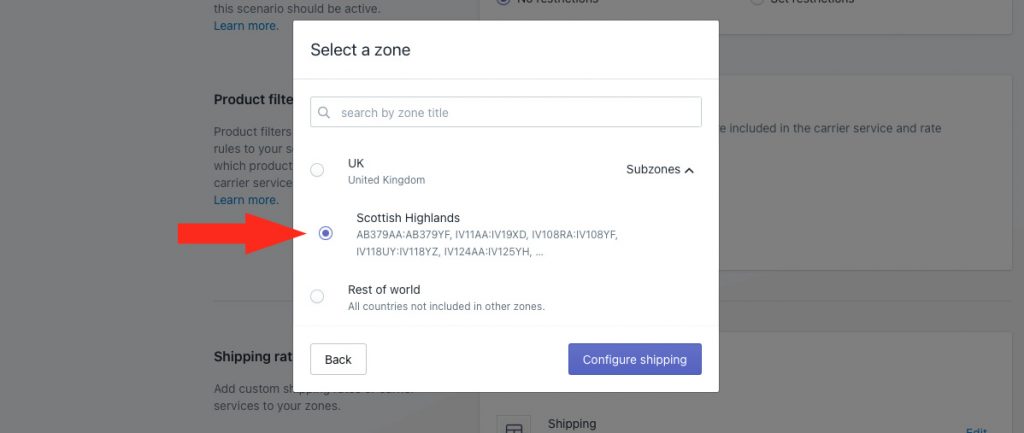
5) Select the sub-zone you created earlier in this guide. For this example, we’re selecting ‘Scottish Highlands’.
6) Click the Configure shipping button.
General
1) Enter a shipping method title, like ‘No Shipping – Scottish Highlands’.

2) Leave the Status set to ‘On’.

Optional settings are available for rate blending. Adjusting these settings is not required when using ‘no shipping’ with sub-zones.
Save Your Settings
1) Click the Save button to save you ‘no shipping’ shipping method.
