Shipping Zones determine the countries or geographical regions your products can ship to. They may have the same shipping rates or similar shipping methods.
Shipping Zones are set up and maintained in your Shopify Shipping and delivery settings and are synced with Intuitive Shipping when you install the app.
Each time you set up a Shipping Method within an Intuitive Shipping Scenario, you can assign it to one or more of your Shipping Zones. Here’s how to create a new Shipping Zone.
Add A Shipping Zone
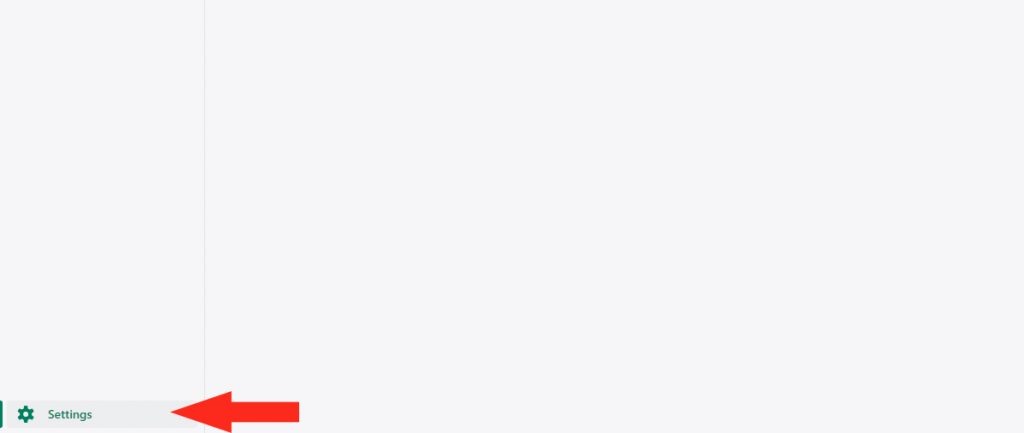
1) Click on Shopify Settings at the bottom of the sidebar menu.
2) In the Settings menu, click on Shipping and delivery.
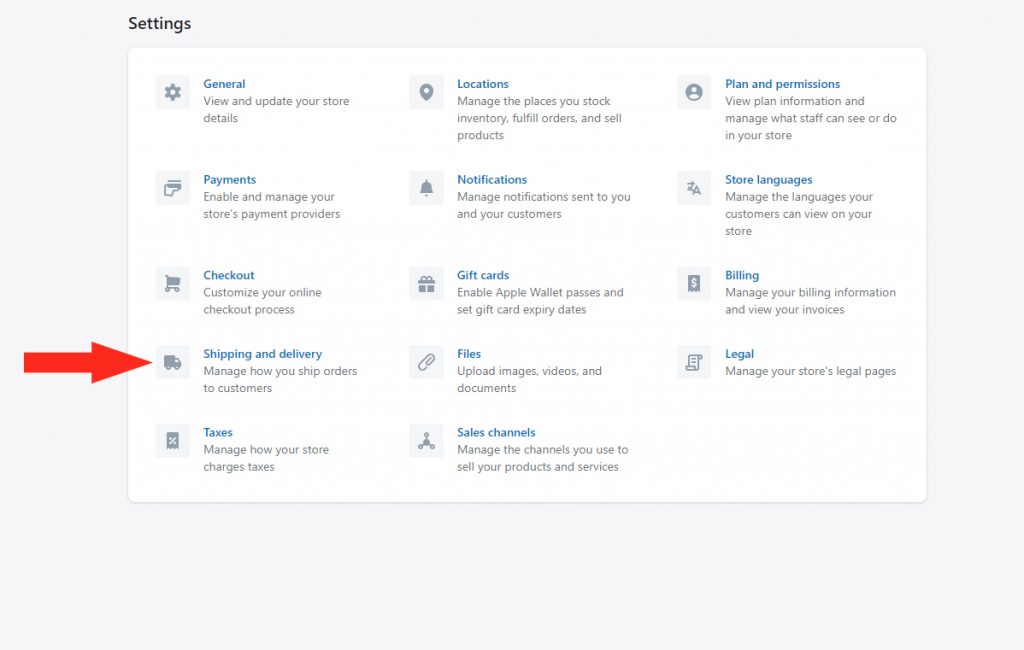
Shopify lets you configure Shipping Zones for Canada and the US by provinces and states respectively. If you are setting up Shipping Zones for specific provinces or states, follow the steps below to Remove Provinces or States From An Existing Shipping Zone. Otherwise, skip ahead to Create A New Shipping Zone.
Remove Provinces or States From An Existing Shipping Zone
Each Canadian Province and territory and each US State and territory can be set up as a stand-alone Shipping Zone. Or, you can group provinces, states or territories together. For example, you could create a Zone that includes only western States and call it ‘West Coast’, or a Zone that includes only maritime provinces and call it ‘Maritime’.
For example, you cannot set up a single ‘West Coast’ Zone that includes both western US states and western Canadian provinces. You would need to create two separate ‘West Coast’ Zones.
To create a Zone from an individual province, state, or territory – or a group of them – you must first remove those regions from your existing national zone.
For this example, we’ll create a ‘West Coast’ Zone that includes California, Nevada, Oregon and Washington states.
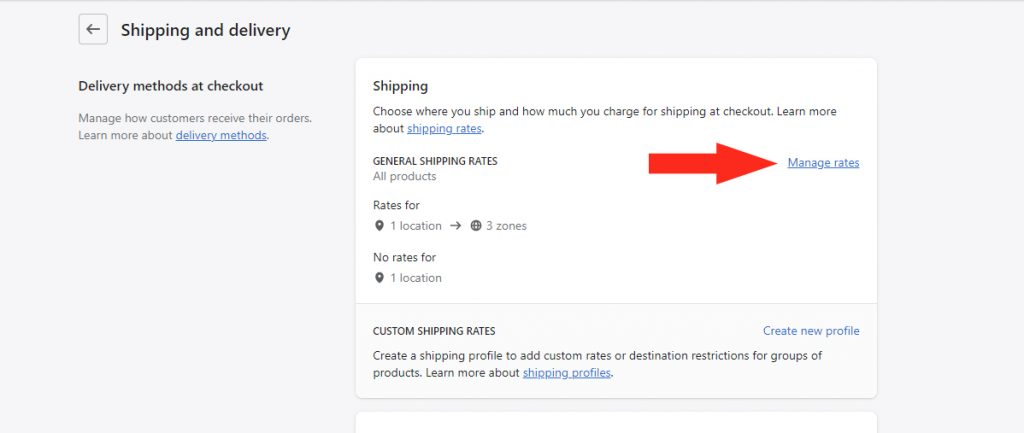
1) In the Shipping section, click on Manage rates.
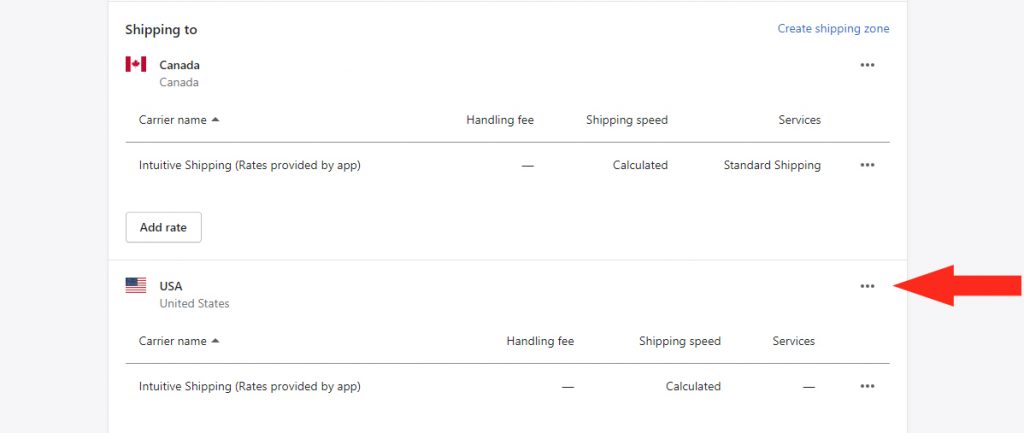
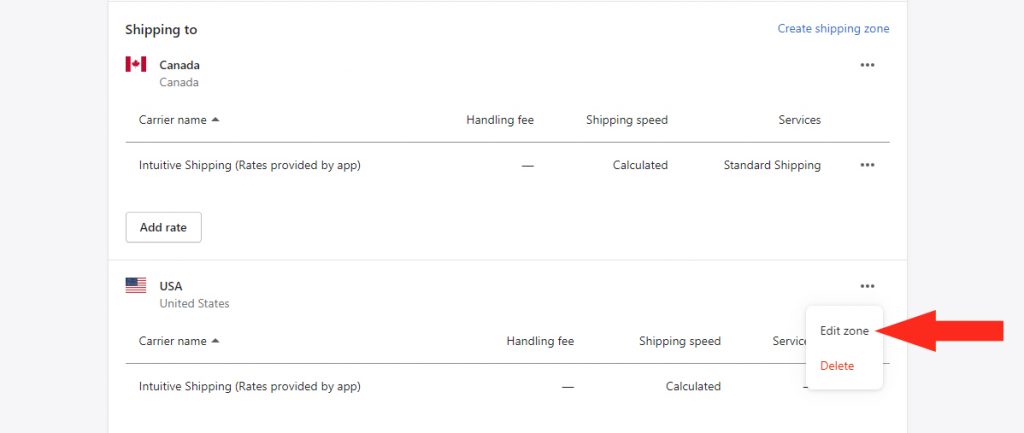
2) Under Shipping to, find the national Zone – e.g. ‘USA’ – and click the three dots beside the country or region with the provinces or states you wish to remove, then click Edit zone.
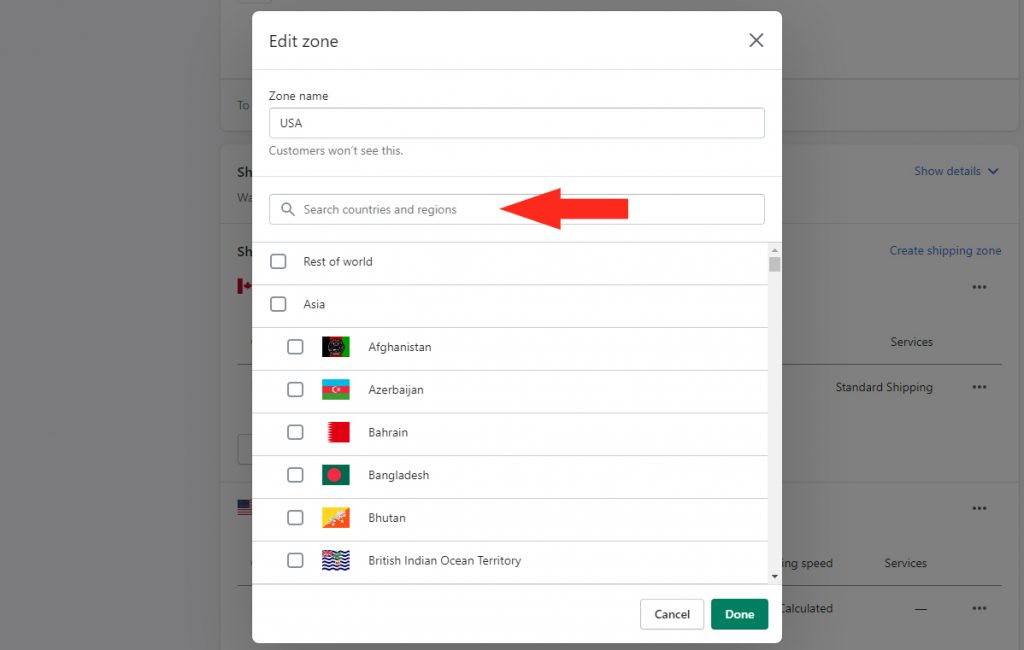
3) Type the actual name of the country into the Search field – e.g. ‘United States’.
4) Scroll through the list of provinces, states and territories and uncheck the box beside each one you want to remove from the national zone.
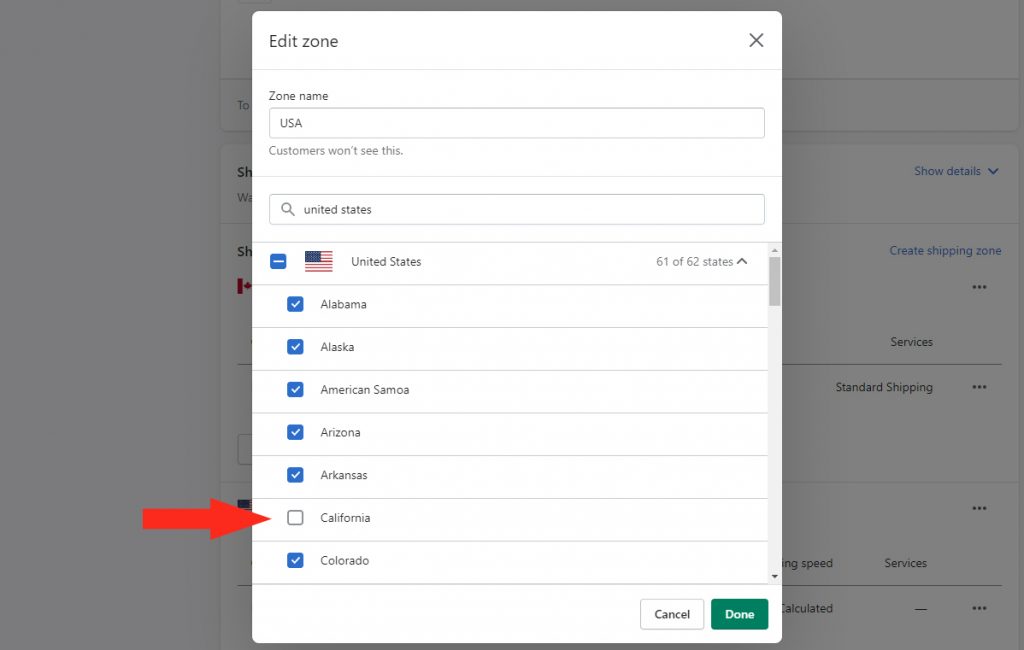
5) Once you have unchecked all of the applicable provinces, states or territories, click the Done button to save your Zone settings.
Create A New Shipping Zone
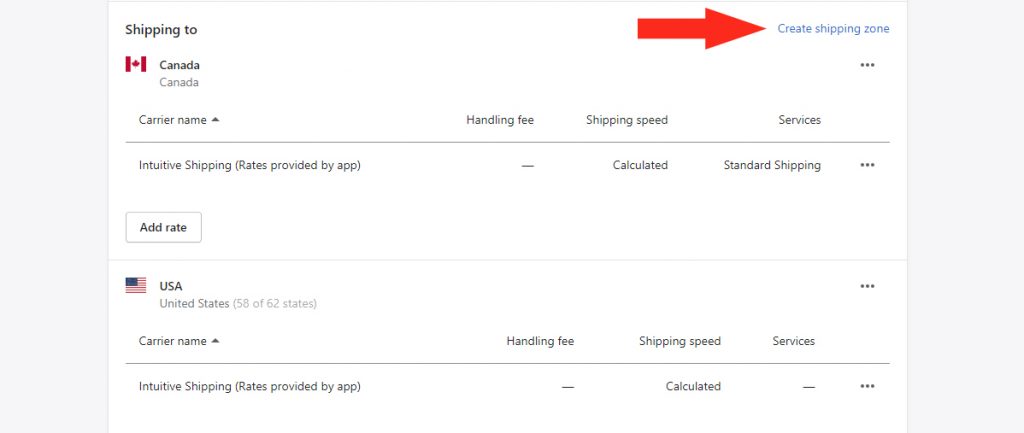
1) In the Shipping to section, click Create shipping zone.
2) Enter a Zone name – e.g. ‘West Coast’
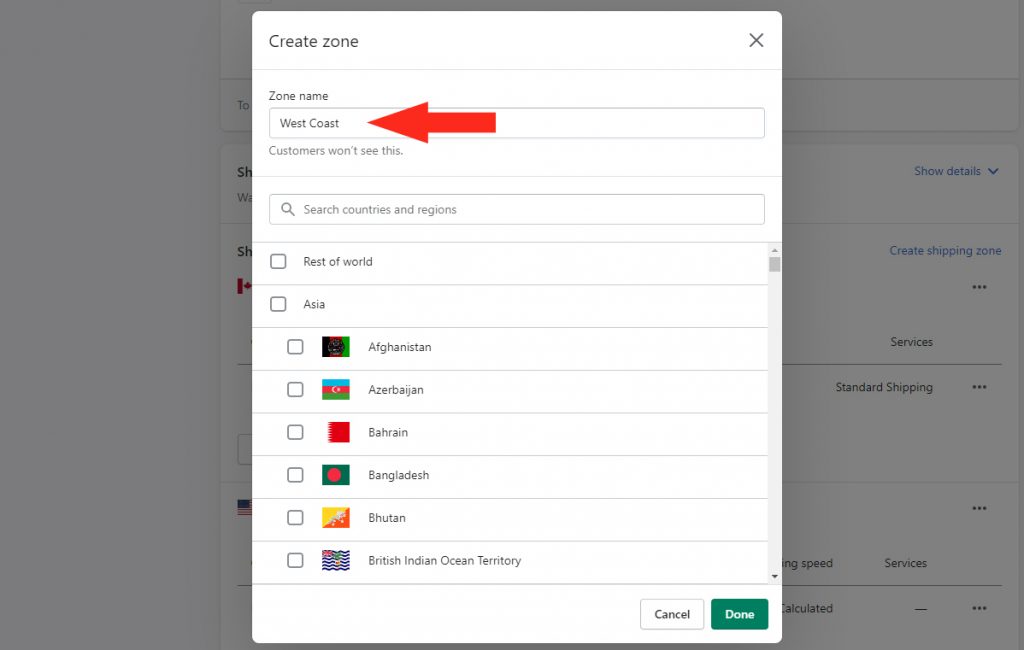
3) Type the same name of the country you removed your provinces/states from into the Search field – e.g. ‘United States’.
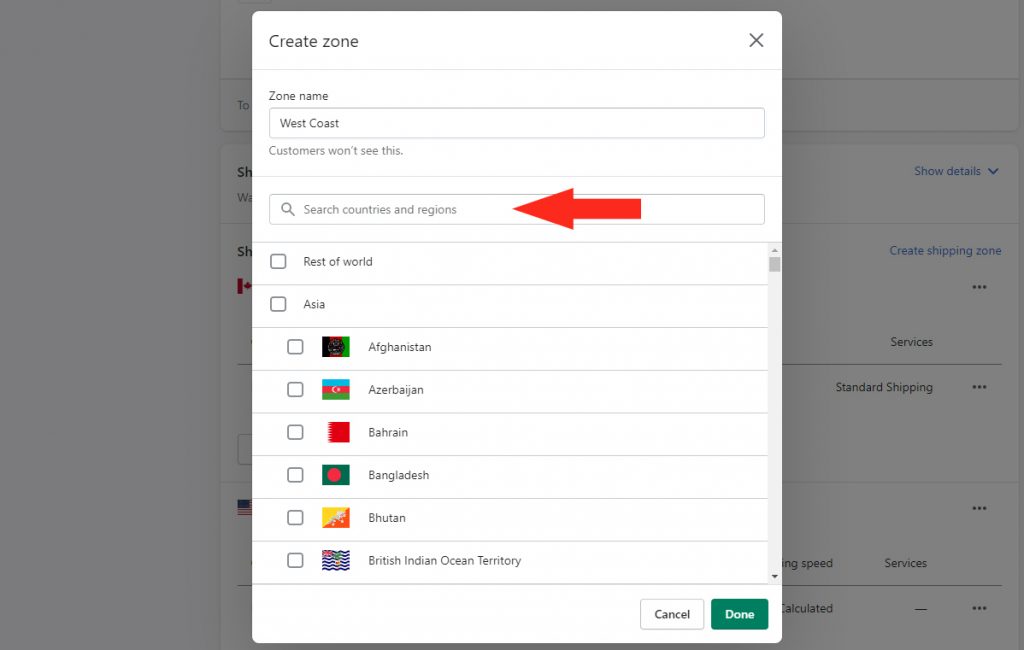
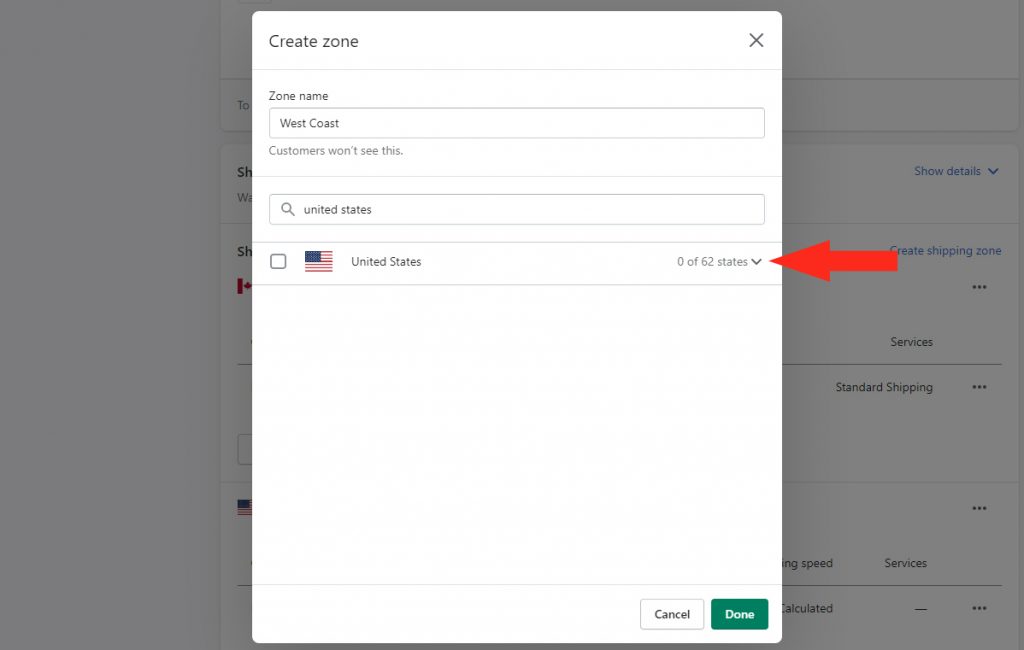
4) Click the down arrow to display the list of provinces, states or territories in the national zone.
5) Scroll through the list and check the box beside each province/state you want to add to your new zone.
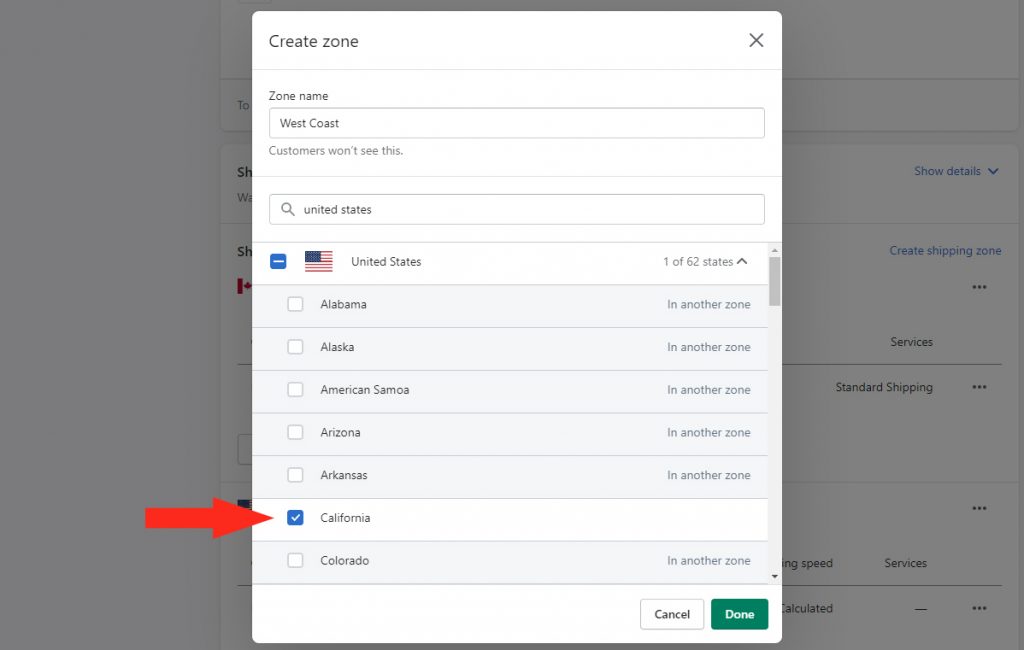
6) Once you have checked all of the applicable provinces, states or territories, click the Done button to save your Zone settings.
7) Under your newly created Shipping Zone, click the Add rate button.
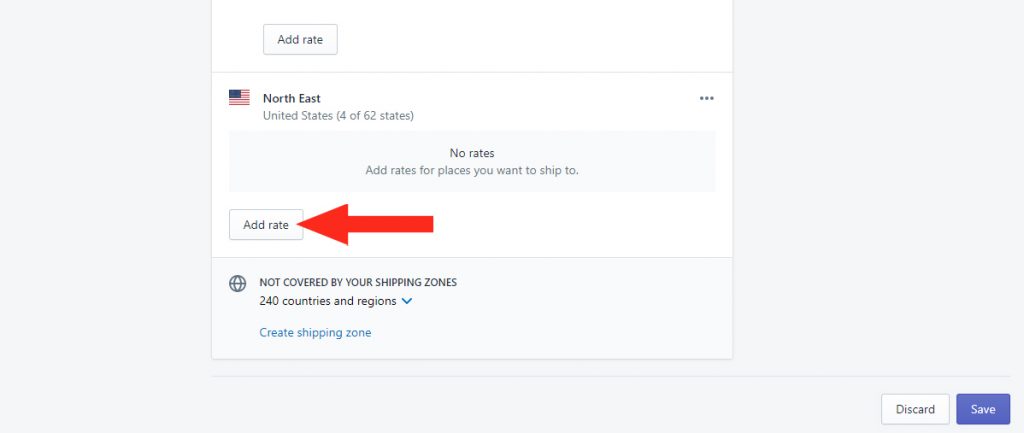
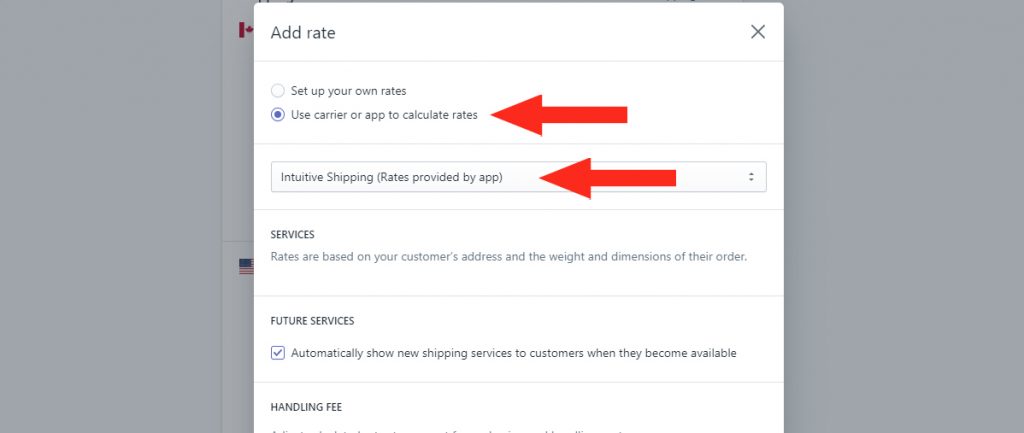
8) Under Add rate, select Use carrier or app to calculate rates, then select Intuitive Shipping (Rates provided by app) from the drop-down list.
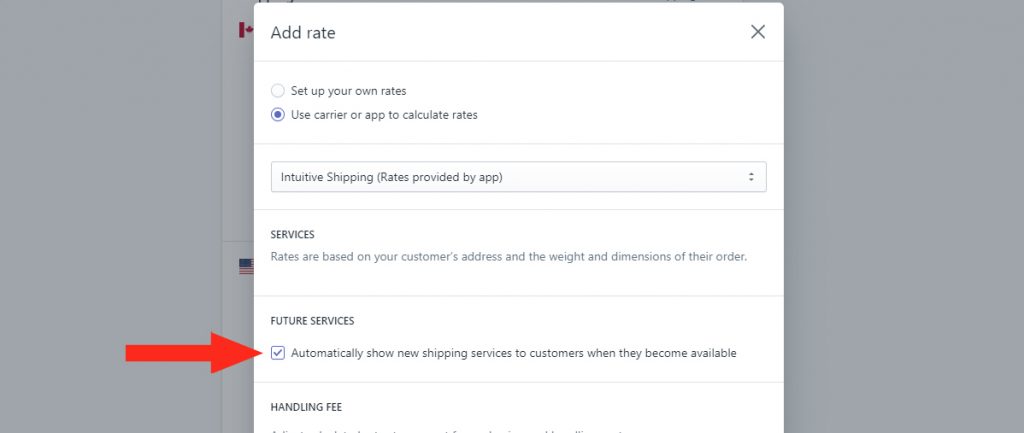
9) Under Future Services, be sure the check box to ‘Automatically show new shipping services to customers when they become available‘ is selected, then click the Done button.
10) In the General shipping page, click the Save button.
Sync You Shopify Settings
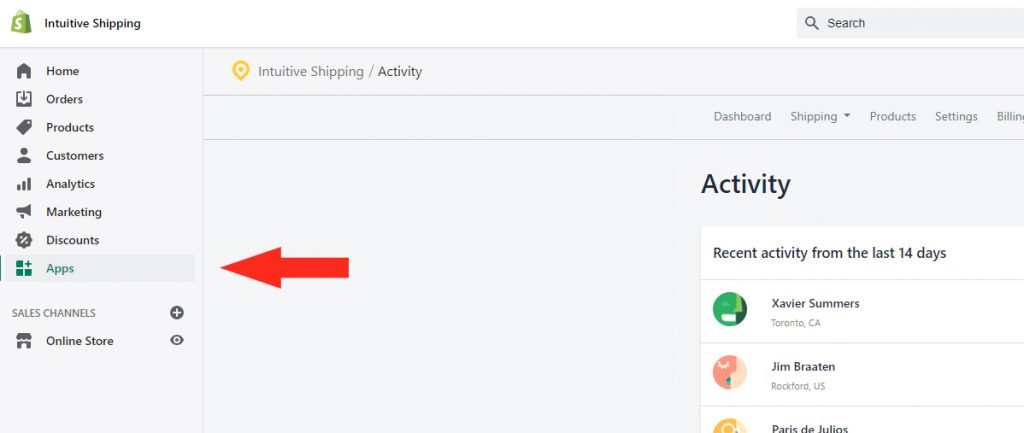
1) Click Apps on the sidebar menu, then click on Intuitive Shipping in your Apps list to return to the App.
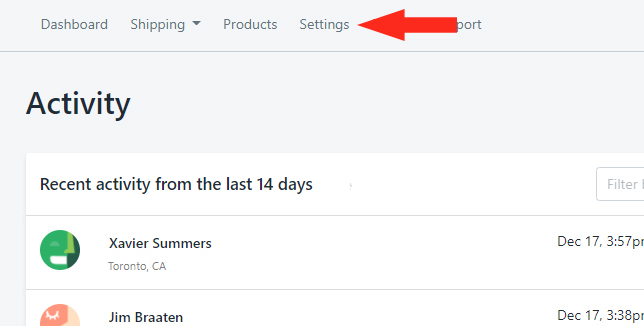
2) Click the Settings menu button.
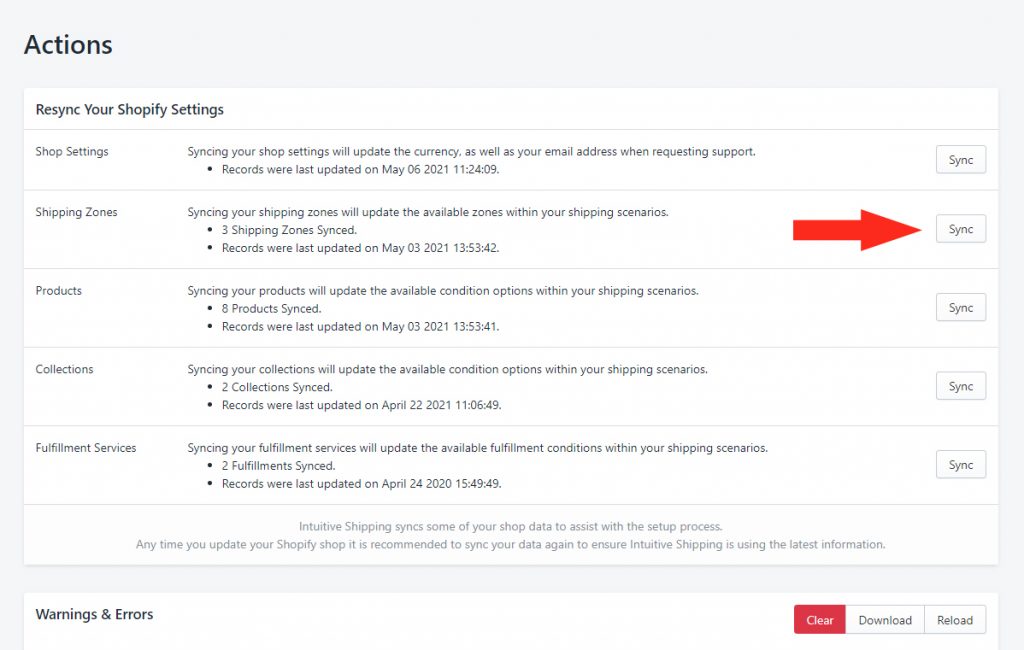
3) In the Actions section, click the Sync button beside Shipping Zones.
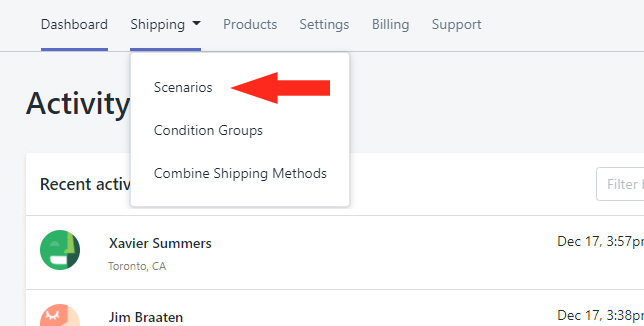
4) Click the Shipping menu button, then select Shipping Scenarios from the drop-down list.
Add A Shipping Method
You can add a new Shipping Method to your newly created Shipping Zone. Or, if you are not making any changes to the Shipping Method, you can Copy An Existing Shipping Method.
Add a Shipping Method to your new Shipping Zone using one of the following options.
Option 1: Add A New Shipping Method
Use this option if you are adding a brand new Shipping Method to your new Shipping Zone.
1) Click on the Shipping Scenario you wish to update with your new Shipping Zone.
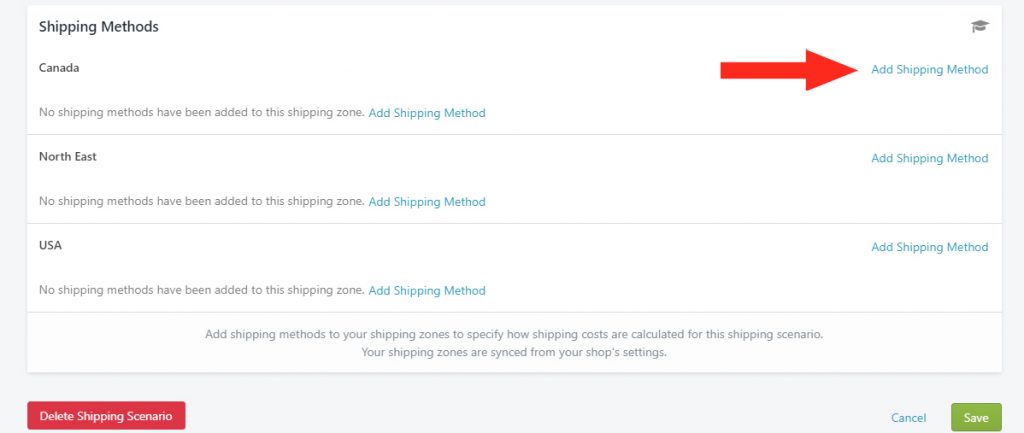
2) Scroll down to the Shipping Methods section, then click Add a Shipping Method beside your new Shipping Zone and complete the Shipping Method setup.
Option 2: Copy An Existing Shipping Method
Use this option if you are not making changes to an existing Shipping Method, or if you are making very minor changes – e.g. changing Domestic Rates to International Rates.
1) Click on the Shipping Scenario you wish to update with your new Shipping Zone.
2) Click the Copy button beside the existing Shipping Method you wish to copy.
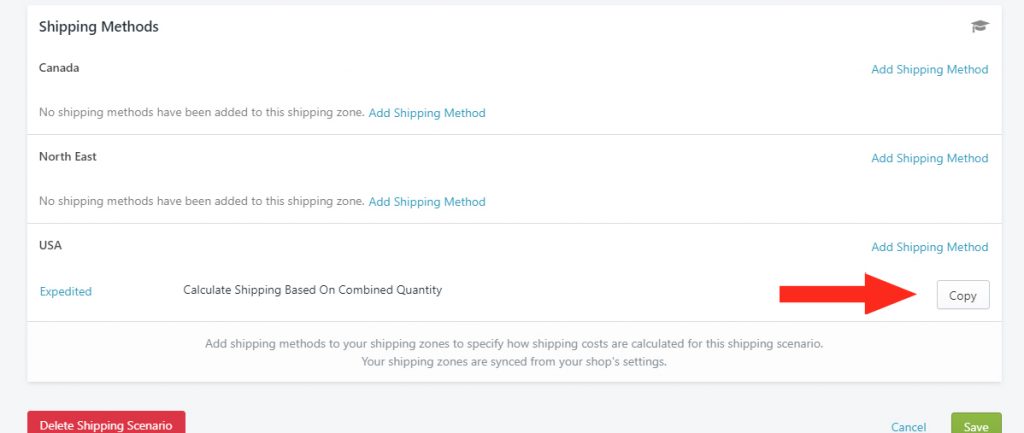
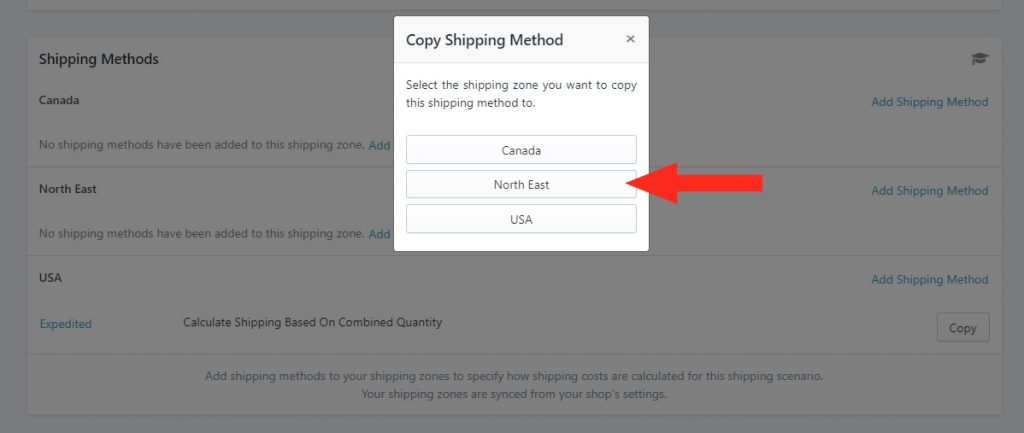
3) Click the new Shipping Zone to copy the existing Shipping Method to that Zone.
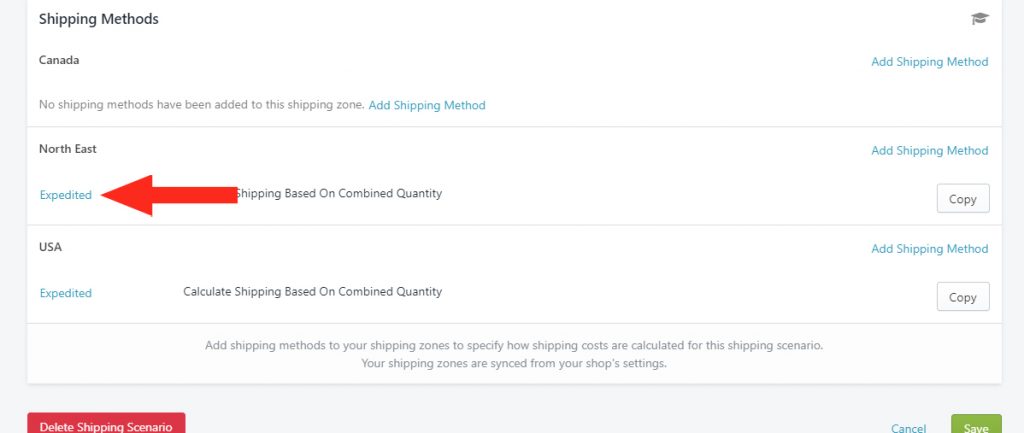
4) If you wish to make minor changes to the Shipping Method, click on the Shipping Method you just added to the new Shipping Zone and make any desired changes. Be sure to save your changes!
Save Your Settings
1) Click the Save button!
